Shadow Tutorial For Paint Shop Pro 7
This is a tutorial that will show you how to create shadows for objects for use with PGA 2000. I'll will attempt to take you through this step-by-step, and hopefully at the end..you will understand how easily you can add your own custom objects to the various courses that you create.
One Note : Most objects will not have the complexity that this one does, but I'll be using it to illustrate another technique at the end of this tutorial called " Rigging Tutorial ", so please bear with me.
Let's get started :
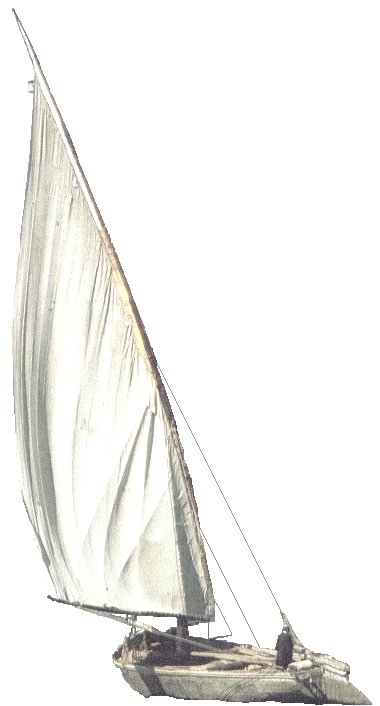
1) The first step is to pick out a suitable object, and in this case..I will use this image from an upcoming design that I'm currently working on. This image was 24 bit 16 million colors, and since we need to have an 8 bit, 256 color image, I adjusted the brightness of the too dark boat by 30 ( found under COLORS, ADJUST, Brightness and Contrast ), and then reduced the image to 256 colors ( found under COLORS, REDUCE COLOR DEPTH, 256 colors).

2) After editing out all of the backround, including the almost invisible rigging, I'm left with this finished..but not quite complete image.

2A) I use a color that is never used as the backround color, in this case..a bright neon pink that shows up very well, and makes the task of cropping, or cleaning up the image so much easier. ( Note the finished rigging, but I'll get to that in a moment ).

2B) I changed the color that resides in palette enry 0,0,0 to pure white 255, 255, 255 ( the hot pink color in the upper left hand corner on the image below ). This is the first step to creating a proper shadow.
3) Then SAVE this image as follows : boat1_1.bmp
4) Next, Goto COLORS, ADJUST, Brightness and Contrast. Increase the contrast to 50 to 60, and decrease the brightness to negative (-) 126. This will leave you with an image that looks like the following :

5) Next, Goto COLORS, DECREASE COLOR DEPTH, 2 colors. This will decrease the image to a pure 2 color black and white image, as seen below.

5a) Please notice that the image has a ton of white in it, and if you proceed to actually creating the shadow, the image will look like this when finished.

6) Since this will not be a good looking shadow with all the white showing through, use a solid black color, and take the time and fill in the very bright areas that you see WITHIN the outline of the shadow base. When done correctly, here are the results :

7) Then, Goto COLORS, INCREASE COLOR DEPTH, 16 million colors. Then Goto EFFECTS, BLUR, and use a regular blur, followed by two blur mores. This gives the haziness of the shadow, and also note that the smaller white areas are now blended in very well. A finished shadow as seen below :

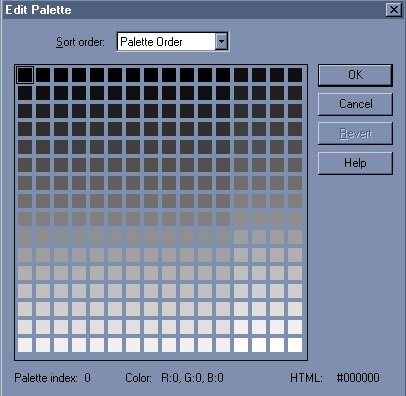
7a) Included is an image of the palette that accompanies this image, and from looking at it, you can see that everything is not quite correct. It's reversed. If you used this shadow as is..you'd basically get a reversed or inverse shadow image.
8) To correct this, Goto COLORS, REDUCE COLOR DEPTH, 256 colors.
9) Then, Goto COLORS, LOAD PALETTE, and load the PGA palette. See the link below to download a tiny zipped archive that contains the PGA palette. The correct palette is shown below.

10) Then SAVE this image as follows : boat1_S.bmp
Congratulations !
You have just completed a working shadow for your image. pretty simple isn't it ??.
Here is the link for the PGA palette that I mentioned earlier.
Palette.zip available here
Earlier, I made mention of a rigging tutorial to finish off this image, and to give it a more realistic look. here, presented for your enjoyment, is a short way to do this.
RIGGING TUTORIAL :
1) What I did was to zoom in about 3 times..and to mark the areas where the rigging started and ended, prior to cropping them out of the image. You can see where I made these small pink marks where the ropes started and ended. Then, using the techniques described on the image itself, I simply chose a dark green color for the rope, and proceede to build the staircase for each area needed.
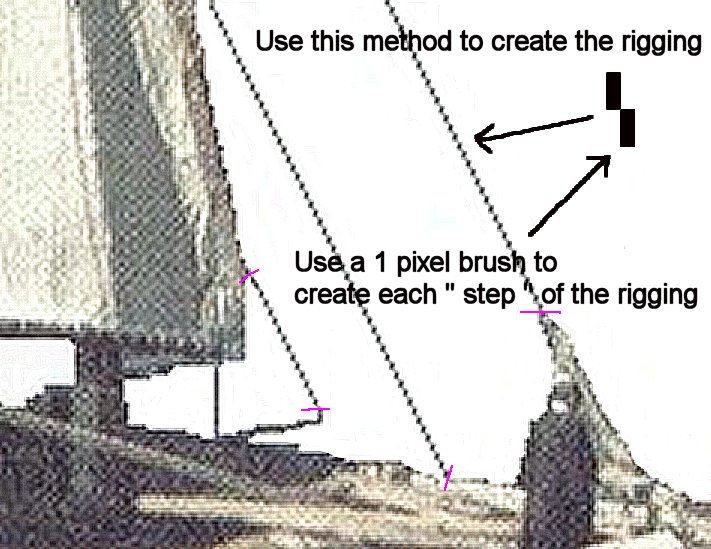
2) As you can see, this system works well, and that when viewed from the normal distance, it looks pretty good. This is the finished image that I used to create the shadow in the above example.
I hope that your able to use this example as a way to finish your images, and that this tutorial has been of some help.
Any comments can be sent to me care of r_silverleaf@yahoo.com
