| PSP #7 screen | 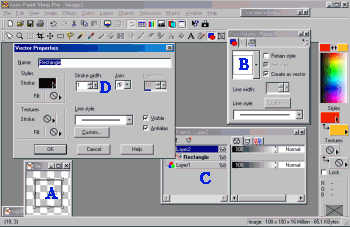 |
PLEASE NOTE: All of the comments and items listed in COLORS are for you to use to make the animation box work using a specific version of the Paint Shop Pro program
In Paint Shop Pro version 7 you are able to create images by using a Roaster
or Vector method. I would suggest creating both types, to help you to understand
the Vector side of the program.
| PSP #7 screen | |
|
|
|
|
|
|
|
Select (black as your) foreground color, to be used for the
lines drawn
Ruler turned on (View/Ruler)
If it helps turn on your grid lines (View/Grid)
Notice: In the lower left corner of all the PSP Program, it shows the settings for the cursor. In the lower right hand corner it shows you the size of your image area and the bytes you are using at the time of creation.
Start your box drawing at the 20,20 mark on your image, click the left mouse button and holding it down, draw/drag your cursor. to the 80,80 mark. It is very important to stay consistent in your marks, on each of your animation layers, (Picture Frames) or it will be off by pixels. Each of the boxes, were created with the same settings, other then the outline number, which was increased by 2 for each new gif.
Again, there will be a total of 12 boxes completed for this animation project. Each one will be part of our animated Box. The first set of 6 are Boxes with the Outline width size changed from size 2 to 12. (2,4,6,8,10,12)
For the SECOND set of Boxes we will copy and paste each of the first 6 images we made as new images, then flood filled the center changing the center from white to another color. (I used Basic 216 pallet safe colors).
NOTE: If you choose to use PSP# 7 with the VECTOR properties manipulated, create each of the 12 boxes and manipulate the Vector area and save all 12 boxes separately.
Used pallet safe colors: Colors will show on all browser forum and have a faster loading time on a graphic intense page.
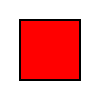
| Plain Squares with Outline Width from size 2 to 12 |
 |
 |
 |
|---|---|---|---|
 |
 |
 |
|
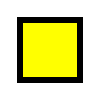
| Squares with Center flood - filled with 216 pallet safe colors |
 |
 |
 |
 |
 |
 |
| Browser safe Color codes and names |
Red = "#FF0000" |
Lt.Blue = "#00FFFF" |
Yellow = "#FFFF00" |
Green = "#00FF00" |
Dk. Blue = "#0000FF" |
Purple = "#FF00FF" |
Now we can take our individual pictures into Paint Shop Pro Animation
package and start the process of animation, or movement.