Breaking Out of the Box!
My first complete project in six years is a wall quilt. This is for a room with oil paintings where bunches of poppies lie on chocolate background. The walls are white. The finished quilt is fairly small, so wasn't too cumbersome to finish by machine.

First three days:
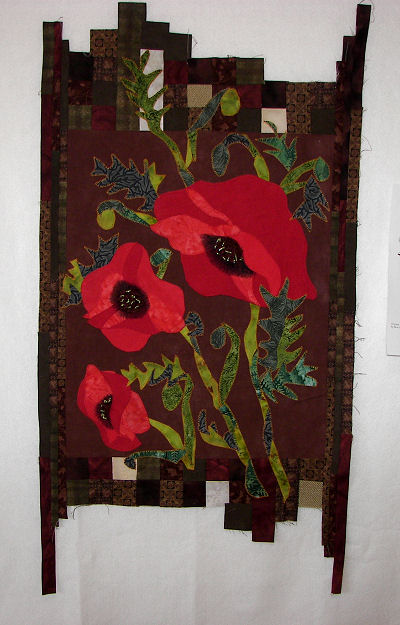
I choose the chocolate fabric - a monotonic chocolate hand-dyed. The plain, rich look will work well alongside the poppies out of the same hand-dyed in three shades of red. Then I am free to choose prints for the leaves and stems... I have often noticed the gray-green tone of poppy leaves, and although the border squares have olive greens, I am going to use teals in the leaves and stems to purposely clash and add interest.

After adding top and bottom borders, I fuse the flowers to the background. I realize that I like the look of the leaves escaping the confinement of the center, into the borders. But this means I must add some more squares. I am pleased that after all this time, I can still set in the squares easily!

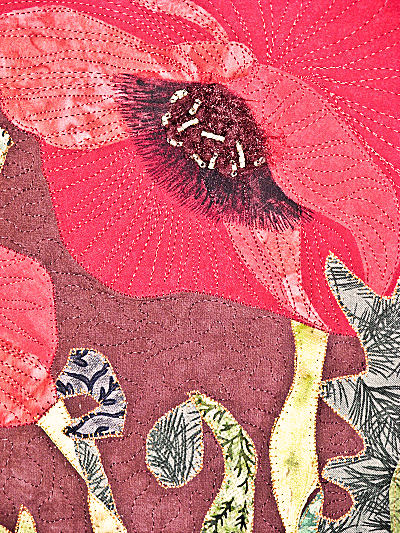
Using a new machine with which I am not familiar (Janome 6500 - I LOVE it) I appliqué the stems, leaves and blooms with a blanket stitch and light-weight tear-away stablilizer. I find as I suspected I would, that the look of the raw edges bother me - having hand appliquéd for so many years, even to blanket-stitch around fusing, I am spoiled. But I fight discouragement and forge on. I straight stitch along the overlaying raw edges on stems and blooms.


Poppies - 2008, 22 X 18.
Click on photo for larger image.

The way the fabrics are working together in the borders is really pleasing to see. I have used some white cotton gauze (which I tea-dyed) and some burlap to create patches of light. Just a few seems to work best.

After the blooms are appliquéd I can begin painting on the centers with the ink. Using a tiny brush I can work slowly and control the saturation easily, and I can also get some fine strokes. I think about doing some shading further out in the blooms - I would want to use brown ink - but decide it would be too much.


Adding stips and squares to make it all fit.
Days four and five:
I think that using strips of the brown prints for the binding would be really nice. I like the borders at top and bottom, but adding a wide border on the sides would take away from the flow. I decide to add a strip of prints and then the binding.

After adding the strips on the sides, I like them so much, I add another row, and then another. Then I make myself stop.

I enjoy the work of adding yarn to the centers of the blooms. I have some very fine, soft and fuzzy brown yarn. I couch it haphazardly by hand, adding bunches of beads here and there. I always use glass beads, and these are a nice greenish yellow.

Days six and seven:
Home stretch! This is that point in a quilt where you are really tired of it. You are tired of the colors, the fabrics. The TASK. I remember this! But I also remember the reward of a finished product.

The side borders are good. The appliqué is finished. I need to machine quilt it. I am nervous - I have not done this for six years, and never with this machine. The first ten inches I rip out, not liking the look. But the second attempt feels better, and by the time I am halfway through the quilt, I am very comfortable. Once again, I am pleased and surprised that these skills come back so quickly - like riding a bicycle!

After it is all quilted, it is fun and satisfying to cut the curves in the top and bottom borders. Although my eye is attracted to symmetry (I suppose that is why I love old quilts) I like a surprise thrown in on a border. This is going to work nicely and add interest. The binding goes on easily.

I think I am finally finished. But after it is hung on the designing wall and I stand back and look at it, I find a problem. I stipple quilted all around the flower elements, but although I used a mixed cotton/poly batting, the flowers are puffing forward oddly. I hadn't wanted to add any stitching into that pretty plain red - it looks like ultra-suede - but I'm going to have to.

So I do something I have never done, and that is to embroider all over an element by machine. I just do a straight stitch free-motion, and draw lines to emphasize the shape and direction of the petals. It is actually kind of fun in the end.


Detail, blooms with yarn and beads.


Detail of blooms and stems.
Conclusions:
- I am happy with the overall design and with the choice of fabrics.

- The raw edges, once the quilt was quilted and embroidered, don't bother me as much.

- I like the way the ink painting worked and the embellishing.

- I like the placement of elements very much, from the flowers and stems to the patches in the borders.

Had this not been an assignment and specific to a certain decor, I would have been a little more experimental with color. I would have liked to see what an occasional patch of blue in the border would do. However, perhaps the visual punch comes from the olive of the border greens contrasting with the blue-gray greens of the foliage. If I had thrown blues into the border, however occasionally, it may have taken away from that contrast and made the quilt not so interesting. Who knows? The quilt is going in the mail tomorrow, and so that experiment will never happen.

But I am so tired of poppies, and red and brown, and eager to move on to something very different!

Go to next project!