M e t a l C l a y
T I P S
Rolling a Nice Metal Clay Coil
Well moistened, fresh clay is best for making coils (see re-moisturizing tip). The clay needs to grip the surfaces in order to turn. So make sure your surfaces are clean of oil and dust.
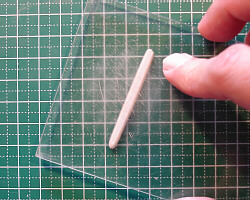
1) While still in the wrap, press your lump into a sausage shape to get it started.
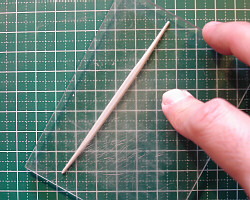
2) For a uniform coil, roll your clay under a flat piece of acrylic. With each pass, your coil should get longer. If it doesn't, press harder.
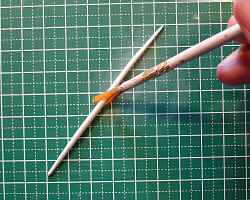
3) As you roll, press down more on one side to create a taper in your coil.
4) To taper both sides, do one side and then the other.
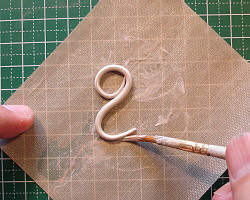
5) Brush your coil with water before manipulating.
6) Gently coax your coil into place with a tiny damp paintbrush. Bending too quickly will produce cracks.
Here, I've placed the coil on a non-stick surface so it can be transferred directly to the warmer.
Rolling a coil takes practice and requires working efficiently. You should be able to roll a coil in less than a minute. If you are rolling back and forth and your coil is not getting longer, you are just drying your clay out. As you roll your clay, use just enough pressure to create results but not so much that it flattens your coil.
Back to Tips