|
|
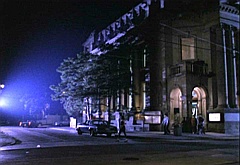
The 96th Precinct
Police Station
|
|
 From the second season on, Det. Nicholas Knight worked out of the 96th Precinct police station.
From Tracy's directions to Vachon in "Black Buddha", this is usually taken to be located
at Queen and Spadina. And, in fact, the public library that was filmed as the station
in
From the second season on, Det. Nicholas Knight worked out of the 96th Precinct police station.
From Tracy's directions to Vachon in "Black Buddha", this is usually taken to be located
at Queen and Spadina. And, in fact, the public library that was filmed as the station
in
 Forever Knight actually is on Queen - though Queen Street East, not Queen Street West.
It is indeed the Queen streetcar that runs in front of the building.
Forever Knight actually is on Queen - though Queen Street East, not Queen Street West.
It is indeed the Queen streetcar that runs in front of the building.
However, this library is located on the corner of Queen and Saulter,
which, for the purposes of the television series, became the entrance to the police parking lot.
This means that the police station is not at the intersection of Queen Street with
Spadina Avenue. (Not that Saulter could ever pass for Spadina,
 which is unusually broad for a downtown street, and, like Queen, has a street car line.)
It follows that, in "Black Buddha", Tracy must just have been giving Vachon directions to the
nearest main intersection.
which is unusually broad for a downtown street, and, like Queen, has a street car line.)
It follows that, in "Black Buddha", Tracy must just have been giving Vachon directions to the
nearest main intersection.
So, is the station east or west of Spadina? Actually, there is
a possible clue. Given the frequency with which we see Nick turning west onto Bloor at
Honest Ed's (a gaudily lit store at the corner of Bloor and Bathurst Streets), the station is
probably somewhere west of the Queen/Spadina intersection, between Spadina and Bathurst.
If the station were east of Spadina, it would make more sense for Nick to cut north to
Bloor via Spadina, rather than Bathurst; but this is not the route we normally see him use.
If the station is west of Spadina, on the other hand, it would be very reasonable for
Nick to continue west on Queen to Bathurst, drive north on Bathurst to Bloor, and then turn west
onto Bloor, when he needs to drive to somewhere in the western part of the central city area.
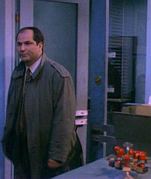
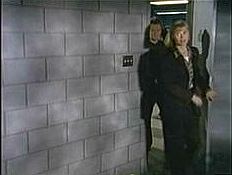
 The main entrance to the 96th Precinct police station is on the
corner of the building, right by the broad drive leading to the parking lot. It is fairly
impressive structurally (though more so on film than in real life), with a short flight of stone
steps and an arched canopy set into the facade. It is marked by a large illuminated sign,
angled so that it can be read from either direction.
The main entrance to the 96th Precinct police station is on the
corner of the building, right by the broad drive leading to the parking lot. It is fairly
impressive structurally (though more so on film than in real life), with a short flight of stone
steps and an arched canopy set into the facade. It is marked by a large illuminated sign,
angled so that it can be read from either direction.
 There is also an official billboard with a lot of notices posted on it.
There is a second entrance at the far end of the building where the
drive ends and the parking area starts. This is much less impressive: just a
single door up a short flight of steps with a railing. However, like the main entrance,
it is marked with an illuminated sign.
|
|
|
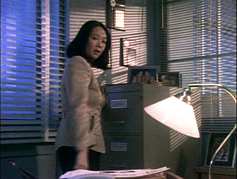
The Squad Room

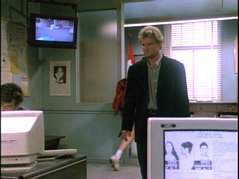
 Going by the room numbers, the various interconnected portions of the
set built for the police station all represent rooms on the second floor of the 96th Precinct
building. Although uniformed police officers frequently pass through, those people who
are seated - and presumably are actually assigned to that particular part of the station -
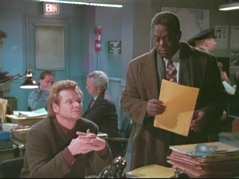
generally are wearing regular clothes. The principal room of the police station set,
therefore, would seem to represent the detectives' squad room.
Going by the room numbers, the various interconnected portions of the
set built for the police station all represent rooms on the second floor of the 96th Precinct
building. Although uniformed police officers frequently pass through, those people who
are seated - and presumably are actually assigned to that particular part of the station -
generally are wearing regular clothes. The principal room of the police station set,
therefore, would seem to represent the detectives' squad room.
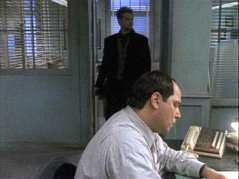
The squad room can be considered to be divided into sections.
At the front, there is an entrance corridor, separated from the squad room proper by an
information desk. There is an open central area with the desks where the detectives sit,
with offices down the outer wall of the room. Opposite these, along the inner wall, are
doors accessing the interview rooms. And, beyond those, at the rear of the room, is an
area used for storage cabinets and computer access to police files - though, in Season III, it
was partly converted to a conference area, with a table around which several people could sit to
discuss a case.

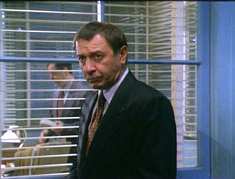
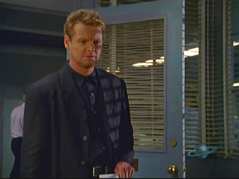
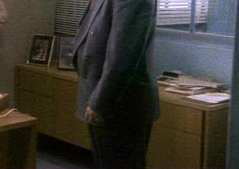
 Two large windows run across the front of the squad room; and three separate offices run down the
outer side of the room, all also having large windows. Windows also comprise much of
Two large windows run across the front of the squad room; and three separate offices run down the
outer side of the room, all also having large windows. Windows also comprise much of
 the wall area between the three offices and the open central area of the squad room proper.
All are fitted with Venetian blinds; and these are usually kept with the slats open.
As a result, there is considerable natural light in the squad room during the day.
Artificial light is supplied by fluorescent strips running across the room.
the wall area between the three offices and the open central area of the squad room proper.
All are fitted with Venetian blinds; and these are usually kept with the slats open.
As a result, there is considerable natural light in the squad room during the day.
Artificial light is supplied by fluorescent strips running across the room.
 At the front of the room, a double glass door separates the squad room from a stairwell that,
presumably, runs down to the main entrance on Queen Street. Although the camera angles
used rarely allowed even a glimpse of what lay beyond the doors, there seems to have been a
payphone on the wall of the landing.
At the front of the room, a double glass door separates the squad room from a stairwell that,
presumably, runs down to the main entrance on Queen Street. Although the camera angles
used rarely allowed even a glimpse of what lay beyond the doors, there seems to have been a
payphone on the wall of the landing.
A corridor runs from the double doors
 along the front of the room. It is cut off from the squad room proper by a long
information desk, which is manned by a sergeant.
along the front of the room. It is cut off from the squad room proper by a long
information desk, which is manned by a sergeant.
The front corridor
has two tall windows, which must look out onto Queen
 Street, though this cannot be seen through the glass. For the first few episodes of
Season II, a bulletin board was hung between the windows; but this was quickly replaced by a
Street, though this cannot be seen through the glass. For the first few episodes of
Season II, a bulletin board was hung between the windows; but this was quickly replaced by a

|

|
reproduction photograph of the Queen, positioned above a smaller frame, which looked as though it
might contain a copy of the Charter of Rights and Freedoms
 (though in none of the episodes were we close enough for it to be possible to read the words).
In Season III these were replaced by a slightly larger photograph, which
was originally hung a little further along the same wall, beyond the second window.
However, I have decided that, in Season IV, this will return to its original position, so that
an official portrait of the Queen may once again be posted prominently - as indeed it would be
in a real police station.
(though in none of the episodes were we close enough for it to be possible to read the words).
In Season III these were replaced by a slightly larger photograph, which
was originally hung a little further along the same wall, beyond the second window.
However, I have decided that, in Season IV, this will return to its original position, so that
an official portrait of the Queen may once again be posted prominently - as indeed it would be
in a real police station.
In at least some Season II episodes there was a wooden bench set
under one of the windows. Here people could sit when waiting for assistance. The bench
seems, however, to have been removed for Season III (and remains gone in my virtual Season
IV).
There are two flags standing in the front corridor: the Ontario
provincial flag near the door, which has been there since the start of Season II, and the
Canadian flag at the far end of the windows by the swing gate; this was added later on in
Season II.
The building must continue beyond the squad room, for there are more
than two windows on the Queen Street façade of the building. However, in Seasons
II and III, access to this area was either through a hallway at the rear of the squad room, or
 down a corridor that runs on the far side of the interview rooms. As far as the squad room
itself was concerned, the front corridor ended in a short cul-de-sac, largely filled with a tall
wooden cabinet containing what appear to be trophies. As this seems to me to be a
nonsensical layout (and potentially dangerous in case of a fire), I have decided that, in Season
IV, this wall has been removed so that the front corridor can run through to the rest of the
building. Since this area has not been built onto the set, however, camera angles have to
avoid filming down that way. But that was almost always true in the real show, too; so
this alteration actually involves no change to the set.
down a corridor that runs on the far side of the interview rooms. As far as the squad room
itself was concerned, the front corridor ended in a short cul-de-sac, largely filled with a tall
wooden cabinet containing what appear to be trophies. As this seems to me to be a
nonsensical layout (and potentially dangerous in case of a fire), I have decided that, in Season
IV, this wall has been removed so that the front corridor can run through to the rest of the
building. Since this area has not been built onto the set, however, camera angles have to
avoid filming down that way. But that was almost always true in the real show, too; so
this alteration actually involves no change to the set.
The front desk is blank grey on the corridor side, except for a
notice saying "Information". But, on the other side, it has a large number of pigeonholes for
sundry forms. The police blotter is kept open on top of the desk.
 To the right of the information desk, from the desk sergeant's perspective, is a
bank of filing cabinets close to hand, on top of which are monitors for some of the
closed-circuit security cameras in the buildings. Four clipboards hang on
the wall just by the desk. There are also some posters stuck up on the wall.
To the right of the information desk, from the desk sergeant's perspective, is a
bank of filing cabinets close to hand, on top of which are monitors for some of the
closed-circuit security cameras in the buildings. Four clipboards hang on
the wall just by the desk. There are also some posters stuck up on the wall.
 Closing off the gap at the end of the desk is a low swing gate,
which provides a formal boundary between the front
corridor and the squad room, though the barrier is more psychological than physical.
Nevertheless, as seen in "Hearts of Darkness", the press are not supposed to go into the squad
room itself. (It should, perhaps, be pointed out that, in that episode, the director had
the gate removed to facilitate filming - precisely the sort of nonchalant disregard for
consistency that irks fans.)
Closing off the gap at the end of the desk is a low swing gate,
which provides a formal boundary between the front
corridor and the squad room, though the barrier is more psychological than physical.
Nevertheless, as seen in "Hearts of Darkness", the press are not supposed to go into the squad
room itself. (It should, perhaps, be pointed out that, in that episode, the director had
the gate removed to facilitate filming - precisely the sort of nonchalant disregard for
consistency that irks fans.)
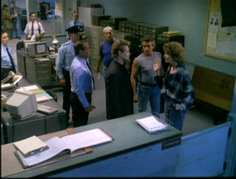 Whereas police personnel pass freely through the gate into the front section of the squad room
proper, visitors are expected to wait, unless the person they are to meet is around to see them.
For this reason, there is a wooden bench just inside the gate, on the left as you face the
front of the room. It was here that Tracy sat - and nearly dropped off to sleep - when
she was newly assigned to the 96th Precinct, and Reese left her there while he broke the news to
Whereas police personnel pass freely through the gate into the front section of the squad room
proper, visitors are expected to wait, unless the person they are to meet is around to see them.
For this reason, there is a wooden bench just inside the gate, on the left as you face the
front of the room. It was here that Tracy sat - and nearly dropped off to sleep - when
she was newly assigned to the 96th Precinct, and Reese left her there while he broke the news to
 Nick that she'd be partnering him on the night watch, to which her circadian rhythms had not
yet adapted.
Nick that she'd be partnering him on the night watch, to which her circadian rhythms had not
yet adapted.
A partial alcove for this bench is formed by a short
partition, which is solid (probably painted plywood) below but half frosted glass above - the
same sort of construction used elsewhere in the station for the various partitions that divide
 the squad room into work sections. The swing gate is attached to this partition, running
between it and the front desk. A television or monitor screen depends
from the ceiling. The alcove walls are used for posters, with a large bulletin board
positioned just above the bench itself.
the squad room into work sections. The swing gate is attached to this partition, running
between it and the front desk. A television or monitor screen depends
from the ceiling. The alcove walls are used for posters, with a large bulletin board
positioned just above the bench itself.
 Beyond the bench is a bank of filing cabinets (the first three black, and the rest almond),
which contain
Beyond the bench is a bank of filing cabinets (the first three black, and the rest almond),
which contain
 records of past cases and their disposition. On top is a long row of small
brown file boxes - the kind that hold filing cards. Although we've not seen Nick or either of
his partners consult the
records of past cases and their disposition. On top is a long row of small
brown file boxes - the kind that hold filing cards. Although we've not seen Nick or either of
his partners consult the
 filing cards, they often are found over at the cabinets pulling files to consult at
their desks.
filing cards, they often are found over at the cabinets pulling files to consult at
their desks.
A white cupboard is set at the end of the filing cabinets.
We've never seen anyone open the door of this cupboard; so it's impossible to be sure what
actually is supposed to be kept inside it. However, it may contain office supplies, or
something like that.
Just beyond the white cupboard is a

|

|
short partition, attached at one end to the wall, and sticking out into the room. Like
the other partitions elsewhere in the squad room, it is the same blue-grey as the walls, and
topped with a section of rippled glass. Functionally, it separates the front part of the
room from the mid area where Nick and his partner have their desks.
In the front section of the squad room, only one pair of desks is set on this
side of the room, since space has to be left at the front for people to come in and out,
 and go to sit on the bench. But there are two pairs of desks on the other side, behind the
reception desk. A space down the middle of this front area is left for people to walk
to the rear of the squad room. Although we do sometimes see people in the background
cut across to the side corridor, Nick and his partners have always had their desks further up the
room. Therefore, when they are in the front part of the squad room, they are coming from
or going to their desks; so they normally use the central corridor.
and go to sit on the bench. But there are two pairs of desks on the other side, behind the
reception desk. A space down the middle of this front area is left for people to walk
to the rear of the squad room. Although we do sometimes see people in the background
cut across to the side corridor, Nick and his partners have always had their desks further up the
room. Therefore, when they are in the front part of the squad room, they are coming from
or going to their desks; so they normally use the central corridor.
The centre portion of the squad room contains four structural support pillars. These are
square in section, painted the same grey as the walls, and have wainscoting around the base.
Two of the supports are set on the outer side of the room,
 two on the inner side.
The first inner support is situated several feet out from the wall,
just beyond the short partition that separates the front and central portions of the room,
which is to say that it is more or less in front of the doors to the interview rooms.
There is a "No Smoking" sign posted on it.
Its mate is set opposite,
 just near the door to the Captain's office and the desks used by Nick and his partner,
with a second outer support situated inside the side rear exit. Between these two
outer support columns
just near the door to the Captain's office and the desks used by Nick and his partner,
with a second outer support situated inside the side rear exit. Between these two
outer support columns
 run two partions, which are used to delineate a side corridor by the offices. As usual,
these partions are solid grey on the bottom portion, with rippled glass on top.
run two partions, which are used to delineate a side corridor by the offices. As usual,
these partions are solid grey on the bottom portion, with rippled glass on top.
The remaining support is located a few feet into the room
from the central rear exit. This is also freestanding; and people walk past it on one
side when heading to the exit, but cut inside it on the other side when heading to the inner
side rear exit.
 The centre portion of the squad room has two doors on the inner wall, each of which is labelled
as leading to an interview room, though, in fact, only the one on the right opens directly into
such a room. Being fairly complicated sets, the pair of
interview rooms themselves are described below
in a separate section.
The centre portion of the squad room has two doors on the inner wall, each of which is labelled
as leading to an interview room, though, in fact, only the one on the right opens directly into
such a room. Being fairly complicated sets, the pair of
interview rooms themselves are described below
in a separate section.
Initially, of the pair of doors, only the righthand door opened.
 People were often filmed going in and out; and it was possible to see into the room
beyond through the open door: the sets were connected, providing the full police station
set with a complex of interrelated rooms, giving a realistic impression of a working environment.
In Season II, the view through the door from the squad room showed a small
conference table and bulletin boards.
People were often filmed going in and out; and it was possible to see into the room
beyond through the open door: the sets were connected, providing the full police station
set with a complex of interrelated rooms, giving a realistic impression of a working environment.
In Season II, the view through the door from the squad room showed a small
conference table and bulletin boards.
For most of the series, the lefthand door remained closed (or at most
ajar) when viewed face on. However, after a couple of episodes an "EXIT" sign was placed
over it; and, thereafter, if the camera angle was oblique (so that it was impossible to see in),
 then people might be filmed going through it, heading down a corridor that, presumably, had not
actually been built and hence could not be shown. In the later episodes of Season II,
at least one wall must have been finished, since the occasional peek was allowed; however, the
cautious camera angles indicate that the corridor had not been completed.
then people might be filmed going through it, heading down a corridor that, presumably, had not
actually been built and hence could not be shown. In the later episodes of Season II,
at least one wall must have been finished, since the occasional peek was allowed; however, the
cautious camera angles indicate that the corridor had not been completed.
Two-thirds of the way through Season III, the corridor portion of
the set was finally finished. Thereafter, the door was usually left open. The new
corridor has the usual grey walls common throughout the station. At the end is
positioned a security camera with a bright blue light on it. It is clear from the layout
of the station that, at this point, the corridor doglegs to the right and runs down towards
the front of the building, going past the door to the main interview room.
Once the new corridor had been built, suspects and detectives were
sometimes seen going down (or coming up) it just before or after interrogations were conducted.
In my virtual Season IV, therefore, this continues to be the usual route for Nick and
Tracy to take when they are going to or coming from interrogating a suspect. However,
it should be pointed out that this is not consistent with the practice in episodes that were
filmed before the corridor was built: at that time, when detectives
coming from interrogating a prisoner returned to the squad room, they came in through a door
further along on the inner side of the squad room, at the end of the cross-corridor at the rear
of the room. (Towards the end of Season III, this route was used when going to the
 evidence locker
, instead.)
evidence locker
, instead.)
From the corridor (or the door to the corridor), there is a short
further length of wall along to a corner, which serves to demarcate the rearward bounds of the
central portion of the squad room. What lies behind this short section of wall was never
filmed; but, as it is far too narrow to be a room, and too long to be a closet, it seems most
likely that either the corridor is perplexingly broad, or it doubles round to a stairway.
On the squad room side of this section of wall,
 there is a large bulletin board, on which is permanently affixed a large yellow poster adhorting
people to report corruption, along with various bulletins from the Legal Bureau.
there is a large bulletin board, on which is permanently affixed a large yellow poster adhorting
people to report corruption, along with various bulletins from the Legal Bureau.
 It is noticeable that no one is ever seen reading anything posted here -
the more obvious because they do stop to use the water cooler that is set in front of it
(the infamous water cooler which
It is noticeable that no one is ever seen reading anything posted here -
the more obvious because they do stop to use the water cooler that is set in front of it
(the infamous water cooler which
 Captain Reese can't get to work, though other people never have any trouble with it).
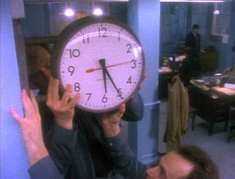
At the corner, a clock is attached high on the wall, sticking out
into the room, so that it is maximally visible to the detectives working at their desks.
In the episode "Forward into the Past", we were shown its installation in the 1950s.
Further on, near the central rear exit, a television monitor screen
depends from the ceiling, matching the one at the front of the squad room. Each is angled
so that it can be seen easily from all the nearby detectives' desks, providing maximum
viewing coverage
 Beyond the corner of the central section, doglegged off to the side, is another open area which
serves as a sort of reference department for the detectives, with storage cabinets and maps on
the walls. Functionally, however, it is cut in two by a de facto corridor that runs
across the rear portion of the squad room. Thus, even though around the corner from the
water cooler a large map of Toronto has been pinned up, there are always people walking back and
forth in front of it, going in and out of the squad room by one or another of the exits.
Beyond the corner of the central section, doglegged off to the side, is another open area which
serves as a sort of reference department for the detectives, with storage cabinets and maps on
the walls. Functionally, however, it is cut in two by a de facto corridor that runs
across the rear portion of the squad room. Thus, even though around the corner from the
water cooler a large map of Toronto has been pinned up, there are always people walking back and
forth in front of it, going in and out of the squad room by one or another of the exits.
 Effectively, therefore, this wall is cut off from the reference area, and serves instead as a
sort of corridor wall, with the rest of the reference area as an alcove off it.
Effectively, therefore, this wall is cut off from the reference area, and serves instead as a
sort of corridor wall, with the rest of the reference area as an alcove off it.
Just around the corner from the squad room proper, a cluster of
clipboards hangs on the wall.
Further along is the map of Toronto. Although
it is unusual
 to see anyone actually using this map, it has occasionally proved helpful - as, for example, in
the episode "Hunted" in Season II, when there were multiple crimes in the same part of town.
to see anyone actually using this map, it has occasionally proved helpful - as, for example, in
the episode "Hunted" in Season II, when there were multiple crimes in the same part of town.
In Season III, a long low wooden cabinet was added, running along
the wall of the end corridor underneath the map. This is divided into fairly wide pigeon
holes, suitable for taking large envelopes or file folders.
 The corridor running across the rear of the squad room ends in a door, which is usually kept
open, since it is in regular use. In Season II and the first part of Season III, this
door was the route taken by Nick and his partner when going to interview suspects (being later
replaced in this function by the new corridor described above).
The corridor running across the rear of the squad room ends in a door, which is usually kept
open, since it is in regular use. In Season II and the first part of Season III, this
door was the route taken by Nick and his partner when going to interview suspects (being later
replaced in this function by the new corridor described above).
Through the door, there is a hallway, running to the left, and
doglegging round to another part of the building. The first few feet
of corridor were built early in Season II, so that the door could be opened, and used as one of
the entrances to the main set. At that time, there was a bulletin board on the
wall just opposite the door to the squad room, clearly visible whenever it was open.
 The full corridor was built during Season III; and the
bulletin board was shifted to the end of the corridor. A second one was positioned on the
wall common with the squad room, and a third at the far end
The full corridor was built during Season III; and the
bulletin board was shifted to the end of the corridor. A second one was positioned on the
wall common with the squad room, and a third at the far end
 of the corridor. As in the squad room proper, the walls of the corridor are a light
neutral grey tone.
of the corridor. As in the squad room proper, the walls of the corridor are a light
neutral grey tone.
There is another door at the far end of the corridor, which seems to
lead into a separate section of the station, for the walls beyond seem to be a lighter colour.
Unlike most of those in the squad room, this is a double glass door, similar to the door
that leads into the squad room from the front stairway landing.
The extension of the corridor enabled the filming of scenes in which
Nick is shown walking along towards the squad room, talking either to Tracy or Captain Reese.
As well, this became the route taken to go to the
evidence locker
, another set that was built midway through Season III. (The
corridor is, of course, still part of the squad room set in Season IV.)

|

|
Returning to the squad room: on the opposite side of the corridor from the map of
Toronto is the rest of the reference area, mostly filled with various storage, with maps and
notices on the
 walls. In Season II, for example, a large map of the province was located beside the door
to the corridor, though, in Season III, it was shifted to the end wall of the alcove, and
replaced by a bulletin board.
walls. In Season II, for example, a large map of the province was located beside the door
to the corridor, though, in Season III, it was shifted to the end wall of the alcove, and
replaced by a bulletin board.
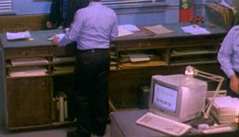
In the second season of the show, this area was also the computer
centre for the squad room, since most of the detectives did not have computer terminals at
their desks, at least not at the beginning of the season. At the head of the room,
straight up from the central corridor, therefore, was a computer desk that the detectives could
use for research.
In the third season of the show (by which time all the detectives
had got their own
 computers), the communal computer desk was replaced by a wooden table, with some chairs.
This is set partly across the alcove, visually cutting it off from the central corridor.
However, access to the alcove is no problem, since one need only walk a few
steps down the side corridor to go around the table.
computers), the communal computer desk was replaced by a wooden table, with some chairs.
This is set partly across the alcove, visually cutting it off from the central corridor.
However, access to the alcove is no problem, since one need only walk a few
steps down the side corridor to go around the table.
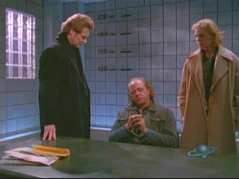
This table is used for group meetings, especially if there are
police personnel involved who are from outside the 96th Precinct. It substitutes for the
table that was in the second interview room in Season II.
 The rear section of the squad room proper starts at the far end of the table, where a short
partition cuts the alcove off from the end of the central corridor, so that one walks down by
the other side of this
The rear section of the squad room proper starts at the far end of the table, where a short
partition cuts the alcove off from the end of the central corridor, so that one walks down by
the other side of this
 partition to reach the central rear exit. Like the side corridor, this has a
door that was originally left closed; but early in Season II, a short stretch of corridor
was built so that the door could be opened. A coat rack was usually set there in Season
II, replaced in Season III by a poster on the wall.
partition to reach the central rear exit. Like the side corridor, this has a
door that was originally left closed; but early in Season II, a short stretch of corridor
was built so that the door could be opened. A coat rack was usually set there in Season
II, replaced in Season III by a poster on the wall.
The corridor turns off to
 the left as you leave. Exactly where it goes was never stated; but, given the side rear
exit only a short distance away, it seems likely that the corridor turns round on itself to a
flight of stairs leading down to the first floor about midway along the rear of the building.
the left as you leave. Exactly where it goes was never stated; but, given the side rear
exit only a short distance away, it seems likely that the corridor turns round on itself to a
flight of stairs leading down to the first floor about midway along the rear of the building.
Although Nick and his partner are often seen coming in this way
wearing their overcoats (suggesting that this is the route they take when returning from the
crime scene or heading out to interrogate a witness), this exit only leads indirectly to the
parking lot: presumably when they come in this way, it is because they have made a stop
somewhere else in the building en route to the squad room. It should be noted, in
particular, that uniformed officers take prisoners in this direction from the interrogation room,
or come in through this door with them when bringing them to be interviewed; so it seems likely
that this staircase continues down to the basement, where the
holding cells
are.
The rear wall of the squad room proper is dominated by a large blackboard, which details the
duties and cases of the various detectives attached to the 96th Precinct. It starts near
the side rear exit, and runs right along the wall to the central exit. Interestingly, they
have actually had different things written on this board at different times - though exactly
what they put up there is another matter.
The door to the side rear exit is usually kept closed, except (obviously) when
people are coming in and out. It has a fairly large window, which affords a
 view of the wall of the staircase beyond. For reasons best known to the set designer, this
seems to have been painted in magenta or red: the colour is clearly seen through the
window, even when the door is shut. It is reasonable to assume that the door leads to the landing of a staircase which goes
down to the side entrance of the police station, debouching at the parking lot at the
far end of the building. Certainly Natalie, and Nick and his partner, sometimes come in
this way wearing coats. However, this is probably also used as a quick route to the next
floor, since many of the people going to and fro are uniformed officers carrying things.
view of the wall of the staircase beyond. For reasons best known to the set designer, this
seems to have been painted in magenta or red: the colour is clearly seen through the
window, even when the door is shut. It is reasonable to assume that the door leads to the landing of a staircase which goes
down to the side entrance of the police station, debouching at the parking lot at the
far end of the building. Certainly Natalie, and Nick and his partner, sometimes come in
this way wearing coats. However, this is probably also used as a quick route to the next
floor, since many of the people going to and fro are uniformed officers carrying things.
 Just inside the side rear exit, underneath the blackboard, is a small table holding a coffee
 machine. This is popular with the detectives, who often stand there for quite a
while chatting together while getting a refill. Although not attached to the detectives'
squad, Natalie also seems to be privileged to drink their coffee - maybe because she is so often
over there, delivering her reports.
machine. This is popular with the detectives, who often stand there for quite a
while chatting together while getting a refill. Although not attached to the detectives'
squad, Natalie also seems to be privileged to drink their coffee - maybe because she is so often
over there, delivering her reports.
 On this outer side of the squad room, there is a corridor cut off from the middle of
the room with a series of light partitions. These are solid at the bottom, but
topped with frosted rippled glass. Each partition is set beside a pair of desks,
with gaps so that
On this outer side of the squad room, there is a corridor cut off from the middle of
the room with a series of light partitions. These are solid at the bottom, but
topped with frosted rippled glass. Each partition is set beside a pair of desks,
with gaps so that
 people can readily go in and out of the corridor without having to go the long way
round,
people can readily go in and out of the corridor without having to go the long way
round,
 and access is easy both to and from the offices along the corridor.
One end of each of the two rearmost sections of the
side-corridor partitions abuts one of the columns that provide structural support in
the rear of the squad room. Indeed, as a rule the partitions of this type that have been
put up to divide the squad room into sections either abut a support column
or are attached to a wall. However, the remaining end of each partition is usually
free-standing, suggesting that the arrangement is for convenience in defining the sections of the
room.

 The side corridor runs from the coffee machine down almost to the far end of
the squad room. The final partition section runs along outside the front office.
At the end of the corridor, the partition is attached to a short wall, on the
The side corridor runs from the coffee machine down almost to the far end of
the squad room. The final partition section runs along outside the front office.
At the end of the corridor, the partition is attached to a short wall, on the
 other side of which is the front stairwell. There seems to be some sort of white notice
board mounted on the wall, and a speaker (intercom or alarm) located high up. Sometimes a
poster is also stuck above the notice board. On the squad-room side of this dogleg are set
the filing cabinets by the front desk.
other side of which is the front stairwell. There seems to be some sort of white notice
board mounted on the wall, and a speaker (intercom or alarm) located high up. Sometimes a
poster is also stuck above the notice board. On the squad-room side of this dogleg are set
the filing cabinets by the front desk.
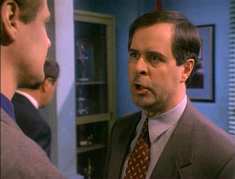
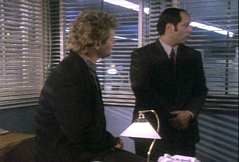
In Season II, when Nick and his partner reported to Captain Cohen,
 she usually talked to them while standing at the end corner of the partition. However,
Captain Reese is tall enough to have gotten into the habit of leaning over the
partition to talk to any detective whose desk is on the other side. Alternatively, of
she usually talked to them while standing at the end corner of the partition. However,
Captain Reese is tall enough to have gotten into the habit of leaning over the
partition to talk to any detective whose desk is on the other side. Alternatively, of
 course, he can walk straight out of the office, through one of the larger gaps between the
partitions, and into the centre area of the squad room. If he wants to talk to one of the
detectives further up or down the room, the central corridor can be used for access.
course, he can walk straight out of the office, through one of the larger gaps between the
partitions, and into the centre area of the squad room. If he wants to talk to one of the
detectives further up or down the room, the central corridor can be used for access.
The central corridor is also the route likely to be used to get to
the front exit. But, for the rear central exit, the captain has two options - to go along
the side corridor and turn along by the blackboard to go to the rear door, or to go across the
side corridor, turn into the main area of the squad room, and then walk up the central corridor,
which leads straight to the rear door.
Going down the side corridor, you pass three offices, set along the side of the building, with
the same type of large window found along the front of the room. These look out on the
laneway leading to the parking lot (though obviously no view through the glass is possible,
since the interior of the station was not filmed on location, but rather was a permanent set on
the soundstage).
 It seems probable that the front office is
occupied by another senior officer, since someone else presumably has charge of the day shift.
Certainly, it has one desk prominently inside, positioned so that the person sitting
It seems probable that the front office is
occupied by another senior officer, since someone else presumably has charge of the day shift.
Certainly, it has one desk prominently inside, positioned so that the person sitting
 there has their back to the wall that is common with the front staircase. On this wall is
a large bulletin board; and a filing cabinet is set in the corner near the window.
there has their back to the wall that is common with the front staircase. On this wall is
a large bulletin board; and a filing cabinet is set in the corner near the window.
In some episodes, a man can be seen sitting at the desk. One
can easily imagine the senior officer of the previous shift lingering to complete paperwork.
However, the office is often empty, presumably during the later portions of the night
shift, when its regular occupant would be at home.
 In "Beyond the Law", Nick and his partner took advantage of this to
use the office to interview an angry consular official, whom it would not have been politic to
take into an interrogation room. They couldn't use their own captain's office, since an
RCMP officer was in there making a phone call. The general lack of privacy in the
precinct is demonstrated by the fact that, with the blinds open, the RCMP officer was quite
visible in the centre office through the window between the offices.
In "Beyond the Law", Nick and his partner took advantage of this to
use the office to interview an angry consular official, whom it would not have been politic to
take into an interrogation room. They couldn't use their own captain's office, since an
RCMP officer was in there making a phone call. The general lack of privacy in the
precinct is demonstrated by the fact that, with the blinds open, the RCMP officer was quite
visible in the centre office through the window between the offices.
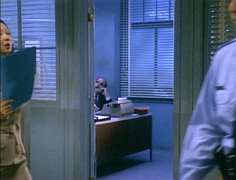
 The central office is occupied by the captain in
charge of the shift that Nick and his partner are on - Amanda Cohen in Season II, and Joe Reese
from Season III on. Because of the frequency with which scenes were set there,
the captain's office
is described in detail in a section below.
The central office is occupied by the captain in
charge of the shift that Nick and his partner are on - Amanda Cohen in Season II, and Joe Reese
from Season III on. Because of the frequency with which scenes were set there,
the captain's office
is described in detail in a section below.
The use of the rear office is
unclear, although, logically, it would be the office for whomever is in charge of the third
shift. People are often seen moving around inside; but no scene was ever filmed
there.
In my virtual Season IV, I use it as a meeting room. For this
purpose, I dress the set with a large wooden table that has a selection of chairs around it.
 On the other side of the partition, are four pairs of desks running down the squad room, each
pair set facing one another, end-on to one of the sections of the partition. The forward
two pairs of desks are in the front part of the squad room; but the rearward two pairs are in
the central portion of the room. At the front of the room, there is also a pair of desks
on the inner side of the room. But, in the central part of the room, desks are set only
along the partition to the side corridor, for the wall opposite is occupied by the door to the
observation room and the corridor to the interrogation room.
On the other side of the partition, are four pairs of desks running down the squad room, each
pair set facing one another, end-on to one of the sections of the partition. The forward
two pairs of desks are in the front part of the squad room; but the rearward two pairs are in
the central portion of the room. At the front of the room, there is also a pair of desks
on the inner side of the room. But, in the central part of the room, desks are set only
along the partition to the side corridor, for the wall opposite is occupied by the door to the
observation room and the corridor to the interrogation room.
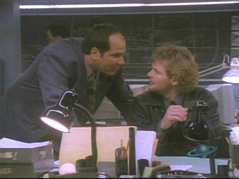
 Nick and his partner have the pair of desks second from the end of the room. Nick's is
the one to the rear, facing front, while his partner's faces the back of the room.
This arrangement affords for easy conversation; and one may assume that the other
pairs of desks are also assigned to partnered detectives.
Nick and his partner have the pair of desks second from the end of the room. Nick's is
the one to the rear, facing front, while his partner's faces the back of the room.
This arrangement affords for easy conversation; and one may assume that the other
pairs of desks are also assigned to partnered detectives.
During Season II, most of the
detectives in the squad room were seen using rather old-fashioned typewriters, though there were
 computers on some desks - though not Nick's or his partner's until late in the season.
Until then, they had computer access only at the back of the room, in the reference alcove.
But, throughout most of Season III (and, of course, since then), they have had computers
at their desks. There has, however, been some inconsistency in this regard - generally
when the script calls for them to use a typewriter (as, for example, Tracy does in one episode
to fill out a form). They also, of course, have the usual desk paraphernalia:
telephones, desk organizers for such things as pens and paperclips, in and out trays,
desk lamps, and blotters.
computers on some desks - though not Nick's or his partner's until late in the season.
Until then, they had computer access only at the back of the room, in the reference alcove.
But, throughout most of Season III (and, of course, since then), they have had computers
at their desks. There has, however, been some inconsistency in this regard - generally
when the script calls for them to use a typewriter (as, for example, Tracy does in one episode
to fill out a form). They also, of course, have the usual desk paraphernalia:
telephones, desk organizers for such things as pens and paperclips, in and out trays,
desk lamps, and blotters.
Each pair of desks is set sufficiently apart from the
side partition that it is possible to walk down between. One can therefore get to Nick's
desk from the side corridor either by walking down by the partition, or by going around his
partner's desk to the central corridor. However, the latter is the more usual route.
 Nick's partner's desk is located just outside the captain's
office, and just opposite the corridor to the interrogation room.
In fact, it is possible to walk in a straight line from the office, past the back of Tracy's chair, and across to the corridor to go to interrogation.
Nick's partner's desk is located just outside the captain's
office, and just opposite the corridor to the interrogation room.
In fact, it is possible to walk in a straight line from the office, past the back of Tracy's chair, and across to the corridor to go to interrogation.
 The side partition by their desks ends in a support column.
If he is just coming to or going from his desk, Nick often leans against it when talking to his
partner; and other people use it as a handy stopping point when they have come around from the
side corridor to talk to them.
The side partition by their desks ends in a support column.
If he is just coming to or going from his desk, Nick often leans against it when talking to his
partner; and other people use it as a handy stopping point when they have come around from the
side corridor to talk to them.
Late in Season II, in "The Code" (an episode which was set in
wintertime), a coat rack was set up by the support column so that Nick and his partner can hang
up their overcoats in the squad room. This means, of course, that they thus have them to
hand, rather than leaving them in their lockers, and having to go and fetch them whenever they
need to go out of the station.
|
|
|
Captain Reese's Office
 In Season II, Nick and his then partner, Don Schanke, reported to Captain Cohen; in Season III,
Nick and Tracy reported to Captain Reese (as they do in my Season IV). But, in either case,
In Season II, Nick and his then partner, Don Schanke, reported to Captain Cohen; in Season III,
Nick and Tracy reported to Captain Reese (as they do in my Season IV). But, in either case,
 the captain's office is the middle of
the three offices that run along the outer wall of the squad room. From the
perspective of Nick and his partner, this location is either convenient - or extremely
inconvenient - depending on the circumstances, since their desks are right
outside. Reese tends to keep his door closed a lot of the time. His desk is set
opposite, facing the door.
the captain's office is the middle of
the three offices that run along the outer wall of the squad room. From the
perspective of Nick and his partner, this location is either convenient - or extremely
inconvenient - depending on the circumstances, since their desks are right
outside. Reese tends to keep his door closed a lot of the time. His desk is set
opposite, facing the door.
The room has a very open feel to it, since all the walls have large
windows. Behind the desk is a window out onto the street. On either side are
 windows through to the other offices. And the wall to the squad room and the door also
have windows. These are fitted with Venetian blinds, so that Reese can have privacy, if
necessary, when talking to someone. Usually, though, the blinds are kept
with the slats open. Though the view is somewhat impeded, it is always clear to Reese
what is going outside his office. People can often be seen through the open blinds, moving
around either in the next office, or out in the squad room.
windows through to the other offices. And the wall to the squad room and the door also
have windows. These are fitted with Venetian blinds, so that Reese can have privacy, if
necessary, when talking to someone. Usually, though, the blinds are kept
with the slats open. Though the view is somewhat impeded, it is always clear to Reese
what is going outside his office. People can often be seen through the open blinds, moving
around either in the next office, or out in the squad room.
The door opens flat against a short section of wall common with the squad room.
 It connects to a side wall, which has a low piece of furniture placed midway along.
Basically, though, this wall is just a large window, through whose blinds the front office can
be seen. Functionally, the area just in front of it serves only as a corridor for the
captain to come out from around the desk.
It connects to a side wall, which has a low piece of furniture placed midway along.
Basically, though, this wall is just a large window, through whose blinds the front office can
be seen. Functionally, the area just in front of it serves only as a corridor for the
captain to come out from around the desk.
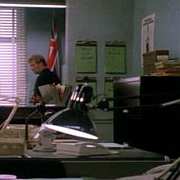
 The outer wall of the office has a display of medals in a case to
the left of the window. This clearly relates to the squad, rather than the person
occupying the room, since it did not change when Captain Reese took over the precinct. A
small cabinet is located underneath, next to the desk: Captain Cohen kept a computer on
The outer wall of the office has a display of medals in a case to
the left of the window. This clearly relates to the squad, rather than the person
occupying the room, since it did not change when Captain Reese took over the precinct. A
small cabinet is located underneath, next to the desk: Captain Cohen kept a computer on
 it.
it.
The desk is located in front of the window.
On the other side of the window, in the corner of the room, is a tall
 filing cabinet. When Captain Cohen had the office, there were also several plaques on the
wall; but these must have been personal awards, returned to her family after her death.
Reese has nothing on this wall. As for the cabinet, the files Reese keeps here are not
just for the personnel assigned to his command, since, in "Outside the Lines", he pulled out his
records on one of Tracy's father's
filing cabinet. When Captain Cohen had the office, there were also several plaques on the
wall; but these must have been personal awards, returned to her family after her death.
Reese has nothing on this wall. As for the cabinet, the files Reese keeps here are not
just for the personnel assigned to his command, since, in "Outside the Lines", he pulled out his
records on one of Tracy's father's
 protegés who was working undercover with the Drug Squad.
Beside the filing cabinet and running along the other side wall, there
is a long wooden cabinet. The top of this is convenient for laying things on, so that the
top of the desk doesn't get too crowded. Reese's predecessor, Amanda Cohen, for example,
sometimes put a photograph of her family on it.
 The room is not large; but, like other small sets, the office looks
larger on film than it was in reality, because the outer wall could be removed and the camera positioned well behind the desk, giving
a broad field of view.
The room is not large; but, like other small sets, the office looks
larger on film than it was in reality, because the outer wall could be removed and the camera positioned well behind the desk, giving
a broad field of view.
The wall common with the squad room is free of permanent furniture.
It is here that people usually stand when talking to Reese. However, the
room does sometimes have a chair or two set in this area, since visitors do not necessarily feel
compelled to stand when talking to him. The chair is sometimes seen pushed up against the
wall when not in use; but (depending, I suppose, on the whim of the director)
 it is usually just removed from the set when not needed. In the same way, a coat rack is
sometimes positioned in the corner of the office at the end of the long wooden cabinet; but, if
the story doesn't call for the captain to don a coat (and it usually doesn't), then the rack is
absent.
it is usually just removed from the set when not needed. In the same way, a coat rack is
sometimes positioned in the corner of the office at the end of the long wooden cabinet; but, if
the story doesn't call for the captain to don a coat (and it usually doesn't), then the rack is
absent.
Reese uses the same desk as his predecessor. Of course, it
still has a telephone, pens, and - when appropriate - files on it. But he has arranged it
somewhat differently from Captain Cohen. Most noticeable is the new desk lamp, which has a
striking green shade. But, like Cohen, Reese also has a picture of his family on his desk.
|
|
|
The Interrogation and Observation
Rooms
 When the set for the new police station debuted in the second season premiere, there were two
doors in the middle of the squad room opposite the desks assigned to Nick and his partner.
Both bore labels designating them as
interview rooms;
but, initially, only the door on the
When the set for the new police station debuted in the second season premiere, there were two
doors in the middle of the squad room opposite the desks assigned to Nick and his partner.
Both bore labels designating them as
interview rooms;
but, initially, only the door on the
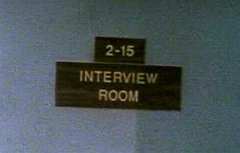
 right actually opened. It led into 2-15, a room designed for multiple functions.
There was a table in the middle, with chairs; a map on the back wall; and a bulletin board on
the wall common with the squad room. Thus, although the room was certainly employed as an
interview room (though for talking to witnesses rather than suspects), it was also used for case
conferences, and for private discussions (between, say, Natalie and Nick). And it had a
right actually opened. It led into 2-15, a room designed for multiple functions.
There was a table in the middle, with chairs; a map on the back wall; and a bulletin board on
the wall common with the squad room. Thus, although the room was certainly employed as an
interview room (though for talking to witnesses rather than suspects), it was also used for case
conferences, and for private discussions (between, say, Natalie and Nick). And it had a
 fourth function, which was the one that carried over into Season III: the room was set up
for observation of a second room, designed for interviewing people who were actually suspected of
committing crimes or of withholding evidence that could help the detectives. A one-way
mirror was set into the inside wall perpendicular to the squad room; and this allowed visual
monitoring of whatever was going on in the other interview room. There was also a
television monitor, set to the right of the one-way mirror.
fourth function, which was the one that carried over into Season III: the room was set up
for observation of a second room, designed for interviewing people who were actually suspected of
committing crimes or of withholding evidence that could help the detectives. A one-way
mirror was set into the inside wall perpendicular to the squad room; and this allowed visual
monitoring of whatever was going on in the other interview room. There was also a
television monitor, set to the right of the one-way mirror.
 The room on the other side of the one-way mirror, 2-15A, was not accessed
directly from the squad room. Instead, its door was on the side of the room opposite to
the wall that was common with the squad room. Clearly, it opened onto a corridor; and
this had to run down on the far side of the pair of interview rooms from the squad room proper.
In Season II, this corridor seemed to head along parallel to the main squad room, linking
somewhere beyond the door to the end corridor, since Nick and his partner would return
via
the end corridor when they had been interrogating a prisoner. The numbers on the doors
in the squad room would belie this layout; but there is no other logical explanation for the
characters' movements. In actual fact, it would make more sense to arrange things that way
than to have
The room on the other side of the one-way mirror, 2-15A, was not accessed
directly from the squad room. Instead, its door was on the side of the room opposite to
the wall that was common with the squad room. Clearly, it opened onto a corridor; and
this had to run down on the far side of the pair of interview rooms from the squad room proper.
In Season II, this corridor seemed to head along parallel to the main squad room, linking
somewhere beyond the door to the end corridor, since Nick and his partner would return
via
the end corridor when they had been interrogating a prisoner. The numbers on the doors
in the squad room would belie this layout; but there is no other logical explanation for the
characters' movements. In actual fact, it would make more sense to arrange things that way
than to have
 two parallel corridors, one at the end of the squad room and the another only about six or seven
feet away, which is explicitly the situation once the extensions to the set were
completed in mid-Season III.
two parallel corridors, one at the end of the squad room and the another only about six or seven
feet away, which is explicitly the situation once the extensions to the set were
completed in mid-Season III.
Opposite the one-way mirror, the wall of the second interview room
was marked with horizontal lines indicating height. The room could therefore be used for
witness line-ups. More usually, though, it had a table and chairs set in the centre, used
by the suspect and the detectives. Any uniformed officer assigned to escort the prisoner
had to stand at the side or the corner of the room.
A few episodes into Season III, the interview and interrogation room
complex was rebuilt. The basic layout remained the same. There was still one room
directly accessible from the squad room; and this still had a one-way mirror through which one
could see into the other room. And the second room was still accessed indirectly from a
corridor. However, the decor was completely redone. (It is this new version of the
interview complex that appears in my virtual Season IV.)
Furthermore, as has already been discussed, partway through the
third season, the second, leftward door opposite Nick's and Schanke's desks was fully opened for
the first time - and thereafter usually left open to show the corridor that had been built
leading off it. Nick and his partner therefore now use that, rather than the end corridor,
when going to (or coming from) an interrogation.
 This corridor runs parallel to the side wall of the witness
interview room. It does not, therefore, run straight to the second interview room.
Instead, the corridor turns at the end, and continues along to the right to the door to the
interrogation room, which opens on the right side of the corridor. Brief glimpses of the
corridor were occasionally seen when the door was open; and, even in Season II, a bit of it was completed so that Nick and his partner could be seen outside the door. However, the full rightward extension of the
corridor was only seen properly - and then only briefly - in the series finale.
This corridor runs parallel to the side wall of the witness
interview room. It does not, therefore, run straight to the second interview room.
Instead, the corridor turns at the end, and continues along to the right to the door to the
interrogation room, which opens on the right side of the corridor. Brief glimpses of the
corridor were occasionally seen when the door was open; and, even in Season II, a bit of it was completed so that Nick and his partner could be seen outside the door. However, the full rightward extension of the
corridor was only seen properly - and then only briefly - in the series finale.
 The new interrogation room is psychologically
more intimidating than the original, with an eerie glow up the side and rear walls, each of which
has a sort of little plinth at the bottom which houses blue lights. The structure
continues up the corners of the room, so that the flat areas of the walls seem as
though they have been inset.
The new interrogation room is psychologically
more intimidating than the original, with an eerie glow up the side and rear walls, each of which
has a sort of little plinth at the bottom which houses blue lights. The structure
continues up the corners of the room, so that the flat areas of the walls seem as
though they have been inset.
 Instead of horizontal lines for measuring prisoners' height, the
back wall has a pattern of squared lines (perhaps tiles). These serve the same function,
however, since the heights are marked at either side (metric on the left, feet and inches
on the right), so that the room can still be employed for witness line-ups.
Instead of horizontal lines for measuring prisoners' height, the
back wall has a pattern of squared lines (perhaps tiles). These serve the same function,
however, since the heights are marked at either side (metric on the left, feet and inches
on the right), so that the room can still be employed for witness line-ups.
 The wall common with the squad room is now made of large grey
bricks. Since these look structural (and it is surely only the decor that has been
altered), it must be assumed that they used to be covered with plaster or plasterboard and then
The wall common with the squad room is now made of large grey
bricks. Since these look structural (and it is surely only the decor that has been
altered), it must be assumed that they used to be covered with plaster or plasterboard and then
 painted, and that this has been stripped off. However, the wall common with
the observation room still has plain grey painted walls, just as before. And it continues
to be dominated by a large mirror which, from the other side, serves as a window through which
the interrogations can be observed.
painted, and that this has been stripped off. However, the wall common with
the observation room still has plain grey painted walls, just as before. And it continues
to be dominated by a large mirror which, from the other side, serves as a window through which
the interrogations can be observed.
The wall with the door is marked with the same squared tile pattern
as the back wall of the room, but without the height indicators. It is pierced on either
side of
 the door with a window made of glass blocks, through which light enters the room. The
brilliance of this light is quite striking, the more so when one considers that, on the other
side of the wall, there is only an interior corridor. The light coming in through these
glass-block windows has to come from the ceiling lights, which are probably fluorescent lights,
like those elsewhere in the police station. The relative brilliance of the light coming
in suggests that the interrogation room is kept fairly dark,
the door with a window made of glass blocks, through which light enters the room. The
brilliance of this light is quite striking, the more so when one considers that, on the other
side of the wall, there is only an interior corridor. The light coming in through these
glass-block windows has to come from the ceiling lights, which are probably fluorescent lights,
like those elsewhere in the police station. The relative brilliance of the light coming
in suggests that the interrogation room is kept fairly dark,
 presumably to increase the disconcerting effect of the strange blue lighting.
The door into the interrogation room is in the middle of this wall,
flanked by the windows. Like the one-way mirror, it is essentially unchanged: a
plain grey door, with a little shuttered window set in it so that one can see into the room from
the corridor. The room number is on a black plate set under this peephole on the corridor
side.
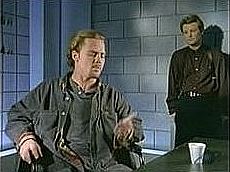
 The other room of the interrogation complex was also rebuilt early in Season III. From an
all-purpose room serving for witness interviews and conferences, it became an
observation room dedicated to the
function of observing the interrogations being conducted in the adjoining room. The walls
were therefore cleared of distracting maps and bulletin boards; and the room was
emptied of furniture. It is dominated by the the big one-way mirror.
The other room of the interrogation complex was also rebuilt early in Season III. From an
all-purpose room serving for witness interviews and conferences, it became an
observation room dedicated to the
function of observing the interrogations being conducted in the adjoining room. The walls
were therefore cleared of distracting maps and bulletin boards; and the room was
emptied of furniture. It is dominated by the the big one-way mirror.
Each wall stylistically matches the
 corresponding wall in the interrogation room proper. That is to say: the wall
 common with the squad room - the wall with the door - has been stripped to its underlying grey
brick construction; the wall common with the corridor has a squared tile pattern; and the
remaining walls are painted a plain dark grey. This provides a subtle visual tie between
the two rooms; but, from the perspective of someone looking from the observation room, through
its open doorway, into the squad room, there is a considerable shift of style from the previous
decor: the new observation room, with its dark, undecorated, block-wall design is much
harsher to look at than the serviceable light grey-painted multi-purpose room of heretofore.
common with the squad room - the wall with the door - has been stripped to its underlying grey
brick construction; the wall common with the corridor has a squared tile pattern; and the
remaining walls are painted a plain dark grey. This provides a subtle visual tie between
the two rooms; but, from the perspective of someone looking from the observation room, through
its open doorway, into the squad room, there is a considerable shift of style from the previous
decor: the new observation room, with its dark, undecorated, block-wall design is much
harsher to look at than the serviceable light grey-painted multi-purpose room of heretofore.
 Like the new interrogation room, the observation room is fenestrated
on the corridor-side wall, though, in this case, with a single long glass-block window,
stretching right along the whole wall. As with the interrogation room,
Like the new interrogation room, the observation room is fenestrated
on the corridor-side wall, though, in this case, with a single long glass-block window,
stretching right along the whole wall. As with the interrogation room,
 this admits brilliant light. The observation room is noticeably dark,
the better for observers to concentrate on the scene in the
adjoining room. So that they can also hear what is going on, a speaker is set
up near the ceiling to the left of the one-way mirror.
this admits brilliant light. The observation room is noticeably dark,
the better for observers to concentrate on the scene in the
adjoining room. So that they can also hear what is going on, a speaker is set
up near the ceiling to the left of the one-way mirror.
|
|
|
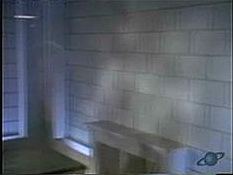
The Holding Cells
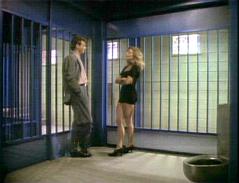 The holding cells are clearly in the basement of
the station, since the windows are high in the walls, which are the typical cement blocks
found in basement rooms. The interior walls are covered with plain tiles, rather
like large bathroom tiles - which presumably makes them easy to clean.
The holding cells are clearly in the basement of
the station, since the windows are high in the walls, which are the typical cement blocks
found in basement rooms. The interior walls are covered with plain tiles, rather
like large bathroom tiles - which presumably makes them easy to clean.
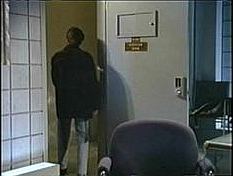
 The door into Holding is at the top of a short flight of steps.
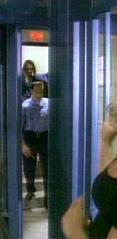 It has a solid construction, with a peephole. Above the door
is an illuminated exit sign. The hall outside is very similar in construction to the
Holding area itself. Like the entrance corridor down the steps, the outer hall runs -
for such of its length as we can see - along one of the outer walls of the police station.
It presumably leads to a staircase coming down from the upper floors; and this
staircase probably continues up to the central rear exit on the second floor (the one at
the rear of the detectives' squad room), since this is the route taken by prisoners being
taken back to the cells after interrogation.
It has a solid construction, with a peephole. Above the door
is an illuminated exit sign. The hall outside is very similar in construction to the
Holding area itself. Like the entrance corridor down the steps, the outer hall runs -
for such of its length as we can see - along one of the outer walls of the police station.
It presumably leads to a staircase coming down from the upper floors; and this
staircase probably continues up to the central rear exit on the second floor (the one at
the rear of the detectives' squad room), since this is the route taken by prisoners being
taken back to the cells after interrogation.
 Once down the steps, the corridor continues across the front of the
Holding cells. There are two high windows along this wall. Each seems to have six
panes of frosted glass. In some shots, branches can be dimly seen outside, suggesting that
there is some form of shrubbery as a foundation planting on whichever side of the building is
out there. From the exterior views of the police station, it is clear that there is no
such shrubbery adorning the frontage on either the
Once down the steps, the corridor continues across the front of the
Holding cells. There are two high windows along this wall. Each seems to have six
panes of frosted glass. In some shots, branches can be dimly seen outside, suggesting that
there is some form of shrubbery as a foundation planting on whichever side of the building is
out there. From the exterior views of the police station, it is clear that there is no
such shrubbery adorning the frontage on either the
 Queen Street or drive sides of the 96th Precinct building. The holding cells must
therefore be somewhere at the back of the building.
Queen Street or drive sides of the 96th Precinct building. The holding cells must
therefore be somewhere at the back of the building.
The entrance corridor runs right along to the side wall of the room,
thus bordering the cells at the top of the room. We've never quite seen it end; but there
is certainly a rear wall to the cell on that side of the room. This appears to be an
interior wall, since it has no windows.
 There is a second corridor turning off the first, midway along the
room. This runs down between the cells; and it is this corridor that has the doors into
There is a second corridor turning off the first, midway along the
room. This runs down between the cells; and it is this corridor that has the doors into
 the cells. The Holding area thus has a T-shape, formed by the two corridors.
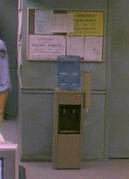
There seems to be a water fountain at the junction of the two corridors.
the cells. The Holding area thus has a T-shape, formed by the two corridors.
There seems to be a water fountain at the junction of the two corridors.
There are two cells, one on either side of the
 room. If one walks down the corridor between the cells, one comes to a blank end wall -
presumably one of the inner structural walls of the station.
room. If one walks down the corridor between the cells, one comes to a blank end wall -
presumably one of the inner structural walls of the station.
A chair is often located at the far end of the corridor between the
cells for the Custody Sergeant to sit on. However, the chair is sometimes shifted outside
a cell if there is a prisoner inside who is
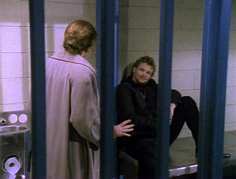 considered to need more supervision.
Each of the cells has vertical bars on both corridors, and on the
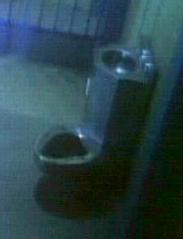 door. Inside, there is a single bunk bed against the back wall, and a toilet-and-sink
unit (with no screening around it). In most episodes, the camera angle
excluded the toilet; you can usually see no more than a small corner of it.
door. Inside, there is a single bunk bed against the back wall, and a toilet-and-sink
unit (with no screening around it). In most episodes, the camera angle
excluded the toilet; you can usually see no more than a small corner of it.
The presence of only a single bunk bed would suggest
that each cell is supposed to hold one inmate. However, the actual number of prisoners
held in a cell can vary by quite a bit. Although usually there are only one or two in the
jail area, if the budget allows or the script calls for it, more may be put into each cell,
despite the limited accommodation. One may conclude, therefore, that this is clearly only
intended as a temporary holding facility.
|
|
|
The Evidence Locker
 The evidence locker only appeared in two episodes
in the third season: "Games Vampires Play", and the series finale, "Last Knight".
Probably in the basement of the station, it is accessed off a windowless corridor, and has blank
concrete walls. On the side of the corridor, the locker takes the form of a wire cage, with a
The evidence locker only appeared in two episodes
in the third season: "Games Vampires Play", and the series finale, "Last Knight".
Probably in the basement of the station, it is accessed off a windowless corridor, and has blank
concrete walls. On the side of the corridor, the locker takes the form of a wire cage, with a
 locked door. Just inside the door, to the right as you face the door, is a desk.
Presumably, there is usually someone on duty here, checking evidence in (and out, if a detective
needs it for a case, or it is being sent for forensic analysis). No
doubt, anyone coming into the evidence locker is also noted, along with the times they entered
and left the room. However, in "Games Vampires Play", Nick came down surreptitiously
locked door. Just inside the door, to the right as you face the door, is a desk.
Presumably, there is usually someone on duty here, checking evidence in (and out, if a detective
needs it for a case, or it is being sent for forensic analysis). No
doubt, anyone coming into the evidence locker is also noted, along with the times they entered
and left the room. However, in "Games Vampires Play", Nick came down surreptitiously
 looking for the equipment used to play a virtual vampire game. Since he had been told not
to play it but concentrate on finding who murdered the man who created it, he therefore must have
chosen to come at a time when the evidence locker was unattended.
looking for the equipment used to play a virtual vampire game. Since he had been told not
to play it but concentrate on finding who murdered the man who created it, he therefore must have
chosen to come at a time when the evidence locker was unattended.
The other walls of the evidence locker have metal shelving, on which
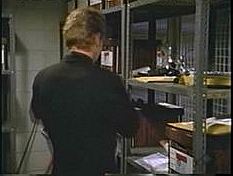 the evidence is stored in uniform brown cardboard file boxes, each labelled on the front with
the case identification. Along the rear wall, the shelves are fairly full of boxes.
However, Nick found the one he was looking for on the shelves by the corridor, which presumably
hold the evidence on current cases. At any rate, those shelves were at that time far from
full.
the evidence is stored in uniform brown cardboard file boxes, each labelled on the front with
the case identification. Along the rear wall, the shelves are fairly full of boxes.
However, Nick found the one he was looking for on the shelves by the corridor, which presumably
hold the evidence on current cases. At any rate, those shelves were at that time far from
full.
|
|
|
The Locker Rooms
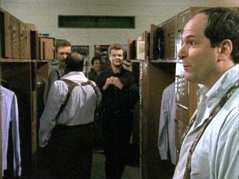 Like the evidence room, the men's and women's locker
rooms each appeared in only one episode - though two different men's locker rooms were
shown. The first men's locker room was seen in "Father's Day", in the second season, when
Schanke was trying to find someone to cover for him so he could be with his daughter on Father's
Day. A corner of the women's locker room was seen in "Trophy Girl", in the third
season, when Captain Reese insisted that, even though she was not under suspension, Tracy still
had to take a few days' leave to recover after shooting a suspect. And a different men's
locker room was seen in the series finale, "Last Knight"; it was there that Tracy cornered an
escaped criminal and was shot.
Like the evidence room, the men's and women's locker
rooms each appeared in only one episode - though two different men's locker rooms were
shown. The first men's locker room was seen in "Father's Day", in the second season, when
Schanke was trying to find someone to cover for him so he could be with his daughter on Father's
Day. A corner of the women's locker room was seen in "Trophy Girl", in the third
season, when Captain Reese insisted that, even though she was not under suspension, Tracy still
had to take a few days' leave to recover after shooting a suspect. And a different men's
locker room was seen in the series finale, "Last Knight"; it was there that Tracy cornered an
escaped criminal and was shot.
None of the locker rooms seems to have windows; and it seems likely
that they are in the basement of the station.

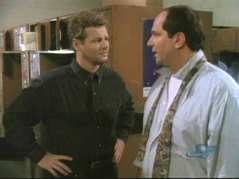 The men's locker room seen in "Father's Day" is large, having at least two double aisles of
brown lockers. These have separate doors for the small top section for storing personal
belongings, and the tall thin lower section for hanging up clothes.
The men's locker room seen in "Father's Day" is large, having at least two double aisles of
brown lockers. These have separate doors for the small top section for storing personal
belongings, and the tall thin lower section for hanging up clothes.
The double aisle construction means two sets of lockers are back to
back; so there is room at the end for posters to be stuck up. Furthermore, at the end of
the aisles, there are a number of bulletin boards.
 The women's locker room is similar to the men's, though the walls and lockers are
grey, and the latter have only one door, with the top and clothing sections only as interior
compartments. Tracy keeps her gun in the upper compartment when she goes home; and,
presumably, it is also where she puts her purse when she is on duty.
The women's locker room is similar to the men's, though the walls and lockers are
grey, and the latter have only one door, with the top and clothing sections only as interior
compartments. Tracy keeps her gun in the upper compartment when she goes home; and,
presumably, it is also where she puts her purse when she is on duty.
Only a small section of the women's locker room was ever seen.
The impression, however, is that it is rather smaller than the corresponding locker room
for the male officers.
The men's locker room in "Last Knight" was part of a larger complex, including a washroom and a
 shower room, through all of which the suspect fled, with a posse of police in pursuit, before
finally being brought to bay in the locker room itself. Unlike the other locker rooms,
this has tiers of large square lockers separated by racks for the men to hang up their clothes.
The units are painted in a drab olive green, and have a rather military appearance.
shower room, through all of which the suspect fled, with a posse of police in pursuit, before
finally being brought to bay in the locker room itself. Unlike the other locker rooms,
this has tiers of large square lockers separated by racks for the men to hang up their clothes.
The units are painted in a drab olive green, and have a rather military appearance.
To make sense of the existence of two quite different men's lockers
in the series, one might consider the possibility that the male detectives and uniformed
personnel have separate facilities. In that case, "Last Knight" shows us the complex of
service rooms designated for the use of the uniformed personnel - whose sections of the
police station did not otherwise appear on the show. (I suspect that, in actuality, the
men's locker rooms were filmed on location - at two different locations.)
|
|
|
The Parking Lot
and
the Rear of the
Police Station
 Two of the walls of the 96th Precinct police station are built in the same formal style, with
large windows separated by columns: one fronts on Queen Street, and the other on a broad
drive. This is actually a cross-street, standing in for the laneway to the parking lot
of the police station. Its width makes this side of the building easily visible from the
main street, hence the handsome frontage.
Two of the walls of the 96th Precinct police station are built in the same formal style, with
large windows separated by columns: one fronts on Queen Street, and the other on a broad
drive. This is actually a cross-street, standing in for the laneway to the parking lot
of the police station. Its width makes this side of the building easily visible from the
main street, hence the handsome frontage.
Beyond the building itself, the laneway turns
into a parking lot for both squad cars and the private vehicles belonging to - in particular -
the detectives attached to the station. We have seen uniformed officers leaving
the building, heading for their
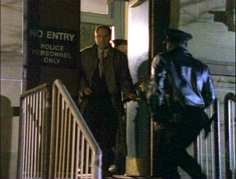 cars; but we have also seen Nick and Schanke going out to theirs. In the second season
episode, "Hunted", for example, it was here that Schanke was drugged and kidnapped, with a taped
message left for Nick to find in his Cadillac.
cars; but we have also seen Nick and Schanke going out to theirs. In the second season
episode, "Hunted", for example, it was here that Schanke was drugged and kidnapped, with a taped
message left for Nick to find in his Cadillac.
Although a lighted sign marks the rear entrance to the building, the
door is clearly marked as "No Entry", except for police personnel. A flight of steps
with an iron railing leads down; and one turns right at the bottom to go to the parking lot
proper.
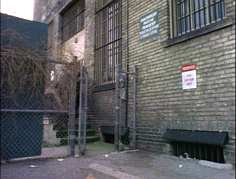 When a prisoner is taken from the holding cells to be transported elsewhere, whether to court or
jail, a different exit is used. This is at the rear of the building, about half way along
the rear wall. The architectural style here is decidedly utilitarian: there is no
doubt that this is the back side of the precinct building: it is dirty brick, with much
smaller windows (which, significantly, have grilles over them on the ground floor level).
Basement windows are clearly visible. Presumably, on the other side of the exit or round
the fourth side of the building, there are further such windows; and some scrubby shrubbery must
be planted, since the set for the holding cells has branches visible through the glass.
When a prisoner is taken from the holding cells to be transported elsewhere, whether to court or
jail, a different exit is used. This is at the rear of the building, about half way along
the rear wall. The architectural style here is decidedly utilitarian: there is no
doubt that this is the back side of the precinct building: it is dirty brick, with much
smaller windows (which, significantly, have grilles over them on the ground floor level).
Basement windows are clearly visible. Presumably, on the other side of the exit or round
the fourth side of the building, there are further such windows; and some scrubby shrubbery must
be planted, since the set for the holding cells has branches visible through the glass.
For those who are curious, the dark sign on the wall between the
windows prohibits unauthorized parking. The red and white sign designates this as the
parking spot for the captain's car. (It is, after all, the spot nearest the station.)
The small white sign says "Police Vehicles Only"; and the larger one further on, high up,
says something about parking, though it's not possible to make out the fine print at the bottom.
And finally, the polygonal sign at the corner states that this area is private parking,
with one car maximum permitted: this is the spot where the paddy wagon was parked in
"Killer Instinct", when Nick was framed for murder. Just around the corner are the steps
up to the parking lot entrance, the one used by the police officers when they go to their cars.


When a prisoner is taken out to transport, he is walked along to where the
paddy wagon is parked. Once the prisoners are loaded into the van, it turns out and
around the corner, driving past the rear exit, and along to Queen Street.
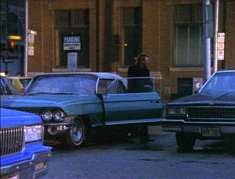 Note that the paddy wagon turns left up the lane. The parking
lot, on the other hand, is to the right. It has one central lane, with cars parked on
either side. Nick normally parks the Caddy on the outer side of the parking lot; and his
partner's car is parked close by. Across the way are a group of fairly utilitarian
looking
Note that the paddy wagon turns left up the lane. The parking
lot, on the other hand, is to the right. It has one central lane, with cars parked on
either side. Nick normally parks the Caddy on the outer side of the parking lot; and his
partner's car is parked close by. Across the way are a group of fairly utilitarian
looking
 buildings.
Set in the asphalt of the lot, near to the rear of the station,
there is a manhole cover leading down into the sewers. In "Hunted", when Nick had to go
and rescue his partner in daytime, this was the route he was forced to take to get to the
location where Schanke was being held.
There remains one more wall: the one running from the back of
the building up to Queen Street. This was never filmed; but the views along Queen clearly
indicate that there are buildings right up near the station. This suggests another plain
wall.
|
|
Return to Top
Return to the List of Permanent Sets
Sets |
Format |
Episode Guide |
Home
|