|
Family
Photo Album Tutorial |
 |
|
Family
Photo Album Tutorial |
|
|
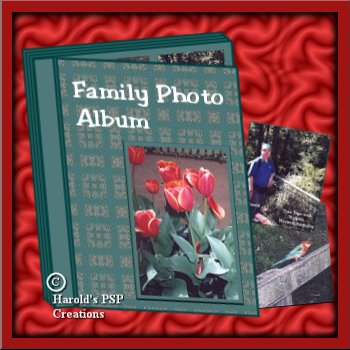
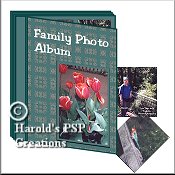
Family Photo Albums hold the treasures and memories of family life and important events.
This is a simple tutorial designed with PSP 6.02 but can be easily completed in other
versions with slight adjustments and one in which you can use your creativity.
Have fun.
Copyright © by Harold E. Jones .. 2001. |
| Level of difficulty: Intermediate |
|
|
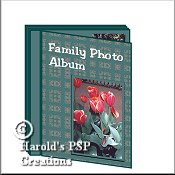
You will need these two graphics for this Tutorial. Right click on each one and save to
your hard drive.
If you wish you can use a pattern of your own choice and if you wish to use a photo of your own to decorate the front cover of the album, please do so. You will need 2 "Family" photos as well to complete this Tutorial. Scan them into your
hard drive or if you prefer |
 |
 |
|
|
1. Open new image, width="350" height="350", 16.7 million colors, White. I have chosen
white so as to make it easier to see your work.
Click on the "Color Options pallet." 2. Go to "View/Rulers" and click Ok. [If you do not already have "Rulers" on your PSP Desktop] Go to "View/Grid" and click Ok. I find it is easier to be more precise when designing your gaphics if you have both the "Rulers" and "Grid" activated. |
|
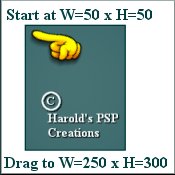
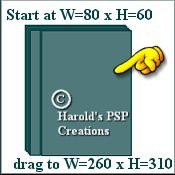
3. Click on the "Layers Option Pallet." 4. Click on your "Preset Shapes Tool," 5. Hold down the left mouse button and start at co-ordinates W=50 x H=50 and drag down and to the right until you reach co-ordinates W=250 x H=300. Release mouse button. You will now have a "Mid Green" shape with a "Dark Green" border. This will be the back cover of the album. |
 |
| Go to "File/save as/" and save your work in .psp extension as "album1.psp." Remember to save your work often. It would be a pity to complete a lot of your work, and then lose it. | |
|
6. Click on the "Magic Wand Tool," 7. Make sure you are on the "back cover" layer. Click outside the "Back Cover" shape. Go to "Selections/invert." click Ok. The "Marching Ants" will appear around the shape. 8. Go to "Edit/copy." 9. Go to "Edit/paste/paste as new layer." |
|
|
10. Click on the "Layers Option Pallet." 11. Click on the "Mover Tool" |
 |
|
12. Repeat steps 9 and 10 twice more and re-name "layer 4" as "page 2" and re-name
"layer 5" as "page 3."
13. Click on the "Layers Option Pallet." 14. Turn Off "layer 1" by clicking on the "small glasses" to the right of the title "layer 1." Go to "layers/merge/merge visible" and click Ok. You now have two layers. Right click on the new layer named "merged," and re-name the layer "Album." Click Ok. Turn on the "Layer 1" again by clicking on the "small glasses." |
| Go to "File/save/" and click Ok. Your work will be updated and saved in .psp extension as "album1.psp." |
|
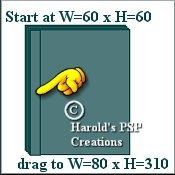
15. Click on the "Layers Option Pallet." 16. Click on your "Preset Shapes Tool," 17. Hold down the left mouse button and start at co-ordinates W=60 x H=60 and drag down and to the right to co-ordinates W=80 x H=310. Release mouse button. |
 |
| Go to "File/save/" and click Ok. Your work will be updated and saved in .psp extension as "album1.psp." | |
|
18. Click on the "Layers Option Pallet." 19. Open up one of the photos that you have chosen. 20. Go to "Edit/copy." |
 |
|
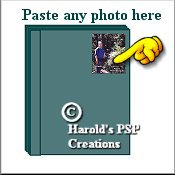
21. Activate the "photo" layer on your main image. Go to "Edit/paste/paste as new
selection" and position the photo to the top and the right of the album page.
[I included a second photo in my Album to the left of this photo. It looked better in
the finished image.]
22. In your layer pallet, with the photo layer activated, click and hold down the left mouse button and drag the "photo" down and underneath the "spine" layer. Release the mouse button. |
|
|
23. While the "Layers Option Pallet." 24. Go to "layers/merge/merge visible" and click Ok. You will now have only 2 layers. "Layer 1" [the white background] and a layer named "merged." 25. Right click on this "merged" layer and re-name the "merged" layer, "album." Click Ok. Turn on the "layer 1" again by clicking on the small glasses. |
| Go to "File/save/" and click Ok. Your work will be updated and saved in .psp extension as "album1.psp." |
|
26. Click on the "Layers Option Pallet." 27.Click on your "Preset Shapes Tool," 28. Hold down the left mouse button and start at co-ordinates W=80 x H=60 and drag down and to the right to co-ordinates W=260 x H=310. Release mouse button. |
 |
|
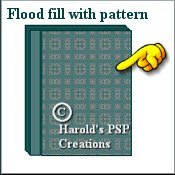
29. Click on the "Magic Wand Tool," 30. Click inside the "Front cover" shape. The "Marching Ants" will appear. 31. Open the "album_bg.jpg" image that you downloaded to your hard drive or choose another pattern. |
 |
|
32. Click on the "Flood Fill Tool" 33. Left click inside the "Marching Ants" on the "Front Cover" and the pattern will "flood fill" the cover shape. |
|
| Go to "File/save/" and click Ok. Your work will be updated and saved in .psp extension as "album1.psp." | |
|
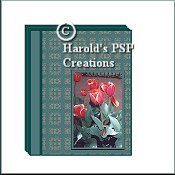
34. Open up the "tulips.jpg" image that you saved to your hard drive or another graphic.
35. Now go to "Edit/copy." 36. Return to the Album graphic. Activate the "Front Cover" layer. Go to "Edit/paste/paste as a new layer. |
 |
|
37. Click on the "Mover Tool" 38. Right click on this new layer and re-name the "layer 3," "Tulips." Release the mouse button. |
|
| Go to "File/save/" and click Ok. Your work will be updated and saved in .psp extension as "album1.psp." | |
|
39. Click on the "Color Options pallet." 40. Click on the "Layers Option Pallet." 41. Click on the "Text Tool" |
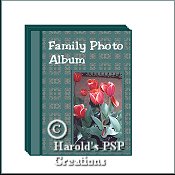 |
| 42. Type in the title "Family Photo Album" in a font face and size of your choice. I have chosen "Hobo" type face and size "18." Make sure that you click on the "White" color box. Click Ok. While the "Marching Ants" are still active around the Title, position the text where you think it looks best. Click Ok. Go to "Selection/select none" and click Ok. The "Marching Ants" will disappear. | |
| Go to "File/save/" and click Ok. Your work will be updated and saved in .psp extension as "album1.psp." | |
|
43. Click on the "Layers Option Pallet." 44. Turn Off "layer 1" and "Album" layers by clicking on the "small glasses" to the right of the titles. 45. Go to "layers/merge/merge visible and click Ok. You now have three layers. Right click on the new layer named "merged," and re-name the layer "Front Cover." Click Ok. Turn on the bottom 2 layers again by clicking on the small glasses. |
|
46. Make sure that you are still on this new "Front Cover" layer. Click on the
"Deform Tool" 47. While holding down the "shift key," left click on the center button on the right hand side. An arrow will appear and still holding down the "shift key" and the left mouse button, move the right hand side of the "Front Cover" down 20 pixels. The left hand side of the "Front Cover" remains in position. Release the mouse button and an "Options" box appears. Click on "Apply." |
 |
| Go to "File/save/" and click Ok. Your work will be updated and saved in .psp extension as "album1.psp." | |
|
48. Click on the "Layers Option Pallet." 49. Open one of the "Family Photos" that you have chosen. Click on this photo and go to "Edit/copy." 50. Make sure that you are on the "My Photos" layer and then go to "Edit/paste/paste as
new selection." Click on the "Mover Tool" |
 |
|
51. Repeat steps #49 and #50 with the 2nd "Family photo," arranging this photo so it
slightly covers the first photo.
52. Click on the "My photos" layer and hold down the left mouse button. A "small hand" appears allowing you to "grab" the "My Photos" layer and drag it down and under the "Front Cover" layer. |
|
| Go to "File/save/" and click Ok. Your work will be updated and saved in .psp extension as "album1.psp." | |
|
53. While the "Layers Option Pallet" 54. Go to "layers/merge/merge visible" and click Ok. You will now have only 2 layers. "Layer 1" [the white background] and a layer named "merged." 55. Right click on this "merged" layer and re-name it "album." Click Ok. Turn on the "layer 1" again by clicking on the small glaases. |
| Go to "File/save/" and click Ok. Your work will be updated and saved in .psp extension as "album1.psp." |
|
56. If you are satisfied with the "white" as a background for your finished "Album,"
now is the time to complete your work. Go to "layers/merge/merge all flatten." Click Ok.
Go to "File/save as" and save as a .jpg extension.
57. If you want to have a different type of background for your "Album," Activate the "White Bckground" or "layer1," and "flood fill" with a pattern of your choice. Then go to "layers/merge/merge all flatten." Click Ok. Go to "File/save as" and save as a .jpg extension. |
|
| Congratulations! You have finished. |
| This tutorial is written by Harold E. Jones.
Other than for personal use, No part of this tutorial maybe copied or reproduced
For further information, please E-mail me. |