Lady's Hand Painted Boot
Tutorial .. Page 3 |
78. Click on the "Drawing Tool," ![]() ![]() 79. Start at co-ordinates W=80 x H=30 and draw a line to co-ordinates W=165 x H=30. 80. Now to create the Bezier curve. Left click at co-ordinates W=120 x H=25 and then a second left click at co-ordinates W=165 x H=10. |
![]() |
Go to "File/save" and click Ok and it will be saved in a .psp extension. |
81. Click on the "Drawing Tool," ![]() ![]() 82. Start at co-ordinates W=165 x H=30 and draw a line to co-ordinates W=205 x H=245. 83. Now to create the Bezier curve. Left click at co-ordinates W=150 x H=110 and then a second left click at co-ordinates W=150 x H=220. |
![]() |
Go to "File/save" and click Ok and it will be saved in a .psp extension. |
84. Click on the "Magic Wand Tool," ![]() 85. Go to "Image/effects/sculpture" and choose the following settings:
86. Click on the "Layers Option Pallet." |
87. Click on the "Drawing Tool," ![]() ![]() 88. Start at co-ordinates W=70 x H=185 and draw a line to co-ordinates W=240 x H=275. 89. Now to create the Bezier curve. Left click at co-ordinates W=100 x H=230 and then a second left click at co-ordinates W=170 x H=270. |
![]() |
90. Click on the "Magic Wand Tool," ![]() 91. Go to "Image/effects/sculpture" and choose the following settings:
|
|
Go to "File/save" and click Ok and it will be saved in a .psp extension. |
92. Click on the "Layers Option Pallet." ![]() 93. Click on your "Preset Shapes Tool," 94. Make sure that your foreground color is "Gold." Start at co-ordinates W=155 x H=40 and draw a small circle for an "Eyelet." |
![]() |
95. Click on the "Color Options pallet." ![]() 96. Click on the "Drawing Tool," 97. Start at co-ordinates W=155 x H=40 and draw a line across to the right, stretching beyond the right hand side of the boot. [We need this black "Boot Lace" to extend over the boot side. We will "Tidy" it up later.] |
Go to "File/save" and click Ok and it will be saved in a .psp extension. |
98. Click on the "Magic Wand Tool," ![]() 99. Go to "Edit/copy" and click Ok. Go to "Edit/paste as a new selection" and position this 2nd "Eyelet and lace" image below the 1st. |
![]() |
100. Repeat this "Edit/paste as new selection" another 9 times, placing each image below
until you have reached the bottom of the "Gold Top Trim."
101. Make sure you are still on the "Eyelets" layer. Use the "Eraser tool" to "Trim" off the excess black laces that extend over the right hand side of the "Boot." |
|
Go to "File/save" and click Ok and it will be saved in a .psp extension. |
102. Click on the "Layers Option Pallet." ![]() 103. Open up the "roses3.jpg" image that you saved to your hard drive. Go to "Selections/select all" and click Ok. Go to "Selections/invert" and click Ok. The "Marching Ants" will surround the roses. Now go to "Edit/copy" and click Ok. |
104. Go to "Edit/paste as new selection" and click Ok. Click on the "Mover Tool"
![]() 105. You will need to "Play around" with "Image/rotate" until you have the "Roses" just where you want them. Then use the "Eraser tool" to remove the part of the "Roses" that extends to the left of the boot. |
![]() |
Go to "File/save" and click Ok and it will be saved in a .psp extension. |
106. Click on the "Layers Option Pallet." ![]() ![]() 107. You will need to "Play around" with "Image/rotate" until you have the "Roses" just where you want them. Then use the "Eraser tool" to remove the part of the "Roses" that extends to the right of the "Toe" of the boot. |
108. Click on the "Layers Option Pallet." ![]() 109. Open up the "bootlace.jpg" image that you saved to your hard drive. I made my lace using the font "Commercial ScriptMT - letter G." [I have made a "Tube" out of my "bootlace" image. I have found it is easier to alter size with a tube graphic.] If you prefer to use the "bootlace" graphic as it is and it is not the right size for your liking, just reduce it slightly. 110. With the "bootlace" image open, go to "Selections/select all." Click Ok. Go to "Selections/invert" and click Ok. Go to "Edit/copy." Click Ok. |
113. Return to the main "Boot Graphic." Click on the "Layers Option Pallet."
![]() 114. Go to "Edit/paste as new selection." Click on the "Mover Tool"
115. You will probably need to go to "Image/rotate" and try several times until you have the lace "just right" under the "Gold trim." |
![]() |
116. Go to "Edit/paste as a new layer" and position the second piece of "lace" adjoining
the first.
117. Continue #116 until you have the "lace" each on a separate layer, right along under the "Gold trim." |
118. Click on the "Layers Option Pallet." ![]() 
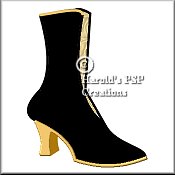
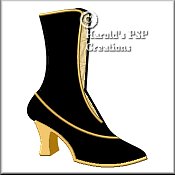
119. Here is where you choose the type of background for your "Boot." 120. If you just want the "White background" to display your "Boot," then go to "Layers/merge all flatten," and click Ok. 121. If you would like a different type of background or color, make sure you are on "layer1" and flood fill with a color or pattern of your choice. then go to "Layers/merge all flatten," and click Ok. 122. Go to "File/save as" and save your final work as a .jpg extension. |
Congratulations! You have finished. Now you can use your talents and design many other different Victorian Ladies Boots. |
This tutorial is written by Harold E. Jones.
Other than for personal use, No part of this tutorial maybe copied or reproduced
For further information, please E-mail me. |