13. Add a new layer and name it "strikers."
Click on the "Color Options pallet." ![]() Keep this new layer highlighted. Click on your "Preset Shapes Tool," ![]() ![]() |
![]() |
On this layer start at end/bottom of first vertical string, hold down your left mouse
button down and drag down till your circle is approx. 10 pixels. Release
your left mouse button.
Click on the "Magic Wand Tool" ![]() Go to image/effects/inner bevel. Same settings as before. Go to edit/copy. Edit/paste/new selection another 4 times. Place each of the red toggles at the end/bottom of the other vertical strings. Deselect. Example on the right. Click on the "Layers Option Pallet." |
14. Add new layer and name it "bridge 2".
Click on the "Color Options pallet." ![]() Click on your "Preset Shapes Tool," ![]() ![]() |
![]() |
Place cursor on top/left side of first bridge rectangle and drag down and across,
until the second rectangle covers the top edge of the vertical strings.
Click on the "Magic Wand Tool" ![]() 15. Go to image/effects/inner bevel with the following settings on the Options pallet,
width=2, depth=2, Smoothness=40, Shininess=10, Intensity=67, Elevation=20, Angle=315.
|
16. Now it's time to decorate your finished Door harp. Make sure your "top or merged layer"
is active.
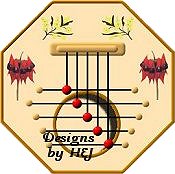
Add a new layer and name it "Decorations". This is where you use your Creative Talents and decorate your Door harp "your way." I have added 4 tubes here on 4 different layers on my Door harp. This has enabled me to place the "South Australian Sturt Desert Pea [red flower]" and the "Australian Golden Wattle" just where I wanted them. I mirrored and moved both of the tubes, second time around. Deselect. Click on the "Layers Option Pallet." |
![]() |
17. Click on the "Layers Option Pallet." ![]() With your Background layer activated, flood fill with a color of your choice. Activate your Layers Options Pallet. Go to layers/merge/merge flatten. Save your work as a ".jpg image." |
Congratulations. You have finished. Well done! |
This tutorial written by Harold E. Jones.
Other than for personal use, No part of this tutorial maybe copied or
reproduced For further information, please E-mail me. |
Tutorial Index. | Back. |