|
58. Click on the "Magic Wand Tool" 59. Click on the "Flood Fill Tool" |
 |
| Terrarium Indoor Garden Tutorial - Page 3: |
|
58. Click on the "Magic Wand Tool" 59. Click on the "Flood Fill Tool" |
|
|
60. Click on the "Layers Option Pallet" Go to "File/save" click Ok, and the image will be saved in the .psp extension. |
|
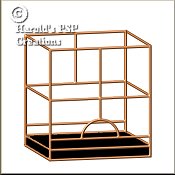
61. Activate the "Potting mix" layer and bring it to the top. Add a another layer and
name it "plants."
This is where you choose various tubes of "Ferns, palms, flowers and rocks." Place each on a separate layer so that you can move them around until you feel that they "are just right." |
 |
|
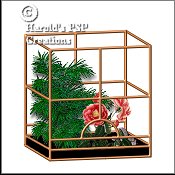
62. Click on the "Layers Option Pallet" 63. Go to "layers/merge/merge visible." Turn all the layers on again. Make sure that you are still on the new "merged layer." Right click on this layer and in the box that "pops up," click on "properties" and rename the layer, "potting mix." There should be 7 layers. 64. Click on the "Layers Option Pallet" |
|
65. Click on the "Drawing Tool" 66. Click on the "Magic Wand Tool" |
|
| 67. Go to "image/effects/sculpture" with the following settings: "Presets=Copper; Size=100%; Smoothness=6; depth=3; ambience=10; shininess=0; color=white; angle=315; intensity=50; elevation=30." Click Ok. Deselect. |  |
|
68. Click on your "Preset Shapes Tool," Start at co-ordinates w=170 x h=30 drag down unil you have a circle of 15 pixels. 69. Click on the "Magic Wand Tool" |
 |
| 70. Go to "image/effects/sculpture" with the following settings: "Presets=Copper; Size=100%; Smoothness=6; depth=3; ambience=10; shininess=0; color=white; angle=315; intensity=50; elevation=30." Click Ok. Deselect. | |
|
71. Now to put the "Clear Glass" in the "Top Panels." Click on the "Magic Wand Tool"
72. Add a new layer and name it "Cutout1." Go to "Image/effects/cutout" and apply the following settings. "Color=black; Opacity=60; Blur=10; Vertical=2; Horizontal=2." Click Ok. 73. Add a new layer and name it "Cutout2." Go to "Image/effects/cutout" and apply the following settings. "Color=black; Opacity=60; Blur=10; Vertical=-2 [minus]; Horizontal=-2 [minus]." Click Ok. Deselect. Go to "File/save/" and save your work. |
|
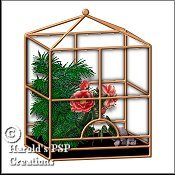
74. If you are satisfied with the "white" as a background for your finished "Terrarium,"
now is the time to complete your work. Go to "layers/merge/merge all flatten." Click Ok.
Go to "File/save as" and save as a .jpg extension.
75. If you want to have a different type of background for your "Terrarium," delete the "color" layer. Activate the transparent or "layer1," and "flood fill" with a pattern of your choice. Then go to "layers/merge/merge all flatten." Click Ok. Go to "File/save as" and save as a .jpg extension. |
|
Congratulations! You have finished. Now you can use your talents and design many other different "Terrariums." |
| This tutorial is written by Harold E. Jones.
Other than for personal use, No part of this tutorial maybe copied or reproduced
For further information, please E-mail me. |