
Harry Potter and the Philosopher's Stone
Walkthrough
This document is maintained by Peter Schouten, and the latest version can be
found at Harry's Hideout.
This document can be distributed on other sites with game information, but only
in its unedited form, with reference to the latest version site. Webmasters can
ensure they get notifications of the changes by mailing jps@dataweb.nl.
General
Take care of time-consuming actions like collecting beans and opening doors before getting a Save-Game-Book (SGB). This will prevent you from having to go through those over and over when the challenge ahead makes you faint frequently.
Harry Potter does not get damaged by falling, unless they are bottomless pits.
The Grey Lady does not damage nor benefit, she just is.
Fred Weasley trades collectable wizard cards for 25 beans. Only 1 trade at the time.
Gnomes don't attack until they make eye contact with Harry. If they hit Harry, 3 beans from Harry will drop to the floor and the gnome will try to collect them before Harry picks em up again (since gnomes are very fast, only a spell on the gnome before he picks up the first can prevent Harry from losing beans).
Attend DADA
Since you can't do any spells yet, there's not much you can do at this stage. Just follow the instructions, collect the 29 beans and trade 25 of them with Fred for your first Wizard card.
You can have 4 succesful attempts at the Flipendo drawing game with Prof. Quirrell. 1 is enough, since there are no benefits in a maximum score in House Points.
Flipendo Challenge
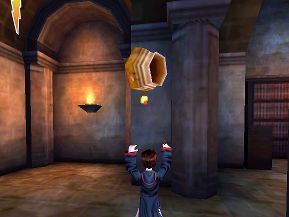
Knock over 3 cauldrons en turnover 2 switches with the Flipendo spell, so the gate opens and the bridge moves. Break a vase and turnover 2 switches to open the gate. Save your game, you now have 14 beans.
Knock over all the caudrons on your way and push the blocks so you can climb on top of them. If the blocks fall into depts you have to watch out not to jump aside from them, for you will surely faint. At the SGB you will have 26 beans.
Make the platforms move by pulling the switches and be careful not to fall off the platforms. Jumping on them often is best taking a run before you jump, not letting the platform get too close so you can land in the middle rather than jump over the platform into the bottomless pit. At the third SGB you will have 39 beans.
The reason why you get the chance of saving your game now, is that you will encounter 3 gnomes, the most annoying of all creatures. If you touch them, you will drop 3 beans and they will try to pick them up before you do. When play in this room begins move a little to the right before the couch and make eye contact with the gnome behind the left couch. Not until he sees you he will run towards you. When he does, Flipendo him on his back and leave him moaning. You can take the other two gnomes at the same time, but if you don't want to, just be as careful making eye contact one at the time. After they are on their back, break the vases and complete the challenge.
Attend Madame Hooch
Flying your broomstick is a nice game by itself, and after your first practice the practice game becomes available from the main menu. When you are flying through the higher hoops, you also get the chance to bump into the Hogwarts glass window. It will open to reveal both the secret area and the second wizard card.
Return to the castle, and Flipendo the cauldrons to get more beans and a chocolate frog for your health (if it isn't still maximum). The harnasses each can take 5 Flipendo spells, so when you go to the SGB you will have 55 beans.
Hermione now gives an extra lesson, Alohomorra. She asks you to find 2 secrets in the room: one is the harnass, which will not only give you a bean, but will also unlock the secret room to the third wizard card. The other is the bookcase which will open to a secret passage. Besides the treasure chests, the mirror and the painting in the secret passage also hold treats. When you return to the big hall, open the bookcase on your left for more goodies and the painting on the left for 1 lousy bean. However, if you did everything correct so far, entering this secret area will also open a secret area behind the bean with 2 more chests. If you take a quicker way to this secret area you will not find the extra secret area, but I do not know what exactly triggers the area to open (probably beans in possession). After emptying the extra trunks you now have 75 beans.
Wingardium Leviosa Challenge
Drawing game 3 out of the 4 that are in store for us. Wingardium Leviosa works best if you stand in the middle of a virtual triangle, with the point of departure and the destination as the other corners. When the block hoovers over the destination it reflects a shadow. As soon as the shadow is cast over the destination, you can press ALT and release it immediately, or hoover until the time is up.
When you walk upto the small bookcase, you do not have to do anything special for it to open and release 2 gnomes at you. Flipendo them dizzy and pull the switch on the wall to continue to SGB 6.
Candy on the small bookcases, in the cauldrons and in the chest. The harnass in the big room takes 2 Flipendos. Move over the big block on the left with a Flipendo and prepare for a gnome to come from behind it. Flipendo the gnome and the switch on the wall. Levitate the brick on the left. Repeat this for the right side of the room. There are several ways to fool the gnomes into not attacking you, but I found that they don't work the same on different computers, so I will not elaborate on that; just Flipendo them.
Don't forget the star in the left corner of the balcony and levitate the block onto its destination to make the floating platform move. When SGB 7 arrives you may allready have 99 beans.
Jump onto the floating platform to the other balcony. You will find a chest and 2 Wingardium blocks. There is a secret area behind the mirror. You will find 3 chests. In the middle one you will find the 4th wizard card. Jump onto the next floating platform, which moves in a triangle so you can reach both the challenge star and the next balcony. After you meet Prof. Flitwick again you can use the Wingardium block to move the small bookcase.
Attend Madame Sprout
Before you enter the big hall, you can climb the big bookcases via the small bookcases. Behind the mirror above the bookcase is your fifth Wizard card.
In the big hall you are attacked by Peeves. He regularly pauses to insult you, which is a perfect time to cast a Flipendo on him. Just stand still at a save distance, he will then throw something at you, and just step away from it before you counterattack. Repeat this until he leaves.
By now you can have 135 beans and you can trade 25 of them with Fred for your sixth wizard card.
If you walk onto the corridor, you will find a secret area behind the painting at 7 o'clock (on the right wall closest to you). The 2 big statues want several Flipendos to be emptied and there is a mirror behind which is a secret area too. Empty the two harnasses and save your work with SGB 8.
Walk down the stairs and be challenged by Draco Malfoy. Keep your distance when he throws his exploding candy. When it is on the floor you can run over it, run towards Malfoy and release it with ALT onto his head. If the candy is fully bloated leave it on the floor; no use getting damage over candy. In case you do get damaged, there is a chocolate frog on the right side which you can either consume during or after the fight. It is even possible to pass the door behind Malfoy without defeating him, but that's probably a bug and less fun than exploding candy in his face.
Meet Hagrid in the garden and walk up to Hermione. Empty the big gargoyle behind her of all its candy and proceed into the Firesnails Maze. With a bit of timing you can easily get by them, and you can even pass them on the side with the most room. Several chocolate frogs to get back all health you lose on the way. Save your work with SGB 9; you now have 144 beans.
In de next part of the maze you will encounter carnivorous plants. Move through this maze in an S-form, only substracted by the secret areas behind the gargoyles. If you come in a secret area and think: "All this space for just 1 trunk?" then use Alohomorra on the hedge opposite of the trunk. It will lead you to 2 other secret areas, in the latter of which are also 3 gnomes hiding behind the gargoyle.
Before you reach the greenhouse, you will meet Fred again who will gladly change 25 beans for a wizard card. Open the trunk to the left of the greenhouse, go around the greenhouse to the small hedge on the right and open it with Alohomorra. You will now be able to go around the back of the greenhouse, cast Flipendos on the gargoyles and receive the second wizard card of this section. Now go inside through the front door.
Incendio Challenge
The next drawing game is for the incendio spell. If you use it on spikey bushes, stand in front of it release your spell and stand still for the spikes to be released to the left and right of you. If you open the door with a Flipendo, you are greeted by 2 gnomes, and a third one awaits around the corner, just before you get to SGB 10.
In the next room venomous tenticles await you. The spikey bushes will also attack you, but they will stop as soon as you hit the venomous tenticles with an incendio spell. Clear the room of all the spikey bushes and empty the trunks lying behind them. The door will now open for star-collecting.
The room that follows is one with SGB 11 and 4 bookcases. Do not stand to close to the bookcases, to give them room to fall forward. If they have room to fall they will reveal a Flipendo switch. Pull the 4 switches to make the plant sink and give way to the secret room and the next Wizard card. There are also 2 gnomes in the secret room, so if you have a particular dislike for gnomes, save your work before entering the secret room.
In the next room you will find out that gnomes are not the most annoying creatures the game has to offer. A Doxy can fly and it takes 2 Flipendos to get rid of. Behind the Alohomorra door you will find 2 more Doxies. If you play for perfect health, you might want to open the door after defeating your first Doxy and get rid of her sisters as well, before continuing to the tree.
If you place Incendio on all standing vines, the tree will lower its branches. On the right side of the frog you can easily jump up, eat some chocolate, get a star and some beans. Then jump back and cast Flipendos on all 4 trees.
Open the Alohomorra door, if you have not done so allready, get rid of 2 Doxies, knock over a cauldron and save your work with SGB 12. You may have 215 beans by now.
Follow the arrows to get around the tree, numb the tenticles if you have to. Pull the Flipendo switch and go inside the tree to get the platform moving and be able to jump to the challenge star and continue to SGB 13.
You will be greeted by 3 gnomes and a trunk is hiding behind the spiky bushes. In the top right hand corner you will find a room with 3 Wingardium blocks and 3 destinations. Placing all 3 blocks on their respective destinations will start the irrigation of the plants and will also open the door in the top left hand corner of the big room. If you are really bored you could also try to stack all 3 blocks on top of eachother, which looks really cool.
If you put the big venomous plant to sleep, its tentacles will still be dangerous. Get around it, pull the Flipendo switch and go to SGB 14.
The green gargoyle can take 4 Flipendos. In the next room, put the left side plant to sleep, climb on top of the platform with the chocolate frog and go upstairs for the flipendo switch to the door, a star and some candy. Then back on the platform with the chocolate frog, put to sleep the one on the far side of the room (to the right of the platform when you return) and jump to safety. Another chocolate frog awaits you behind the door, as well as SGB 15.
The following maze is a bit tricky, sometimes you have to numb 2 plants at the time to get savely through. After you pull the Flipendo switch, you can leave the room, but if you go to the right of the switch, you will find an area behind it with a platform to get you on top of the maze. You will be able to jump to a chest in which the wizard card is put.
If you come outside, to the left of the castle is the Quidditch field. On the grass before it suddenly there are a lot of beans. To the right of the fountain a chest appeared.
Remembrall Chase
Draco Malfoy always moves in the same way. So when you know he will take a corner in a wide fashion, move to that corner in a straight line, so you two will bump. If you persevere, you will knock him off. Do not make the mistake of backing off after you hit him, just keep steering into him to shorten his time (I mean, he's not a nice boy is he).
Find Hagrid's hut
Go to the garden fence on the right side of the castle. Enter the garden, roll over the log with a Flipendo. Open the trunk on top of the tree stump from the ground, this will prevent you from having to jump down again to pick up the beans. Roll over the second log, jump on the lower stump in the far left corner to cast Incendios. Walk over the fallen tree, and climb on top of the platform to cast the remaining Incendios and open the trunk. Jump over the tree stumps and climb on the higher plateau. Pass the 3 fire snails and go to SGB 16.
On the right side of the tree stump you will find a Flipendo sign. An arrow is pointing to it. Knock over the tree to be able to get across, but prepare for Doxies to attack. 2 chocolate frogs on your path in case they get the most of you. Jump on the tree stumps and go clockwise, to find a trunk hidden from view. If you come to 3 fire snails blocking your path, it is enough to Flipendo one to get through. However, you need to Flipendo all three, because if they are all stunned then the grass around the right corner will raise so you can reach the upper platform. Climb on top of it, clear your way and go through the cave to find a trunk with a secret wizard card.
Go back again and jump down to clear the spiky bushes. There's a trunk behind it and an arrow is pointing at the second cave, in which the second wizard card of this area can be found.
Find the fire seeds
If you enter the caves area in Hagrid's garden, you will be greeted by Doxies again. The entrance of the cave itself is indicated by an arrow in the rock square, but the wall opposite it can be opened to find a trunk. Follow the arrow to an easy SGB 17.
You will now see the first wheelwall you will encounter. The idea is that the gates to its left and right can be opened, but one of the gates can only be opened from the other side. So if you turn the wheel and go through the opened gate, look for a secret area in the wall to get around to the other side.
Jump counterclockwise, find a chocolate frog and continue to the waterfall. A Flipendo will make the tree fall so you can walk across. However, if you stay on the platform and drop to its side, you land on the lower platform which leads to the secret cave and a wizard card. Use the lift to go back upstairs, walk over the tree and jump to SGB 17, which is in front of the waterfall.
Enter the waterfall and come to the boulders. The first boulder takes 1 Flipendo to get out of your path, but a second Flipendo will reveal a trunk. The boulder on the left blocks your way to a chocolate frog and a trunk. Move the boulder on the right to continue on you path to the first fire seed plant.
After you collected its 3 (cooled down) seeds, the gate will open and you will be greeted by a Doxi again. There's also a trunk to open. You then come to a circular area. Just follow the arrows and you will meet 2 waterfalls behind which are the next fire seed plants. Behind the second waterfall is also a secret door to reach the trunk which you could see earlier on your path.
You then reach an arrow pointing to the right, but don't forget the fire seed plant to its left. You meet a colorful turtle, that is not so much trouble if it has not pointed its back to you. If it does, Flipendo it on its back to prevent it from breaking wind at you. On the platform on its right you will find SGB 18.
At the fork in the road take the left to enter the cave before you reach the chocolate frog (Alohomorra), which brings you back to the turtle again. The second time you get to the fork in the road you can take either side, as long as you end up in the right hand corner to continue your journey to the next fire seed plant and SBG 19.
Walk back to Hagrid who will give you a wizard card. Go inside his house to see Norbert hatch.
Quidditch match against Slytherin
Just like in broomstick practice there are colorful rings you could fly through. They are, however, only useful to indicate in which direction the snitch is flying, and like you cut off Malfoy, you should also repeatively 'bump' the snitch, which will make its meter run high very quickly, after which you press the jump button to catch it.
Attend DADA
When you are going upstairs to attend DADA, you will see Fred and George slip into a room. Speed is not important in following them. You can clean out the library to the left side (stand on the carpet and turn the switch behind the bookcase, empty the trunk and turn the switch to get back up; only one corner bookcase has a trunk hidden behind it) and the hallway to the right (more cauldrons) before you walk through the door indicated by Fred and George.
Open the bookcase on your right, turn the switch and go through the painting. Now walk on the wooden floor before the fireplace to have Fred and George come out and give you the next wizard card. Now join the other students and use SGB 20 before meeting up with those darn gnomes again.
Open the armor (if you stand to its right you can even get a lift from it) and go down the basement where a lot of materials are stored. There are 5 gnomes in this room. They don't start running until you enter the arches before the room. Take position in the hallway outside the room so you can see the gnome around the right corner. Place your Flipendo on him so you can deactivate him as soon as possible. When they start running, one will move in front of you from left to right, take that one out as well. If you get more close, the one on the left comes running toward you, and you take that one out. The two remaining are behind the middle and top right corner couch. Personally I think it is most fun to lure them out of hiding and then jump on top of the brown benches. They can't climb and are an easy catch when they get so close to you. This of course also works if there are vases between you and the gnome in a straight line, but that takes more timing.
Now go up the stairs for DADA and do a drawing game for the Lumos spell.
Lumos challenge
Walk over the light into the room. Put a spell on the gargoyle on the right, then go over to the left and enter the room there to put a spell on the gargoyle. Now climb the light upstairs for another gargoyle next to SGB 21.
Jump over the lights and cast an Alohomorra spell on the glass artwork. It will reveal the secret wizard card. Jump back to continue your star hunt.
Flipendo the 2 vases and Lumos the gargoyle to make the light lift appear. Go upstairs and use Wingardium Leviosa to remove the gate in front of the gargoyle for the light ramp to the next star. Move on to SGB 22.
You see a star in the middle of the room. You will have to face Peeves as soon as you touch it. If you want to eat chocolate first, circle the outer limits and find a frog in one of the side rooms. A dark door will open and reveal SGB 23. No reason to grab it until after Peeves, who is not more difficult than the previous time you met him.
Jump on the moving light platform and jump off on the left side. A Doxy will greet you. Lumos the gargoyle to create a light lift which you won't use for a while. Now jump over to the other side, take a chocolate frog if you want, open the 3 trunks in the room next to it and go down the steps into the basement. You will come to a dark room with woodwork and you will have to jump on and off the center, since the path to it is broken. Turn the Flipendo switch to make the bridge appear. Now use the light lift, jump off at Nearly Headless Nick's napping place and use the bridge to get to the gargoyle in the room across and return on your steps to SGB 24.
In the outer circle you will find a trunk and a chocolate frog. Now jump the rotating light platform to finish the challenge.
We are now back on the landing, and all the statues are filled up with beans again. The secret room behind the mirror even changed completely and now is very deep and behind a Alohomorra door we find 2 gnomes and a trunk. One of the paintings contains goodies too and if you pass the other paintings, Fred and George will show in it offering you your next wizard card. As soon as you see the staircase Ron will call from below that you are allready late for potions lessons. Now since Snape will tell you always you are late anyway, do not forget to empty the harnasses behind you and the trunk on the left side at the bottom of the stairs, especially since the latter one contains your wizard card. As soon as you come near the door that Ron went through, you will be sucked into the next part of the game.
Potions lesson
As soon as you touch the bridge you will fall through it, no escape. It will take you to SGB 25.
Throw the big stones into the canyon to make a path for you. If you throw in both stones the gate will open and from the other side you can push the little stone over the newly created path so you can climb up and collect the Moly. Continue to SGB 26.
Jump on the moving platform to get to the ledge with the beans on it. If you turn the switch on the right, the door on the left will open. If you jump towards it, you will find the wizard card. Pull more switches to get upstairs. Jump on the vertical platform (easiest is to jump toward it when it moves up to enforce climbing on top of it) and get off on the ledge with the beans. Be careful not to jump over the ledge. If you have trouble positioning try jumping diagonally and steer to the side. It usually helps to stay up. Get back on the vertical platform, turn the Flipendo switch to make the next platform work, jump on the highest ledge, open the Alohomorra gate and then jump on the platform to SGB 27.
The next part involves a lot of jumping over stones that crumble when you step on them. Be quick in jumping, but do try to take a little run on the stone before jumping. Personally, I hate this part of the game, but find most successful attempts when I walk as left on the stones as possible in a straight line. Open the gates before jumping on the platform and get to SGB 28.
Same joke with the crumbling blocks again. This time walking in the middle worked best for me. You get to see the Bloody Baron and can walk up the stairs to a room filled with 5 gnomes. 2 of them can be taken out without them seeing you. When they start running to you, 2 come toward you one at the time, and the other 2 hide behind the dragon statue. The statue contains beans which I don't like flying about when the gnomes are not on their backs. It is not really necessary to lure them from behind the statue, you can hit them when they stand still. Now get the Wiggentree Bark.
In the next room you can find a Wingardium Leviosa block. Put it on the left destination to raise the left cage which holds another block. Put this new block on the right destination (although it will probably be on the left from your best angle to move the new block). The second cage will reveal a third destination. Take the block from the left destination on this third destination to open the gate.
Move on to the circular room. Wait until the wall platform on your right comes in upright position and jump on it. Run to the other side and continue to the next until SGB 29. Lumos the gargoyle, climb upstairs, clear the trunk and flip a switch. Go down again, continue in the same fashion. Jump the clouds back upstairs, get the Flobberworm mukus. Go out on the ledge, stand on the platform and turn the Flipendo switch. Step off the platform and turn the next Flipendo switch. Jump on the moving platform to get across.
The Bloody Baron moves in a square and the gates will open for a few seconds when he passes through. Stand in a save position (for example next to the trunk) and follow him. Use the Lumos spell on the gargoyles to get to the next room and meet Bloody Baron again. This time he passes a small statue of a dragon. Flipendo it to get a wizard card and don't forget the trunk a little further down the path.
Now jump down in the middle room. Move the Flipendo block toward the exit so you can climb your way out. Snape will insult you again, which means you finished the challenge.
Follow Ron
You can follow him in a straight line, but why not break 2 vases to get some candy first?
The corridor to the girl's bathroom
A challenge in using the down key and the jump key, and left and right if you want to get all beans. Now you don't need more than 275 beans, which you probably have by now (you can have 422 at this point). The run for the troll is finished when you reach SGB 30. You then will have to defeat the troll. You can cast your Flipendos at the objects he throws in an orderly fashion at first, but when he speeds up throwing there is so much dust flying around that you hardly see what he is doing. Just keep your finger at the ALT button and fire away all the Flipendos you have. They will automatically be directed at the objects. Standing next to Ron is a good idea, because if you don't have control over objects he throws at Ron, his Wingardium Spell takes longer.
Gryffindor vs Ravenclaw
More of the same Quidditch, only this time there is a nasty sharp turn upwards in the snitch's course.
Sneak up to the tower
Mrs. Norris is a very nasty animal. If you move past her she will strike her paws at you. Filch is easier to fool, but standing still after making some noise (for example opening doors) is a good idea.
The first library is easy, you can climb the bookcase using the little steps on the back and jump for beans. Then Alohomorra out of the room to SGB 31.
The second library is a little harder. There are 2 Flipendo switches to be turned. One is on the left of the room, and the other on the right. The one on the right is sometimes hard to make out in the dark (depending on your computer's settings), but it is on the wall near the dead-end-bookcases. After turning both switches the door is open and you reach SGB 32.
The third library is not really hard, but it is a puzzle with a lot of legwork. There is an Alohomorra door which hides a switch to open a gate on the second floor. There is a book case with a Flipendo sign which you throw over to climb up to turn another switch. Go into the other room to turn another switch. Go back to Lumos the gargoyle. Climb up the lights in the other room, jump down and turn yet another switch. This will have you locked from the third library. Lumos the gargoyle to get more light platforms and climb them combined to reach more gargoyles and get more platforms. The only part where you have to watch out it when you want to jump toward a door and right below you, you see a wizard painting, directly under the door. Drop yourself on that hallway and open the trunk, because it contains the wizard card you want. The painting hides a Flipendo sign, which you need to get out of this position and back up to where you were. Save your hard labor in SGB 33, which has a painting behind it with chocolate and candy.
Now climb the circular light platforms upstairs to Filch and turn the switch. This will make the bridge turn and Filch fanatically protect the entrance. If he looks left, Flipendo a vase on the right or vice versa. This will distract him. Make sure he does not look at you when you do your magic, he is bound to catch you that way. If he runs toward the side to check on the vase, the way is clear to enter the tower.
Sneak down the tower
Give Filch time to leave the room. Unfortunately, from this point Mrs. Norris gives you hell too. Flipendo the bookcase, jump over the balustrade. Watch what Mrs. Norris is doing and when she walks from right to left, you go from left to right, jump over the bookcases to the other balustrade and leave the room to SGB 33.
Walk into the library until Filch appears. Give him and his cat room to get out of your way and turn to the far left, where you will find a study table. Climb it, jump on the book case and onto the balustrade. The side section of the balustrade has beans there. Jump back on the study table and Flipendo the bookcase in front of you. As soon as you get high Nearly Headless Nick will rumble to you. He will however point you the way you have to move, and will continue to do so. Basically what you are doing is jumping bookcases between balustrades and switching between rooms in doing so. If you are interested in catching the few beans on top of the bookcases you don't have to jump, don't take the trouble of timing Mrs. Norris to get to them. Just speed to the last room (the one where Nearly Headless Nick goes through the gate) and then drop on the floor and start over from the Flipendo bookcase. Mrs. Norris and Filch will stay in the last room, and you will have all chances at jumping the bookcases with the beans.
Leave the library and use Alohomorra to be introduced to the mirror of Erised. Use Alohomorra to leave this section, walk toward SGB 34 and open the mirror for some more candy.
Now back up a little, enter the room, climb the bookcase and enter the next room. It is possible to reach the bean in the back by jumping over the ceiling wood (but not really easy). Now use the Wingardium spell on the 4 corners and be careful crossing the room to look where Filch and Mrs. Norris are before you run. After the door is opened, Peeves will distract Filch. By breaking a vase on the left front and running to the right back, you will be able to distract Mrs. Norris and leave this section.
Because you wear the invisibility cloak, Fred and George don't see you and you can follow them to their secret layer of collected beans. Your cloak will automatically be removed and you can trade 25 beans for your second to last wizard card in the game. You will have to end up with 250 beans or more and by this time you may have accumulated 500-525.
The Forbidden Corridor
The teachers of Hogwarts have combined their talents to make this last part of the game very tricky, so every skill you've acquired so far is needed and a few new ones.
First open the trunk which contains your final wizard card in the game, which is number 24/25. If you have all 24 and at least 250 beans and you've defeated Voldemort, you will get card 25. In the trunk are also a few frogs so you can start your journey healthy. Now safe with SGB 35.
Fluffy is a three headed dog. Each head can bite at you. You have to get close to each head and play the flute so it nods off. If your music stops near one head, it will try to wake up again. Now the tricky part is that not all heads wake up as quickly as the others. The one in the middle is so quick that it should be saved for last. The one on the right is slowest, so I always start with putting him to sleep, then move on to the left, and try to keep juggling them both to sleep while chipping away at the middle one as well. No one said this game was easy!
Now Ron and Hermione are taken hostage by the plants. Cast Incendio at the tentacles that get too close and as many as you can at the ones holding your friends, and their horror will soon be over. Now safe with SGB 36.
The idea behind the chess board is that you have to lure them in such a way that if they move towards you in their next move, you are removed at least 2 spaces from them, but one of the pieces has another piece in front of it in a straight line with you.
There are 2 squares on which you can start. Take the one on the right and two pieces will attack eachother. Go one forward and two more will be gone. Two diagonally right-forward will remove the rest. Continue to SGB 37.
The next one is an eye test. Don't let your eye of the right potion and it will be no problem. If you do have a problem with perspective, it may be useful to cast your Flipendo from the same end of the table as the side you have to look at it when it moves around. Else, it will turn the table on you. Go through the fire to SGB 38.
The next room will have You-Know-Who on a higher platform casting spells at you that are quite destructive. There are 2 big blocks and 2 little blocks in the room. If you place a little block behind a large block it is very easy to move them forward. Jump on the little block which should now be behind a large block. Wait until he casts a spell (which does not hit you but the large block). Flipendo the large block one forward, fall backward and Flipendo the little one one forward. If You-Know-Who casts a spell at the large one again, it will not back-up, since the little block is preventing this; while at the same time giving you full protection. At times this comes to a full stop because of the obstacles, and at this point it gets more dangerous to put them back in position again. You can either time your actions very well (and use the chocolate frogs in case you do get hit) or place the other blocks in the same fashion for more hiding options. It is possible to use only 2 blocks and not be hit. When it is close to the higher platform, climb up and jump on top. Load up your health with the 4 frogs and save with SGB 39.
Now we get the most annoying of all animations (too lengthy for the challenge after it, you will see it 20 times before even figuring out what the heck you have to do in the room). The deal is, You-Know-Who is standing near the mirror of Erised, casts 5 spells in a row at you and then loads up for more. To make things worse, he has spells that circle around and follow you like a heat-seeking missile.
You-Know-Who stands closest to the pillar on the right. Hide behind the pillar and lure him behind the pillar so you can't see him. While he is casting spells at the pillar now, you Flipendo the pillar on his ugly head, which will damage him a bit and give you time to run to the next pillar. You can have 3 successful attempts at throwing a pillar on him, he will automatically blow up the fourth if you do so. Now enter the inner circle and stand behind the mirror of Erised on the side that is broken. If the mirror is in one line between you and him he will cast spells in the mirror, which will reflect back at him. When he moves you will have to rotate the mirror to make it stay between you and him. Some people like having the option of running away in a circular motion so his spells don't hit you (down and left key at the same time give you a circular retreat clockwise) and for this purpose it may be useful to force You-Know-Who to destroy the little pillars too. It is however not necessary.
With you know who defeated, Ron will give you a brand new wizard card, nr. 100: Harry Potter, the boy who lived.
Last update: Dec. 26, 2001
