1 heavy duty extension cord (15A)
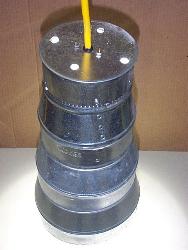
1 stove pipe end cap - 5"
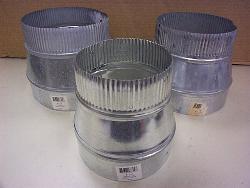
3 stove pipe reducers - 1 each of 8"to7", 7"to6", and 6"to5"
1 rubber grommet
3 wire nuts
1 unswitched mogul base socket
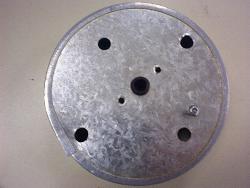
Drill a wire hole, mogul base mounting holes, ventalition holes and the ground wire screw hole. Install the rubber grommet around the wire access hole.
Cut off the female end of the extension cord. Cut another length of the cord for the pendant to ballast wiring. Save this end of the extension cord for later. Wire the extension cord end with the male plug to the ballast power side wires.
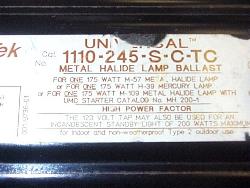
Bare the three extension cord wires and the three usefull wires from the ballast. The fourth ballast wire is for 227V and
remains unused. Connect the wires as described by the ballast diagram. Be sure to utilize the ground wire. This will
necessitate the use of a three prong timer and a GFCI for complete safety.
Feed the socket wires through the grommeted wire access hole on the top of the end cap. Connect appropriately and be sure to use the ground wire. Secure the mogul base socket to the end cap with the socket bolts and provided nuts.
Using metal screws join the three stove pipe reducers and top off with the end cap/socket assembly. There is no need for a glass plate in this pendant. Most newer MH bulbs have a UV shield. They also have an outer envelope that will protect the bulb in the event of water spray contact.
Double check the wiring and plug the ballast into an outlet. Within a couple of minutes the MH should be glowing brightly, but don't expect it to spark right away. Cold bulbs will require a 30 to 45 second delay. If you did everything right it should look like this.
BTW, I'm not an electrician, nor that way inclined. Follow these instructions at your own risk!