I call this a "Fabric Border", as it looks like fabric that's been pleated. Let me know if you have any questions on this tutorial.
Download this tutorial in a Zip File (22.5 KB).
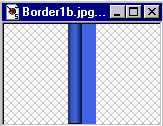
- Open a graphic, 14 x 100, in the color you want the bevel to be (mine was dark blue). Buttonize (Image, Effects, Buttonize). Properties:
- Height= 1
- Width= 7
- Opacity= 100
- Transparent Edge

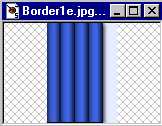
- Add a border of the same color on the right side (Image, Add Borders), size 14.
- Click on the Magic Wand on the right, and click on the right side of the graphic, on the border that you just added. Add a border as before. Repeat adding borders and buttonizing, until you have the border the size you want it. Here is my border finished:

- When you're finished adding a border, Change your foreground color to a light color for the background of the border, I used light blue. Make sure to keep this as your background color, as you'll need it later on. Add a Border on the right, size 14

- With the Magic Wand, Click on the White border, then Invert Selection (Selection, Invert) so that you have selected the whole left side bevel section. Apply a Drop Shadow (Image, Effects, Drop Shadow) with these Properties:
- Color: Black
- Opacity: 100
- Blur: 6
- Both Offsets: 1
- Now Crop a small portion of the graphic from the middle, making sure you have enclosed the whole width, but a small height.
- One more step to go. Make sure you still have your light color as the background color. Now you're going to Add a Border (Image, Add Borders). Make sure Symmetric is not checked, and make your Right Border: 1200.

