Re-enacting Tips - Equipment
January 1998
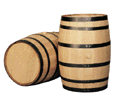
Barrels - First of all, although you will most likely refer
to every wooden container for the containment of liquids as a "keg" or
"barrel", technically they are all a kind of a cask. There are a variety of
terms that are used for those containers, according to
their size, and most of those sizes are classified and named in this fashion:
Firkin - equal to about 4 1/2 gallons. It's about the size of a good-sized waste basket.
Rundlet - equal to about 18 gallons. This size was commonly used for wine.
Kilderkin - equal to about 21 1/2 gallons.
Barrel - equal to about 31 1/2 gallons.
Tierce - equal to about 42 gallons.
Hogshead - equal to somewhere between 54 and 63 gallons.
Puncheon - equal to anywhere from about 72 gallons to almost 120 gallons. Popularly used
for alcoholic beverages.
Butt - equal to about 126 gallons. It was commonly used for fermented beverages,
particularly beer, and sometimes wine.
Pipe - equal to about 126 gallons. This size was often used to hold oil, wine, or brine.
Barrels are available through sutlers and range in size from 4 1/2 gallon (a firkin) to more than a 54 gallon (hogshead) capacity. Larger containers are available, but not commonly available from sutlers. You will pay about $45 or so for a 4 1/2 gallon barrel (a firkin, sold as a 5 gallon barrel) from a sutler. You may do very well indeed to check with local flea markets and antique or junk shops for old barrels. If you are going to use them for water, be sure that the barrel seems sound enough with the staves intact and no visible holes other than the bung hole. If the barrel will be used to hide your trash bag or will be used to conceal your dirty clothes, or even if it is to be used as a container in which you will transport some of your goods, then it won’t matter if it would leak when filled with water.
Should you plan to use a barrel or keg that was formerly used to store liquids, you may find that there are problems with the interior finish, or problems may exist or develop having to do with the staves fitting together and staying together as the wood dries progressively more. Barrels for water or whiskey storage are fitted much more tightly than nail kegs, for instance, but when the wood shrinks from lack of moisture, they can become even looser than nail kegs; it becomes easy to lose the hoops or bands, and the staves can fall out.
If you find an inexpensive barrel or keg (or even an expensive one), do not think that it will hold water the first time you fill it. Unless liquids have been stored in the barrel recently, the staves may have shrunk and it may leak like a sieve when you first fill it. You will need to re-fill it numerous times, perhaps several times a day for the first few days and then daily for a total period of one to two weeks before it finally will hold water for you. You will be able to buy a wooden spigot from a sutler for under $10, as a rule. Wait until you have the spigot to drill the hole for it, however.
Having a keg or a barrel is not a necessity, though; simply a matter of preference and convenience, unless you are using the water to bathe, in which case you should draw your own water. 5th Company has a fifteen-gallon barrel in which it stores water for washing dishes and cooking. Some folks prefer to have their own water at hand, however, for drinking and bathing. You may find that all of your needs can be supplied with a five-gallon plastic Jerry can for less than $7 from Wal-Mart, and you may even choose to bring water from home.
The drawback to the plastic Jerry can is that you will have to keep it hidden in your tent because it is not authentic. But it is a whole lot cheaper than a barrel or keg. And some folks use the Jerry cans in which to tote water when there are no spectators allowed in the camps to fill the keg or barrel because it is so much easier to handle than a full keg or barrel, as well as being lighter than a water-swollen barrel. This can be verified by asking a woman who has given birth to one child or more whether it would be easier to be pregnant and carry forty extra pounds on her abdomen (analogous to carrying a full, water-swollen keg), or not to be pregnant and carry a thirty-pound purse. The answer should be the thirty-pound purse, but that question asked at the wrong time may only serve to get you hit with the purse. Take our word for this one.
Beds - See Cots.
Blankets - If you choose to keep your tent closed during each event, then you may not be concerned about the appearance of your bedding. However, if you do want to keep your tent open on a hot day in case of cool air, or if you want to give spectators an opportunity to see what life was like inside a tent of the period, you can buy authentic wool blankets or quilts from a variety of sources. There are many less expensive sources for wool blankets, however, and their colors may be as authentic as any, although their measurements may not be historically perfect or you may have to be mindful to hide stampings on the blankets. Sources such as Sportsman’s Guide or a local Army surplus store may provide you with relatively inexpensive, reasonably authentic 100% wool blankets, ranging from under $12 to more than $20. The truly authentic wool blankets may range from $60 to over $200. Blankets or quilts are a great way to hide a sleeping bag or a cot.
Inexpensive quilts which have actually been quilted (not just a printed pattern masquerading as a quilt) are often available at Wal-Mart, Maison Blanche, Sam’s, Sears, K-Mart, and other similar stores, and they will be passable - even if they draw the ire of the hyper-authenticists of the hobby. Prices can range from $20 to $30 and up. Just be careful about the patterns of fabric used in the quilts, for you may find psychedelic patterns or colors used that no one would ever mistake for period. As a point of interest, you should know that paisley prints were not a creation of Carnaby Street fashions (the "Mods") or a product of the 1960s, but paisley prints were popular in the antebellum and War periods. Paisley, incidentally, did not originate in India as many have supposed, but the print pattern is named after the city of that name in Scotland located near Glasgow in which a wool shawl with the distinctive paisley pattern was created.
It can get pretty cold at night, and damp, too. Many folks choose to sleep in sleeping bags and camouflage them from the view of spectators with quilts or wool blankets during the day; but it is a good idea on colder nights to wrap up in the blanket inside of the sleeping bag, providing you with multiple layers to help keep you warm. Also, you may want to place a foam pad or flannel blanket under your sleeping bag or cot in order to insulate you further against the updraft from the ground.
Camp Stools - They are small and easy to pack, although they can be rough on your back if you sit in them for long. However, they can be an inexpensive way to take care of your seating needs. Available from discount stores such as Wal-Mart and K-Mart for under $8, as a rule. Be careful about the colors you choose; their ivory and black are the most acceptable colors; blue and red are less so. They can be dressed up substantially by covering or replacing the canvas with Victorian-styled upholstery fabric. Because so many people who re-enact have these little stools, you may want to give some serious thought to marking your name somewhere prominent on the stool so that it doesn’t get misplaced in someone else’s gear in the rush to break camp and go home at the end of an event.
One problem common with these little stools is that they are made of oak, and oak which is weathered tends to split and crack. In fact, oak on its best day that has never been outside of a house tends to want to split and crack, so the stools have an unpleasant habit of breaking. For those with basic woodworking skills, it may be worth your while to buy one of them to use as a model from which to make your own. We would recommend poplar over oak, or even pine over oak for this piece of camp furniture. Remember that the chief advantages of stools are that they are inexpensive and they fold. You may want to slightly enlarge the dimensions of the legs and the stretchers to get more life out of a stool you make than one you would buy. If you have the skill to make a stool, you probably have the skill to make a camp chair, and you will almost undoubtedly be happier with a chair than a stool. Especially if you are a greybeard, as some of the men are.
Canteens - When buying a canteen from a sutler, there are two primary options you will want to consider. The first is to buy a wooden canteen, and that may generally be acceptable. A wooden canteen requires no wool cover. You'll need to be sure to keep the canteen filled with fresh water every day for a period of one to two weeks prior to an event to allow the wood to swell so that your water does not leak or run out between the cracks. If you choose to buy a canteen which has a wool cover, though, consider at least two choices you have before you decide to buy two different canteens. The first option is to buy one covered with sky blue kersey, for that will fit in with either Federal or Confederate impressions.
A popular item among sutlers is a black leather canteen strap to replace the linen or duck strap that comes with most canteens. Although this is popular with sutlers (because they can make a couple of dollars), there is not a great deal of evidence of such straps in use among soldiers on either side for the two companies we portray. Don’t get caught up in a contemporary re-enacting fad, thinking you are jumping on a period bandwagon.
The second choice in purchasing a canteen is to buy one with, for instance, a dark blue wool cover, and make a second cover of grey or even Richmond Grey (to match the Washington Artillery uniform) to fit over the dark blue cover. Be careful to make the open area of the second cover fall under where the strap will lie, for that will hide the seam. If you do that, you can use hooks and eyes to close the cover on the canteen because they will be hidden.
Of course, you could always buy two canteens.
There is also the consideration of whether to buy a tin canteen or a stainless steel canteen. While this may not seem like a major decision, it could be the difference between paying $25 - $30 or paying $55 - $60 for a canteen. As accoutrements go, this is an expensive one when you consider the stainless steel variety. You must ask yourself how authentic you really want to be, too, for stainless steel canteens are an anachronism, even though the anachronism is invisible. Frankly, 5th Company does not give a da....uhh...care if your canteen is tin or stainless steel.
If you feel that you may not currently be getting your minimum daily allowance of rust, and if the taste of a rusty tin can appeals to you, we would encourage you to buy the tin canteen. It may simply be a matter of economy that causes you to choose the tin over the stainless steel, as the stainless steel is usually double (or more) the price of the tin. Keep the canteen as full as possible during the entire event to minimize the rust factor. You must also be careful to dry out the inside of your tin canteen after every event and keep it unstopped and in a dry place between events. This should delay the rusting process and keep it from getting moldy or mildewed inside. Some folks fill their tin canteens with sand between events to aid in drying it out and keeping it dry, using the sand as a desiccant. The grit they later swallow may even help in the digestive process, as it does with many birds who keep a little sand or grit in their gullets for just that purpose.
(Footnote: The claim that a tin canteen always delivers rust-flavored water is a bit exaggerated. That’s not to say that they don’t tend to flavor the water; and the older the canteen, the more distinct the flavoring will become. When the tinning wears off, the steel underneath will surely rust, and most canteens have a very thin layer of tin coating them. The lower the water level in the canteen once the tinning is worn through, the more pronounced the taste of rust or metal, which is a strong argument for keeping your tin canteen filled all weekend.)
You may also try to coat the interior of the tin canteen with polyurethane or even beeswax, although the coating may be rather uneven throughout, assuming you are even able to coat it thoroughly. Please be sure to use a coating that will be non-toxic if you should attempt such a feat. We have no success stories to offer by way of encouragement for you to coat the inside of your canteen.
Another tip is to use an adhesive such as Super Glue to secure the nut to the shaft that goes through the cork stopper of your canteen. That will prevent the tiny nut from stripping off the shaft, and will keep the cork stopper where it belongs.
If you have a leak in your canteen, about the easiest way to find it is to pour a carbonated beverage into the canteen and shake it up. Just follow the fizz and the foam and patch where it all comes bubbling out.
Whether you have a leak in your canteen or not, it is a poor practice to carry carbonated beverages in your canteen. Any little bit of walking or marching will create enough pressure in the canteen to either reveal where you have a leak, or it will pop the stopper out of the canteen; and it will make an annoying "fizz" sound until the pressure is relieved. Either way, you will almost inevitably wind up with your carbonated beverage all over your pants and perhaps your jacket and shirt, too. If you sling your canteen over your shoulder and rest it on your haversack, you will find that the beverage leaking onto the haversack will tend to stain it, and could even stain some runs of sky blue kersey trousers. How do we know so much about it? Well, one time, we...uhhh...some idiot we...uhhh...met from another company....yeah, some other fellow told us he did it, the moron....yeah, that’s it, it was somebody else....
Casks - See Barrels
Chairs (Canvas-Backed or Wooden) - There are two types of canvas-backed chairs, one of which is a folding chair that looks much like a camp stool with a back that also folds. The second type is commonly referred to as a "director’s" chair.
A number of sutlers offer the first canvas-backed chair type. It is quite portable and comfortable, although the seat is not as broad as the second type. It has the advantage (for ladies) of being a side chair rather than being an arm chair, though, along with the other advantages owned by the chair of the second type.
The second chair type is often referred to today as director’s chairs, although their legs are shorter (and should be shorter) than the traditional director’s chair (which are now often seen in catalogs as "bar chairs"). Seen frequently at re-enactments, these are comfortable and affordable at $19 to $25 (about $23 from Service Merchandise and like stores). We have heard comments from other re-enactors to the effect that these chair types are not authentic. There is, however, period photographic evidence to support the use of the director’s-style chairs, as Federal officers are seated in chairs identical in style to our "director’s" chairs in a number of available through the Library of Congress’ collection. Admittedly, their chairs would not have plastic feet on the chairs as ours do, and the bracing of electroplated steel of our chairs would not have been identical to theirs, but the essential style is correct. If you desire to make your chair look more authentic, the plated steel braces of your chair can be painted with a flat black enamel, giving it a wrought iron appearance. As for the plastic feet, they will disappear in the grass and dirt wherever you plant the chair.
As with the camp stools, be careful about the colors you choose. The canvas is commonly available in ivory or black, colors which would be readily accepted. Get the natural wood frames, not the painted frames, for most of the painted colors are not authentic for the period.
One way of making your chair’s appearance more unique is to cover it with upholstery fabric with the Victorian look. That is a relatively simple sewing project that can add a lot of character (and perhaps even longevity) to your chair. The backs and seats of the originals would probably have been an upholstery material rather than canvas in all likelihood, but the chair style and canvas as a material are acceptable. Avoid buying the style with longer legs, often referred to as "bar chairs", for those are not accurate for the period.
It may be necessary to reinforce the joints of these chairs by re-gluing them, and it may also be helpful to help keep the arms and backs secured for long-term use by drilling pilot holes in order to install wood screws by which the chair will be held together well. This will be especially important if the chairs are out in the weather and exposed to the sun very much. Assuming that you participate in a half dozen events a year, more or less, you would do well to place at least one additional protective coat of varnish or satin polyurethane on the chair frame. The finish from the manufacturers tends to be quite thin and will disappear with little exposure to the outdoors.
Chairs with arms do not work well for the ladies in hoop skirts. They require a side chair rather than an arm chair. Arm chairs require them to either try to force their hoops to squeeze within the confines of the arms of the chair, or risk having their hoops be lifted to a height inappropriate for the viewing of younger audiences.
Wooden folding chairs such as you might see at a community center or a Sunday School are an alternative, and should cost about $15 to $25 when you can find them. These are side chairs, lightweight and durable. Their sole disadvantage relative to the canvas-backed chair may be that the seat and back may not be as comfortable as the canvas because the canvas will breathe; but you may require a firmer back and chair seat, thus giving the advantage to the wooden chair. As with other wooden items, you may find that you need to apply an additional coat of varnish or shellac to the chair if it will be out in the weather for long. The manufacturers clearly did not have camping in mind for these chairs.
There are several manufacturers of folding wooden chairs of the sort used (and seen in several photographs with) James Longstreet and Ulysses S. Grant, and they are even fairly attractive pieces of furniture, by and large, with carpet used for the seat. They also cost in the vicinity of $350 for these reproductions, although a person with a band saw and some time on their hands could make one inexpensively.
Some sutlers sell a wooden chair that does not fold but rather comes in two pieces, the seat and rear legs being one piece and the back and front legs being the other piece. The seat and rear legs slide out of the back and store inside the chair front when you are ready to pack it up and move it, so it is very convenient.
Aside from the contentions of some that it is not authentic to the period, the chief drawback to the two-piece chair is that the seat tends to be very low to the ground and you are always leaning back at quite an angle in the chair. A solution to the seat being so low to the ground is to nail another cross member on the back portion which will force the seat up higher and straighter. This may seem a rather trivial matter, but the older you get, the more you will appreciate that it is not so trivial. Any time your rear end is lower than your knees, you place a great deal of strain on your knees when you lower or raise yourself. How dignified do most middle-aged, pot-bellied men look when they try to bound out of a low-slung sports car? And how easily do they seem to be able to get out? Case closed.
Chamber Pot - This may be a handy item for you. For those who use them, you may choose to buy the stoneware variety, and can sometimes find them at flea markets or antique stores at prices ranging from the ridiculous to the sublime. We've seen them sold as soup tureens; they are usually more expensive as soup tureens than as chamber pots. On the other hand, an inexpensive alternative is an enamelware pot with a cover. Whatever you do, just be sure you store it in some place where you won’t knock it over, and be sure to empty it first thing in the morning. This is where bringing your own toilet paper or baby wipes can really come in handy, too. Some folks prefer the stoneware variety because it is quieter when used. We are sure that we do not know what they could mean by that comment, but we do know that those tents walls are thin and noise really carries in the quiet of the night or early morning. Must we draw you a picture?
Chemise / Chemisette - By all means, a chemise should be worn under your period clothing, especially if you decide to cheat by either wearing a bra in place of a corset, or wearing neither bra nor corset. There are a number of patterns available for this simple undergarment, and it can be as plain or fancy as you like, although the material you use should be white. Some of the most delicate, decorative stitchwork was done on the undergarments.
Some of the "Made In India" cotton nightgowns may be good substitutes for the chemise. In looking for a nightgown that will pass as a chemise, bear in mind that it should be white and have a shoulder-to-shoulder neckline with a tiny yoke and tiny sleeves to have the correct look. (Information courtesy of Elaine Ludwig)
Clothes Hamper - If you expect that you will have much in the way of dirty clothes and do not want to have to keep stuffing them into a plastic trash bag to be stored under your cot or in a corner of your tent, you may want to consider making a rude hamper of sorts. Similar to a keg stand, it would be a taller version of one with the top four corners of the stand tied together either with a burlap sack or a muslin sack that you could sew which would serve to hide your plastic trash bag while allowing the clothes to air out a little bit, thus reducing the risk of mildew or plain old funky ferment. In appearance, the clothes hamper frame would appear to be two "X"s of wood which are joined at the top and bottom ends with dowels. By making it fold, it will unpack and pack up quickly, and perform a useful purpose if you will go through a large amount of clothing in one weekend. We are not suggesting that this is a period-accurate item, only that it is convenient for those of us with large families who are re-enacting. It should be kept hidden within your tent.
Corsets - An alternative to the corset is the "torsolette" offered in the JC Penney’s catalog. While not strictly authentic, it is functional and less expensive than the period corsets, easier to put on by yourself, and may present a lower maintenance or upkeep (pardon the expression) problem. However, it has as a disadvantage the fact that it is made of synthetic materials which will not breathe like the period cotton corsets will, and in hot weather that is clearly a disadvantage. It should be noted that many women prefer not to wear a corset or torsolette at all. Since the corset was worn as women wear bras today, should you choose to go sans corset or bra, you will certainly need to wear a chemise or chemisette; you would need at least a chemise or chemisette to cover up the corset anyway.
As for shopping for your corset at Victoria's Secret, please note that the company's name is NOT "Victorian's Secret". Many of the undergarments you may purchase from there may not be strictly for the period we re-enact, but may be more...strictly...recreational, shall we say?...than authentic. Still, the purpose of our hobby at its very root is for the recreational value it has to us; and so long as your Victoria's Secret undies won't be seen (although getting to see them on you could well be recreational to many of us), more power to you.
Cots - When sleeping on the ground has lost its appeal for you, JC Penney’s sells a wooden-frame cot with canvas bed, or your local Army surplus store may have one for you. Stores such as Sears, Penney’s, and Wal-Mart carry aluminum-frame cots which are also suitable. If you have a wedge (also called an A-frame) tent with a low center (under six feet tall), most likely you will want to get a cot whose frame height is ten inches. If you have a taller wedge tent, or a wall tent, you may find that the seventeen-inch-tall cot is easier to live with; the taller the cot, the easier it is on old knees when getting up from the cot. If you have an aluminum-frame cot and you choose to leave your tent open during an event, you will want to be sure that you cover the aluminum frame well with a blanket or quilt. You may be able to find wooden army cots for $15 - 30 at flea markets. A new wooden cot from the army surplus store or camping goods store is apt to cost around $60 to $90. The aluminum-frame cots are normally in the $40 to $60 range.
You may also choose to build a rope bed with 2" X 4"s and one or two hundred feet of 3/8" rope (use hemp and not cotton, for cotton will stretch badly). The local library is likely to have a book (such as Foxfire, from which you can get a fair idea of how to put one together) with instructions on how to make and adjust a rope bed. It will have recommendations for making a mattress, too, and will be terrifically authentic. There are several sutlers who sell a ticking mattress which you will need to fill with straw or hay, although some may want to cheat and fill it with a nice foam pad. Ticking as a mattress cover is authentic for the period, although the snaps found at the end of one of the mattress covers we have seen are not period-authentic, so keep that end turned away from the flaps of the tent and no one will ever know the difference.
Cravats - Should you desire to wear a cravat for special occasions such as balls, dances, weddings, divine services, and the like, that is altogether appropriate but a matter of personal choice. Almost anything seemed to work when it came to cravats. Many were sewn pieces, often with a stripe on one end of the cravat. Some were made with thin or wide grosgrain ribbon, and some were small and almost as tight as a modern bow tie, while others were large and affectedly floppy.
Most sutlers offer either a pre-tied version that secures with a buckle in the back, or a length of ribbon or fabric for you to tie yourself. If you are making your own shirt and choose to use the pattern from Past Patterns, a pattern for cravats is included in their packet, along with a guide to tying a cravat. The pre-tied cravats are approximately $12 - $14 and the others are under $10 from most sutlers.
You can save yourself some money by purchasing grosgrain ribbon and tying the bow yourself if you like the bow-tie style. The trailing ends of the cravat need not be taken up in the fashion of a bow tie, though, as it was also the custom with many to leave the trailing ends long. There is no mystery to tying it, as many are nothing more than a simple bow tie. There are more elegant, full-looking cravats, though, and it is advisable to obtain instructions as to how those are to be tied. There is a booklet that was published in the 1820's or 1830's that shows the most common knots of that time, but the text dwells on the benefits that accrue to the one who ties the proper knots, in contrast with the disdain and contempt heaped upon those who tie a careless-looking knot for their cravat. Sadly, it does not show how to tie the various knots - just shows the finished result - making it a wasted $4 if your interest is in learning how to tie the knot you want.
Cups - Enamelware was not terrifically widespread during the period, but neither was it unknown or entirely uncommon during the period. Sets of black or blue enamelware cups, bowls, and plates are available at Wal-Mart and K-Mart, just to name a few. By all means, avoid the enamelware with the stainless steel rings, as the decorative exposed ring of stainless steel around the edges is not an authentic look or material.
Soldiers commonly carried large tin cups in or on their haversacks, and often used them in place of canteens. If you plan on using a tin cup and expect to drink hot drinks from it, you should know that tin transfers heat quickly and well. Many folks use a leather boot lace and wrap the handle of the cup to keep from burning their hands. We have no solution as to how you may keep from burning your lips other than blowing on the hot liquid and waiting for it to cool, or leaning the rim of the tin cup against a full tin canteen to help dissipate some of the heat. Be careful not to use your tin cup to heat liquids, however, as wood fires can be terrifically hot and the solder holding your tin cup together may melt before you remember you have a cup on the fire, or before the liquid in your cup seems to be hot enough. Make sure that the fluid level is higher in the cup than any soldered point, for solder has a higher melting point than the boiling point of water (which is 212�); so long as the liquid is below or at the boiling point and the liquid is above all soldered joints, the soldered joints should be safe.
There is also a reasonable amount of photographic evidence to vindicate the use of glassware in camp, but glassware was not apparently the predominant type of vessel used for beverages, either for storage or drinking from, and generally not terribly practical for a marching army. Pressed glass or cut glass was popular by the time of the War, though, and some manufacturers had difficulty as far back as the early to mid-1850's in keeping pace with demand. In production at that time, many manufacturers offered pressed glass, both plain and fluted, in the form of tumblers, decanters, wine and champagne glasses, and dishes, as well as some decorative objects. Owing to the popularity of molasses in that era, even molasses decanters were made where the handles were formed and attached after the rest of the work was finished.
Diaper - Diaper is a type of cloth which was widely used during the period. Its distinction as a cloth to wrap around the behinds of babies grew from its soft and absorbent character, being a cloth typically ornamented with small figures (most commonly diamonds). Because of its almost universal application to babies’ behinds, the cloth and the baby undergarment came to own the same name.
Many household manuals of the period advised the housewife to have between forty-eight and seventy-two diapers for their infants so as to have dry diapers at their disposal. Some also recommended that it was not enough to simply dry the diapers by the fireside, but that it was also important to rinse the wet diapers out in clear water before drying them and putting them back on the baby. Clearly, this period was not designed for the enjoyment of those with sensitive noses.
Dish Rack - A simple folding dish rack made of wood is available from Wal-Mart for less than $8. Most have a folding lower section on which you may place your cups. Not only is it handy for drying your dishes and cups, but it also makes handy storage for them while you are in camp so that you don’t have to rummage through your trunks or haversacks or other storage containers to find them. You may be well advised to coat the rack with polyurethane or varnish or shellac, as the rack you buy from the discount department store will almost undoubtedly be uncoated, and therefore it will not weather well. This is not necessarily a period-accurate item, and consequently shoud be kept out of sight.
Dish Towels - Flea markets and antique stores may be good sources for old tea towels, which will be suitable for this purpose. Also, you can buy birds-eye cotton fabric from a fabric store and make your own dish towels. Birds-eye is thicker than muslin or percale and thinner than terrycloth, making it suitably absorbent. Household towels, like blankets, were both purchased and hand-woven in the antebellum and War Between the States periods. Purchased towels were made of cotton, while hand-woven towels were usually linen, normally bleached, white linen. It was far less often the case that natural, unbleached linen was used. Towels were usually done in the same sort of plain weave and twills that they used for blankets, often in a blue-on-white check. Sometimes more elaborate weaves (such as variations of huckabuck, M’s and O’s, or diaper) were used Huckabuck, now called huck toweling, may be more familiar to you in the form in which most of us normally encounter it - as the revolving, continuous loop cloth toweling that used to be so popular (and perpetually nasty) in gas station restrooms so many years ago.
Dishes - See Plates.
Drawers - For ladies, open-crotch drawers are correct for the War Between the States period, and are not intended to be worn with modern-day underwear (it sort of defeats the purpose of the open crotch, you see). They are tremendously utilitarian when worn with a hoop skirt should you find that you need to use the bathroom. We’ll not say any more on that subject. Suffice it to say that you will want open-crotch drawers for convenience, unless you are unusually clumsy and fear going tea cups-over-tea kettle in your hoop skirt and open-crotch drawers.
Should you find yourself in a hoop skirt, open-crotch drawers, and spilling down a hillside, remember the advice we heard shouted by friends of a woman who was in the same circumstance: "Cross your ankles, honey! Cross your ankles!"
You may have a pattern for loose-legged pants that you could readily adapt to make the drawers, if you are a reasonably accomplished seamstress. Drawers are relatively simple in line and construction, although they were often trimmed attractively and even elaborately. The length of the legs should extend to just below the knee, and this is where we find that those who wear authentic undergarments are in the tiniest minority. The color should be white, although other colors might be worn by those considered to be fashionable, aristocratic, or even racy ladies.
For men, see Trouser Lining.
Dresses - See Ladies Clothing in the Re-enacting Tips - Personal section.
Dutch Oven - These are available from department stores such as Wal-Mart or some hardware stores. If you really want to bake in it or use it with the lid, be sure to buy one with a cast iron lid instead of a glass lid. The glass lid is not accurate for the period and cannot be used in the view of the public, and it's hard to cook in secret (we advise against cooking in your tent, of course; this isn't college and the tent's not a dorm room - it's flammable). Just get the cast iron lid. And keep cooking outdoors.
Duster - This is a man’s garment, not a cleaning tool. Should you decide to sew this garment yourself, canvas for the duster is far less expensive when purchased as a drop cloth from a hardware store or discount store than to purchase the canvas from either a cloth store or a sutler. One caution, however: you may need to waterproof the canvas yourself. Waterproofing is available from discount stores and hardware stores, and typically costs less than $13 a gallon. A gallon will do a 12’ X 8’ section of canvas properly, and perhaps more than that, depending on your means of application.
Enamelware - See Cups or Plates.
Eyeglasses - Eyeglasses can make or break an otherwise good-looking impression. Modern frames stand out almost jarringly to re-enactor and spectator alike.
Eyeglasses were considered a luxury until about 1804, when an English lens grinder discovered a method of grinding a number of lenses simultaneously, which then made them affordable to almost everyone. Before the War, the design of eyeglasses was relatively simple: circular or oval lenses in a small metal frame. The temples often had loops at the ends so a ribbon might be run through to help keep them on the head. Curved ear-pieces came into somewhat common use in the 1880’s.
Few photographs from the period show subjects wearing eyeglasses for the same reasons many of us remove our glasses before we are photographed today. Eyeglasses were either considered ugly, or an embarrassing revelation of a physical flaw, so then - just as now - many removed their eyeglasses.
In the Uniform Standards appendix, we have noted a number of sources for period or reproduction eyeglasses. In a pinch, the type of frames so recently identified with John Lennon would be passable until you can get more period-looking frames; and they'll be more acceptable by far than those worn by Drew Carey. Should you purchase actual period frames, bear in mind that they may be far more delicate than modern frames, and treat them accordingly.
Fabrics - The scope of this subject is far too large to be contained in this appendix. There are several items worthy of note under this topic that can be treated briefly, though. First is the fact that the materials we use, including muslin and wool, are far thicker than the materials available and in common use during the period we re-enact. Most of the wool used for War Between the States uniforms is 10 ounce, or (less commonly) 21 ounce wool, the former often referred to as "light" and the latter often referred to as "heavy". The wool weight of the 10 ounce wool, of which the dark blue Federal jacket is almost always made, is about half again as heavy as period wool. By the same token, muslin is about twice as heavy as muslin from the period.
This in part helps to explain why you suffer so under the weight of all of those layers of underthings and outer clothes and your ancestors seemed to bear it all relatively cheerfully. It’s more than the fact that you are too accustomed to comfort and ease, coupled with a natural predisposition to gripe and complain. You are more uncomfortable than your ancestors because all of those layers of their cloth would have weighed perhaps half as much and would have trapped half the heat that your clothes do. You’ve got a right to gripe, given those circumstances.
For many dresses, the outer covering of cloth was meant to be fairly sheer to reveal the more colorful under layers of clothing, sometimes effecting a moir� pattern. Lawn, organdy, and batiste were nice, light fabrics that were often used. Their thinner cloth was no accident or an indication of an inability to make good, thick fabric as we have today, but a recognition of the fashions and styles of the day. That’s why it was not such a hardship for the men to wear wool trousers with muslin underdrawers and a shirt with a long-sleeved undershirt: the lighter fabrics could breath and did not weigh too terribly much. They also did not generally wear as well as thicker fabrics, either.
That is not to say that they did not have thick cloth, as they most certainly did. Their jean cloth was as thick as ours or thicker in some instances. Jean cloth was not the sort of cloth you found on men or women of distinction or of the burgeoning middle class, though, and some types of rough or coarse jean materials were referred to in the crude vernacular as "nigger jean cloth" because it was so commonly used to clothe slaves. The term was also used as a derisive term when applied to whites of the period who could afford to dress no better than, and sometimes not as well as, the slaves. That expression is not to be confused with the expression "nigger wool" which was a derogatory period reference to Africans’ hair, and not a reference to wool at all. We do not endorse the use of those terms, incidentally, but mention them for identification and clarity’s sake because they were terms common enough to the period and were mentioned in letters, journals, and diaries from the North and South alike.
Second, be cautious in your choice of patterns in choosing cloth for dresses or shirts. Rather than rely on the opinion of the lady at the fabric store, consult any of the ladies in our group who have been re-enacting for several years and make use of their research and experience. As a point of interest, you should know that paisley prints were not a creation of Carnaby Street fashions (the "Mods") or a product of the 1960s, but paisley prints were popular in the antebellum and War periods. Paisley, incidentally, did not originate in India as many have supposed, but the print pattern is named after the city of Paisley, Scotland (located near Glasgow) in which a wool shawl with that pattern was created.
Third, there are many cloth types that are appropriate for the period. Most fundamental of all, perhaps, is that just about everything you use should either be 100% wool or 100% cotton. It makes it easier to remember. Polyester is not a period material, and should be avoided. If your wool will be used for a military uniform or in clothing that will be worn around a fire, it should absolutely be 100% wool, for wool does not support combustion. It will burn as long as it is in direct contact with a flame, but the flame will smolder and die when the flame source is removed. That may make a great deal of difference to the artilleryman in particular.
Another compelling reason to use 100% cotton or 100% wool whenever and wherever you can is that they will launder better than the synthetics. This will be especially important to you if you should choose to use lighter colors and patterns and spend much time around the campfire, oil lamps, or kerosene lanterns or heaters. More than that, most synthetic fabrics will burn at a far faster rate and with greater heat intensity than either 100% cotton or 100% wool. Although it sounds unlikely to the modern ear that you would be apt to have your garments catch fire, remember that you will be spending an extraordinary amount of time around fires and open flames at a re-enactment.
Many times in period letters, journals, and diaries, soldiers would write of having received "homespun" garments, or they would write of their preference of "homespun" over the government-issue clothing. While in some cases the term referred to clothing made at home and fitting better than the government-issue clothing, in more cases it referred to the fabric itself. Homespun fabric is fabric which is loosely woven and generally coarse in weave. It could also sometimes be distinguished by an unevenness of dyed color.
The term "shoddy" became a popular term of indeterminate origin during the War for Southern Independence as a result of the slip-shod sewing or construction of clothing and footwear for the military, as well as the poor quality of fabric and materials used. Some have theorized that the term came from the expressions "ill-shod" or "slip-shod" (both commonly used in reference to horses and mules then), while others tie the term to the place of production of some notoriously poor-quality composite wool from a place called Shoddy Pond in Massachusetts.
Be cautious in your choices of fabrics, particularly when you must make assessments of suitability. There are some modern equivalents for certain fabrics that are terrific substitutes, and others whose names would suggest that the period fabric and the contemporary cloth would be identical but are not. Some general guidelines would include avoiding the temptation to follow your heart into the Little House On the Prairie look of a multitude of muted, small print calicos, especially those festooned with hearts and such. Northern and Southern women and children would almost never have been seen in the small calico printed fabrics as those were almost exclusively slave goods, and often used to make sacks for meal and feed. The fabric design choices for Northern and Southern white women and children would have been more along the lines of solids, stripes, plaids, and large floral prints.
Footwear - The subject of men’s footwear for the military impression is covered in the appendix labeled Uniform Standards, and the men’s civilian impression footwear is not far from that used by the military. However, the subject of women’s footwear is one that needs to be addressed. While it may seem as if women’s footwear could be ignored since, after all, they do wear such long dresses, the fact is that the dresses are not necessarily all that long, and when ladies walk, the "bell" of the hoop swings up enough to expose the footwear fully. For this reason alone we strongly encourage the ladies to avoid wearing sneakers at the very least, for it takes much away from your appearance.
There are many other choices which can be made, including purchasing custom-made shoes through sources such as Amazon Dry Goods which has an entire catalog devoted to historic footwear, and specialty manufacturers such as Robert Land. There are styles still available in shoe stores which closely mimic period boots and shoes for women, good leather shoes which will be reasonably accurate and comfortable. With those, we recommend that you lean heavily toward the lower heels rather than the high-heeled versions, both for historical accuracy and comfort. Ladies shoes or booties were more apt to lace up the sides than the fronts, and were more apt to have either no or a low (1" or less) heel, although there are some examples of heels as high as about an inch and a half.
There are other types of shoes which can be used which are readily available and reasonably comfortable, and even affordable. (Information to follow gathered from Elaine Ludwig, Joy Lee, and Debbie Harrison.)
The first and worst choice is a Chinese-made shoe, popular among gung fu and karate and Tai Chi students. It is a black cloth shoe with a red-clay colored sole. When you walk, often the sole will be visible as you step; clearly that is one small drawback. The sole is very, very thin and the cloth is relatively delicate, making it an impractical shoe when an event has us camping on rough or rugged terrain, or where the ground is hard and rocky. The thin soles allow your feet to feel everything you step on. One remedy for that is to put an insole (such as Dr. Scholl’s) in the shoes, thus adding a layer of protection. Still, the fact remains that it is pretty thin. On balance, the cloth upper breathes well, keeping your feet fairly cool in hot weather. This shoe type is not accurate, but is growing in popularity with re-enactors for some reason; perhaps due to the price and the faulty theory that it will never be seen. The appearance of the shoe is far closer to a period shoe than a sneaker, and another redeeming quality of the shoe is that it only costs between $5 and $10, depending on the sutler.
A step up (pardon the pun) from that is the ballet slipper. Its profile and construction is far closer to that of a period shoe than is the Chinese shoe. The sole is not conspicuously wrong when you walk, unlike the Chinese shoe. The sole is thinner than that of the Chinese shoe, so we recommend adding insoles to the ballet slippers, too. The insole will still not provide adequate protection if you must walk on gravel or over ground with exposed roots, or dance on a cobblestone street. Your feet are going to be hurt.
The only element of the ballet slipper which does not have a truly typical period appearance is the shape of the toe, but then neither does the Chinese slipper. The ballet slipper costs a few dollars more than the Chinese shoe, but it is a far better piece of work, sturdier (all leather), more attractive, and certainly closer to the period style. With either one, walking over rough ground could well result in a bone bruise.
A little more expensive than the ballet slipper is a Mary Jane shoe, typically black with a buckled strap. It is almost always available in leather and is durable as well as being very close in appearance to a period shoe. Being a real shoe, it is meant for walking, so your delicate little tootsies will be properly protected from harm. This is almost as good a choice as the leather boot or bootie (with a low heel) that has been commonly available at retail stores the last few years.
Yet another style of shoe or bootie that is available from specialized sources (merchants who sell goods to the Amish) is Amish footwear. The toes tend to be more rounded than square, while square toes were more common than rounded toes during the War Between the States. However, these tend to be pretty reasonably priced and quite durable, while also being quite plain.
Perhaps the closest, most affordable substitute for a truly authentic ankle-high boot ladies of the 1860s is what is often referred to as a pants boot. The color choice should be either black or brown, and thinner soles rather than thicker soles are most desirable. Avoid thick rubber treads. The pants boots should lace up with regular eyes; metal eyelets were available but not in popular use as they are today. A 1" heel or less is accurate for the period, and a snipped toe should give you an almost perfect substitute. By all means, you should avoid buying pants boots with speed-lacing hooks, as that invention did not come into use until the 1870s, and not only are they inaccurate for the period, but they will catch on your hoop. They should cost in the neighborhood of $40 per pair.
Ultimately, the best choice for walking around and dancing would be the leather boot or bootie or the Amish footwear, and the most comfortable shoe for sitting around camp and swapping lies and telling tall stories may well be the ballet slipper.
You may feel the need for India Rubber boots (similar to modern-day "rubbers"). Amazon Dry Goods carries a line of India Rubber boots which they assert are period-correct. Since there are no surviving India rubber goods from the period, we are forced to take them at their word. No matter what your choice of footwear, you will eventually find that you will want or need two pairs: one decent pair, and one for muddy events.
Ground Cloth - When you are looking at tents, keep in mind that you will likely want to have a covering on the ground to make sure that you and your possessions stay reasonably clean and dry. You can order a canvas ground cloth from the various tent manufacturers, or you can go to your local Home Depot, Lowe’s, True Value or Ace Hardware, or other hardware / painting supplies store and buy a canvas drop cloth which will be the almost exactly the same size as the one you might order from a tent manufacturer. You could cover the floor of a 10’ X 12’ wall tent for under $25 in most cases, for instance.
You may have to waterproof the canvas yourself; waterproofing is available from hardware and discount stores, is tedious to apply, but works well. Some prefer to use sheet plastic under the canvas, although it may make the footing a bit slick, especially when there are large accumulations of leaves under foot. Another choice is to buy canvas drop cloths which are rubber-coated on one side, although the appearance is not as pleasing as the regular canvas.
Another way to accomplish the same purpose and make your tent look more colorful is to buy remnants of upholstery material from a fabric store; watch for sale pricing especially. You won’t be able to find one remnant piece that will fill your tent, but you can buy numerous pieces in varying sizes and overlap them throughout the tent. Having multiple relatively small pieces has the added advantage of your being able to launder them in a normal washing machine, should you choose to do so, and it is easy to pack up when you are ready to break camp. Again, you may be able to cover the floor of a wall tent for under $25. (Information from Debbie Harrison and Jennifer Stubbs.)
Yet another source of ground cloth is also the fabric store, where canvas may be purchased in widths ranging from 44"-45" to 72". You may be able to cover the floor of a wall tent for under $45.
Hair / Hairdini - If you have long hair (we are addressing ladies only at this point), you may want to use a Hairdini to help style your hair properly and keep it in place. It is relatively economical and can help transform a modern cut into one which is passably period. If your hair does not look good parted in the middle, using a Hairdini can help overcome those minor difficulties. If the back of your head is relatively flat, however, it may tend to accentuate that characteristic.
Most women wear their hair shorter than waist-length, and many less than shoulder-length. While this may appear to present a challenge in trying to wear a hair style appropriate to the period, you should be aware of the fact that many women of the period used what they termed "false hair". Simply put, "false hair" is...uhh...hair...that’s....uhh...false. Some ladies refer to their false hair as a "rat". Relatively inexpensive, it can be purchased from hair salons or beauty supply stores (such as Sally’s Beauty Supplies), flea markets, or garage sales.
False hair can be pinned into the hair at the back and will be indistinguishable from your own hair if you choose well. Many ladies choose to cover the false hair with a hair net or "snood", as it is commonly referred to by sutlers (a term from the 1920's, not our period). If you put your false hair into a snood, you may have even finally found a good use for that cat you may have around the house who has gone "into the light". Just try to make a good color match.
A period-looking hair net may be made with relative ease from a doily. Many quite attractive doilies are available at craft shops and discount stores such as Wal-Mart. By interlacing an attractive ribbon through the open-work ends of the doily and using it as a drawstring, a most attractive and inexpensive hair net may be rendered, and a period appearance maintained.
(A snood may be a tie or ribbon for the hair, especially as formerly worn by young unmarried women in Scotland. In re-enacting circles, the term "snood" refers to a bag-like net worn at the back of a woman’s head to hold her hair. It may also have reference to a hat, or a part of a hat, that resembles such a hair net. The term accurate to the period, however, is "hairnet".)
During the 1850's and 60's, women also used braids of false hair to enhance the thickness of their own, or simply to better ornament their heads. Synthetic hair is readily available and can be relatively inexpensive, although it may not be as easy to work with as real hair. You may want to buy a length of false hair, braid it, and work it into your own hair as an adornment.
One hair style we have seen that used large, thick coils of false hair made the wearers look much like Princess Leia of Star Wars. We would encourage you to look through as many photographs of the period as you can to see the variations in hair styles, especially if you want to use an authentic hair style that will complement your natural good looks as much as possible.
Hair net - (See Hair / Hairdini)
Handkerchiefs / Hankies - As a refinement of your impression, gentlemen should carry handkerchiefs and ladies should carry hankies. For men, modern white handkerchiefs will pass; after all, the hope is that you will not be whipping them out too often. As for ladies, a delicate lace hankie will add to your impression. Often the beautiful old lace hankies can be bought at flea markets for just a dollar or two, and the discount department stores often have them at very reasonable prices.
Hanging Clothes - Keeping clothes from being too wrinkled from one day’s use to the next may be solved by making your own clothes rack. If you only have one or two garments and sufficient floor space in your tent, using a wrought iron lantern stand which can be driven into the ground may be a simple way to keep your clothes off the ground. Another alternative is to make your own clothing rod.
Take a 1" dowel and cut it to length, typically one to two feet long. Screw an eyehook into each end of the dowel. Then using the dowel with the eyehooks to locate them, screw eyehooks into the ridge pole of your tent to correspond with the location of the eyehooks on the dowel. Be sure to close the eyes of the eyehooks so that the dowel won’t be knocked off in the event that you bump into the clothing. A simple drawing with dimensions may be found in the patterns / plans library.
Hoops may take up a tremendous amount of room in a tent if you have to lay them down, for lack of a place to hang them. Hoops can be hung from a regular wire clothes hanger by turning up the two ends so that they cradle the hoop, and the wire clothes hanger in turn can be hung from a clothing rod as suggested before, or from a pole hook hanger (sold by Panther Primitives) that is attached to one of your tent's vertical pole.
Hat Boxes - Well, you just spent somewhere between $15 and $150 for a hat, bonnet, cap, or kepi. Are you just going to toss (or stuff) it in the back seat or the trunk of the car with all of your other re-enacting gear and hope that it survives the trip home? You may want to think about making your own hat box or boxes to protect your investment. Even if you don’t use it to carry your hat (or hats) around during the re-enacting season, it may be a good idea to store your hat(s) in something that will keep the dust off it (or them) during the off-season. Making a hat box is relatively easy, and uses inexpensive, readily available materials.
A basic plan is available through the 5th Company - Washington Artillery library of patterns and plans. In brief, the primary materials you will need include poster board, wallpaper, newspaper, glue, and masking tape. Newspaper is used to line the inside, as was commonly done originally, and you may elect to line yours with either modern newspaper or reprints of Harper’s Weekly or other period publications. Often a coat of shellac or varnish was applied over the newspaper to give the box greater rigidity, and that will certainly be necessary on larger boxes. Some folks preferred to paint over the newspaper so that it wouldn’t look so inexpensively done, and the paint also tended to lend rigidity to the hat box.
Then again, it may just be a whole lot easier to take a cardboard box you have around the house or that you buy at U-Haul or some such place and cover it with wallpaper to make it look like a period hat box. Should you have more creative skills, you may elect to use butcher paper to cover the box and then paint your own scenes onto the butcher paper, following up your painting with a smooth coat of varnish or shellac. The main thing is that you can protect your head wear inexpensively. Most ladies’ straw hats have a maximum diameter of 17", more or less. Should you use a box which has inner wall dimensions of 20" (true of boxes for 14" or 15" screen computer monitors, for example), you will be safe with that choice in almost any instance.
Depending on the type of brim on your hat(s), you may find it necessary to make a papier-m�ch� form that simulates the top of your head to help keep the edges of the brim elevated above the bottom of the box so that a downward curl of your brim will not become either flat or upturned. The form should fit well into the hat, and you would be well advised to then glue the form to the bottom of the hat box to prevent it from scooting around.
Haversack - A haversack is a relatively simple sewing project, but the Confederate version of relatively inexpensive; enough so that it may not be worth your while to make your own. The Federal tarred haversack, on the other hand, is a good bit more expensive. The primary difference between the two? The tarred haversack is black and looks as if tar has been applied to it.
A regular linen or light canvas haversack may be painted and made to look like the tarred haversack, though. There will be a total of five components required: black enamel paint, boiled linseed oil, turpentine, high-gloss oil-based varnish, and Japan drier; all of which are readily available at Wal-Mart or most hardware stores. Mix the black enamel paint with boiled linseed oil in a ratio of roughly 1: 3 and paint the haversack. After applying the paint / oil mix, mix the varnish, Japan drier, and turpentine in approximately equal parts, and that will accelerate the drying time. It will take approximately twenty-four hours to dry.
Heaters - By all means, if you have access to a kerosene heater and your tent is large enough to safely use one, we would encourage you to use one. As the weather gets cooler, you will find that the romance of sleeping in a tent loses some of its attraction as you slowly freeze to death in the night. Having a heater warming your tent will make your nights so much more pleasant than lying awake in the dark, counting the seconds until dawn when you can get up and move around to try to restore yourself to life. There are few things less fun at a re-enactment than having to sleep with your hands frozen to your crotch in case of warmth. When the dew is especially heavy, using a kerosene heater also helps to dispel the dampness from inside your tent. Just be careful. We enjoy camp fires, not tent fires.
You need to prepare your kerosene heater for use, and it's better to do so at home rather than in camp. However, should you run out of time and have to do your preparation work in camp (preferably in the dark so as to be sensitive to the sensibilities of those who want to preserve a totally period atmosphere), the key to working with a kerosene heater is to remove the heater from the tent, elevate the wick to its maximum height, and then light the wick. Allow the heater to warm up and the wick to burn off old residue for about thirty minutes, and then turn the wick down about as low as it will go so that the kerosene continues to burn. If the wick is left too high, it will burn the wick and inadequately burn the kerosene, creating a heavy soot and smoke that will cover everything in the tent. That condition can be harmful to you, and will leave you looking like a blackface minstrel if allowed to burn in that fashion.
Should you have such a thing happen to you, the most effective means to remove the kerosene soot and smoke is to wipe off everything thoroughly with dry rags, preferably cotton rags (cotton will clean up rather well in the washing machine). Then go back over everything with dry cotton rags that have been treated with naphtha or mineral spirits diluted in roughly a 1:24 ratio with water. Carpet cleaners are not especially effective with such damage, although some products such as "Goop Gone" may be used fairly effectively.
After cleaning with dry cloths and then with a chemical solution as described, wash off everything with a mild detergent diluted in water. Do not use a power sprayer, as we have been told that it may be damaging to many items, and will almost certainly drive out the chemicals for mildew resistance and fire retardant with which the canvas of your tent may be impregnated. You may have to wash everything a multiple number of times before it is clean, but if you will take care not to get the materials wet without first removing the excess soot and smoke with a dry cloth and following it up with a chemical cleaning process, most items will clean up quite well. If you are lazy or find it too much trouble to work at cleaning up everything, particularly the tent, you may well find that your hands are blackened by residual, trapped soot every time you touch the articles or erect the tent. It really is in your best interest to do a thorough cleaning job.
Hoops - Hoops and hoop skirts are often among the first things to attract women to re-enacting, and one of the two items ladies generally need to acquire first. The hoop is the single most defining fashion silhouette of the era, and is essential to the "look" of a lady of the period.
Did you think you could just go somewhere, perhaps a sutler’s, and get yourself a hoop? Well, think again. Now you must know what kind of hoop it is that you want. The inverted bowl-shaped, or 6-bone, hoop was popular immediately before the War Between the States, and was a relatively wide hoop often worn with a ball gown or by a young woman. This hoop is perhaps the commonly available hoop from the majority of sutlers.
The bell-shaped, or 4-bone, hoop was contemporaneous to the War, narrower than the 6-bone hoop. There was also an elliptical, back-weighted hoop at the end of the War, but only moneyed ladies who avidly followed Godey’s could afford and would have that number of style changes. You may find it best to begin with the narrower 4-bone hoop to see how well you are able to negotiate yourself around people and objects. Consider the 4-bone hoop to be your re-enacting training wheels.
Height is also a dictator of the number of bones in the hoop (6-bone versus 4-bone hoops). Check with the sutler who is trying to sell you a hoop to determine the number of bones in the hoop you should need,
The hoop itself is a framework of rings or hoops that looks much like a bird cage, designed to spread out a voluminous skirt. Often, the hoops are made of metal, and can come to feel quite heavy, especially after wearing one for an extended period of time. You may find it necessary to make some simple modifications to your hoop in order to make it more comfortable or to extend the life of the hoop. Modifications may include changing the type of tie used to hold it up, or re-sewing the boning casings (the enclosures into which the boning is sewn). Laundering your hoop in a washing machine may actually cause a rapid deterioration of the boning casing, too.
Some ladies prefer a ribbon-type drawstring to cinch their hoops together, and others prefer a cord-type drawstring. Bear in mind that the hoop itself is fairly heavy, and the only thing holding it up is your waist and the drawstring or cord. Choose the type of closure that you know will have the least tendency to cut into you.
As for the boning casings, you may find it necessary to re-stitch them all around the hoop. Depending on the manufacturer, the boning casings may be open-ended or sewn shut. You may want to make one end of each casing an open end so that the boning may be removed when you launder the hoop, which will facilitate laundering it and will reduce the risk of damaging the boning. Boning should be drilled through at the point at which the two ends meet and overlap so that they may be bolted together with small bolts and nuts, keeping them from slipping out of the casings and holding them in place until you need to remove them.
By all means, be careful when wearing a hoop and skirt. Many women burned to death in the period of the hoop skirt, and that is one aspect of that time which we do not care ever to have repeated. After childbirth, death by fire was the second most common cause of death for women of the 1860s. The look achieved with a hoop was more than a fashion to die for, it was a fashion to die from. If you are cooking, be aware of your skirt’s proximity to open flames. If you are doing anything else, always be mindful of where the flames are.
(Information from Elaine Ludwig.)
Kegs - See Barrels.
![]()
![]()
![]()
![]()
![]()
![]()
![]()
![]()
![]()
This page hosted by ![]() Get your
own Free Homepage
Get your
own Free Homepage