Moving Picture Card- is proudly brought you to by Frances Byrne (Stamp Owl) of The Stamp Pad. Please email Frances if you require further information about Moving Picture Cards and for all the necessary supplies to make your own.
Do hope you enjoy the
animated gif designed by Tim!
Supplies needed:
1 x folded white card
1 x white postcard - same as card
craft knife
ruler
cutting mat
black dye ink pad or pigment ink
blue & green dye ink pad
(If using pigment ink - clear embossing powder)
Tombow markers
Double sided tape
Scissors
Stamps used in sample:
David Dorfman Eccentricks
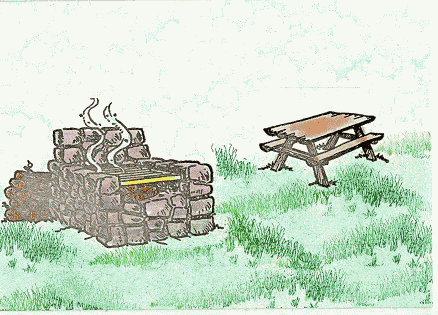
Barbecue Eccentricks
Picnic Table2 Eccentricks
Grass Posh Impressions
Clouds Mostly Animals
Instructions:
1. Before you start you need to decide on the scene you are going
to produce - what is going to be the background to your finished
card and which stamp you will be using as the moving part of the
card. On the sample shown I chose to have “David
Dorfman” as my moving figure and the rest are all stamped as
the background. It is a good idea to practise first on scrap
paper to make sure that the scene you are stamping will work out
as you want it.
2. When you are happy with your design, stamp up the background
on your folded white card. Normally I only use dye ink or the new
memories pads but you can emboss if you like, depending on how
complicated your scene is - the sample card has been embossed.
Colour as desired.
3. On the white postcard stamp the image of “David
Dorfman”. Colour and cut out.
4. Cut a strip of card (from the remaining postcard) approx 1½ -
2cm wide and attach this to your moving image (David Dorfman)
using double sided tape. Now it is important that when you tape
your strip to the moving image you do so using the least amount
of tape possible and that this be place at the very edge of the
strip and attached to the bottom of the moving image. Too much
tape can result in your moving image being to high or too low on
the finished card.
5. Take a look to see where the top of the double sided tape
finishes on the back of your moving image and keep this mind.
Place the moving image onto your card in the exact spot you would
like it to be when the card is completed and work out what
direction your image will be moving - right to left or up &
down - and how far across the card you want your image to be able
to move. Make a mark to show where the double sided tape finished
(remember you checked that previously), this will be where you
will cut your bottom slit. Using a craft knife cut your bottom
slit - remember to leave at least 1½cm at each edge of the card
- it doesn’t matter you if cut through an image on your
background.
6. Thread the moving image through the bottom image and move it
back and forth to check it is working. Now it is time to work out
where to cut the second slit so the strip can be threaded through
and so that you can make your moving picture work. This one is
not as important as the first slit -
depending on the image I have chosen to be the moving image I
normally cut a slit in the sky. Cut your second slit the same
length as the first.
7. Now you have about three choices.
(a) You can decorate the strip the same as your sky so that it
fits in with the card and then leave it like that. (As I have on
the sample card)
(b) You can stamp another image e.g. a bird, a cloud etc -
something that suits the card and attach this to the top part of
the slit so that the image is just above the second slit, cut off
any remaining piece of your strip - you will now move your image
by holding on to the bird or whatever.
(c) If your moving image is quite a large image I normally attach
the strip of card which is threaded through the slits to the back
of the moving image - that way you no longer see any sign of the
strip and you just move the image back and forth by holding on to
it.
8. Now you have your completed moving picture card have fun
moving your image back and forth or up and down your card
depending on what you have chosen. If you do not like to see the
slits that you have cut in the card when you open up the card you
can attach another piece of card the same size as the front to
the back making sure that you keep your adhesive away from any of
the moving parts - this is completely optional I normally leave
it as is.