Section 6.
Secondary Unit and Engine Installation
This section will show one of the most critical steps in the construction of this kit. I followed the instructions that RotorWay provided and with my trusty helper present everything went smoothly and I am very happy with the results.
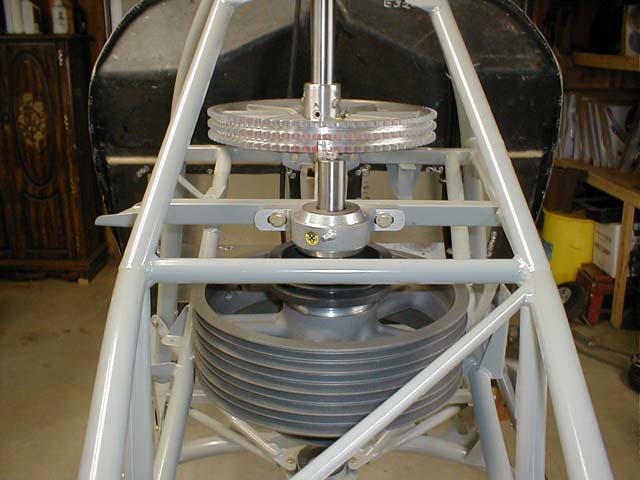
Here you see the secondary unit centered in the frame. Notice that the main shaft is slightly off to the left. This is normal.

Here you can see the shims at the lower bearing plate. The shims are there to achieve proper alignment of the secondary unit, and also to set the proper tention on the drive chain.

The boss says it's level. The important thing is that it is level laterally, and also fore/aft. There must also be no stress on either of the bearings when final installed.

This is the mainshaft sprocket. It has to be drilled and bolted to the mainshaft hub before installation. This was taken just after drilling on the drillpress.

After installing the bolts, they are wired in place. Nice wiring job Ken.

Back on and ready for chain installation.

This is a nice shot of the secondary sprocket. The plate with the three bolts in it is the only thing you have to fab. during the installation.

Here the chain tention was checked again and everything was leveled for the last time before final installation of the secondary unit.

When you final install the secondary unit, remember to put all of the belts on.....
Thanks again to Ken for the terrific photos on this website.
The next series of photos will show the engine going in.

First things first. Now why do you suppose someone would do something like this? hmmmm....

The moment has finally come! I have been chompin' at the bit to pull this thing out! I was suprised at how dusty and dirty this thing was though....I better call RotorWay about that.

Dont try this at home. I was so excited that I didn't have to build a rickety old tower out of blocks of wood to support the engine. What you see here was actually too tall. I can't remember right now what was used, but I think it was a rickety pile of blocks.

Oh yeah, here it is. A plastic milk crate with a couple of blocks did the trick. It went in real easy. Here I am tightening the lower engine mount temporarily. It will be leveled in a bit.

When all was said and done, the engine was leveled and some tention was put on the drive belts. After a couple of days everything was rechecked and leveled and it turned out, the engine did not have to be shimmed at the bottom. Lucky I guess.