Encoding to Avi
Free Software needed-
Virtualdub MPEG2 and AC3ACM from (download both the files
available at site)
http://fcchandler.home.comcast.net/
Just extract zip file into new folder C:\virtualdubmpeg2
Extract AC3ACM into new folder-right click on the .inf file and select
install. It will ask for CD-Browse to folder containing inf file and
click OK to install.
Latest DivX video codec from
http://www.divx.com/divx
You can download free one or the PRO one-the PRO one has a free six
month trial after which it converts to free one if you don't purchase.
Run the downloaded exe file to install.
Lame MP3 audio codec from
http://users.tpg.com.au/mtam/install_lame.htm
Page with download link as well as installation instructions.
Using VirtualDub to encode mpg to avi
1.Change your Desktop resolution to 1024x768
2.Create a Desktop shorcut to the virtualdub.exe file from your
virtualdub folder. Click on the shortcut to open.
It looks like this (the header will be different for you,mine is a
slightly older version)
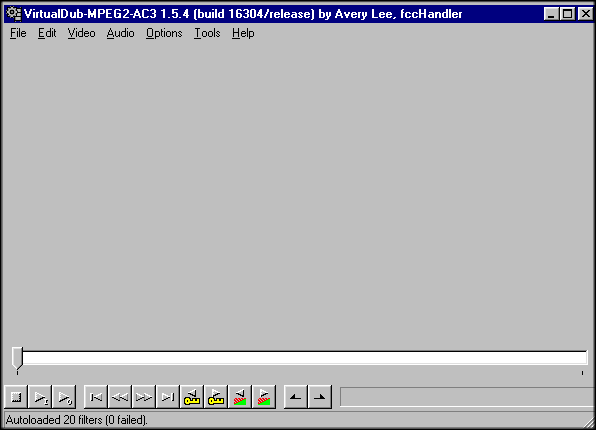
3.Click on File-Open video file and load the first of your .DAT (or mpg
files from ISOBuster re-encoded with TMPGEnc) files.
4.Next click on Video-Compression-you will get dialog box as follows
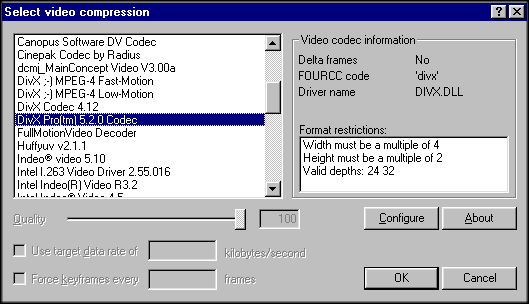
5.Select your DivX 5.2 series codec and then click on configure to get
dialog box as follows
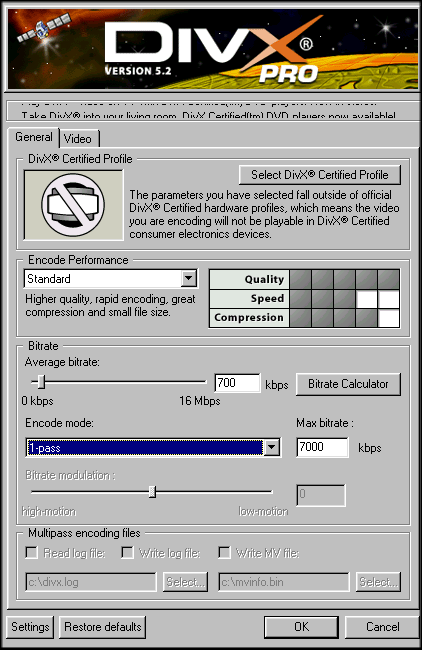
6.Click on the settings button to get settings dialog box as follows
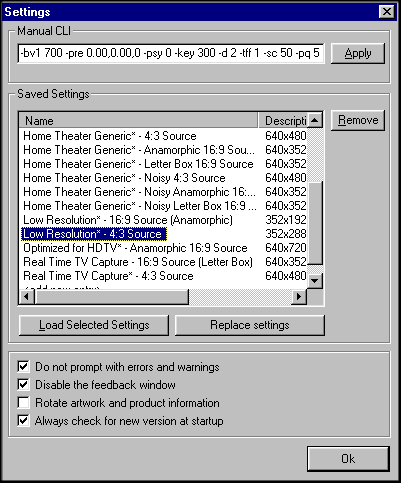
7.Highlight-Low Resolution 4:3 source as shown-click on Load Selected
Settings and then click OK-you will get back the DivX dialog box as
follows
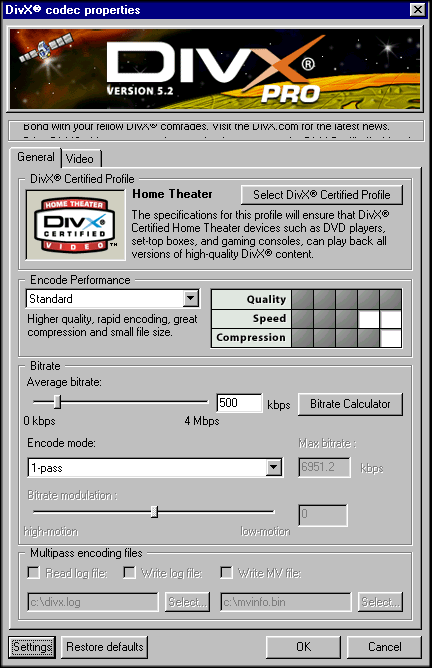
8.If your PC is faster than 1.5 GHz-change Encode Performance to slow
using dropdown box and change the 500 to 400-then click OK
If your PC is slower than 1.5 GHz-just click OK.
If you are using the PRO codec-above 1.5 GHz-change to slow and 500 to
300
-below 1.5 GHz change the 500 to 400.
90.Next Click on Audio-Full Processing Mode-Again Audio-Conversion-in
the dialog box-check 22050 Hz
Click Again on Audio then compression to get dialog box as follows
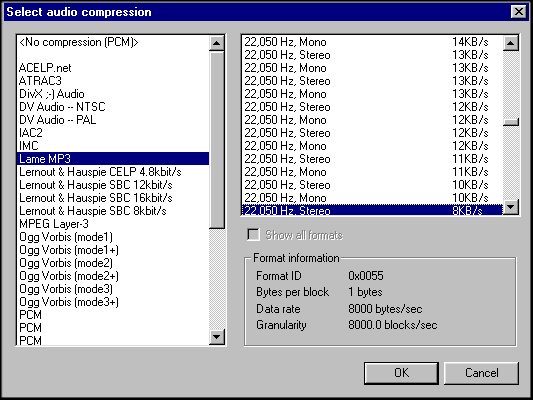
10.Highlight as shown and click OK.
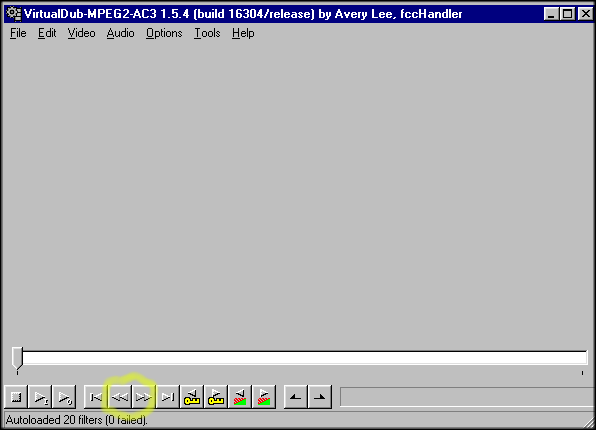
11.In case you want to encode only a part-use the slider at the bottom
of the virtualdub window to select starting point(use the buttons with
double arrows to select precisely)-Then-Edit Set selection
start-Similarly select ending point-Edit-Set Selection end.
12.Finally-File-Save As Avi-choose a file name-click save to begin the
encoding!!
Using VirtualDub to encode vob to avi
In step 2 load your vob, in step 7 select Home Theatre Generic* - 4:3
source,replace step 8 by
Step 8 for vobs:
If your PC is faster than 1.5 GHz-change Encode Performance to slow
using dropdown box and change the 1000 to900-then click OK
If your PC is slower than 1.5 GHz-just click OK.
If you are using the PRO codec-above 1.5 GHz-change to slow and 1000 to
700
-below 1.5 GHz change the1000 to800.
>
Other steps remain same.


