It has been quite awhile sense my last update infact its been about 5 months... for those of you following the project I apologize. But I have been doing alot of work I just don't have alot of time. So if I have to choose between working on my car or working on my wwebpage... the car comes first.
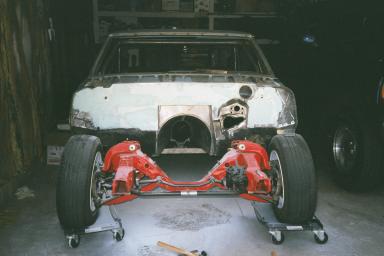
The first pictures in this section are of the engine being set into place in my car. This is the part I have waited so long for, this proves to all of the doubters out there that I am actually making this car, not making up this car. Iincase you forgot its an import engine but, Big Ed's Fabrication, of Simi Valley, CA hooked up the engine mounts like it was any other GM engine. They also built the cage and did the sheetmetal work on the interior of the car.
The way that these engine mounts work, it is still possible to go back to a domestic engine in the future, not that I will want to or anything, its just an option. The stock crossmember was not welded on at all, infact the stock mounting points on the crossmember are used to bolt up the new engine mounts. Pretty nice.
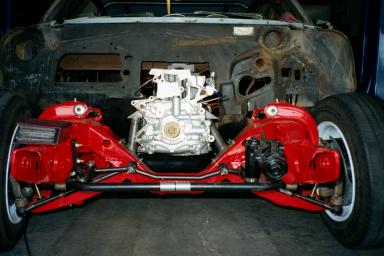
The undershot of the engine shows how everything really fits into place. Its pretty snug in between the oil pan and cross member so the engine had to be set back to get the engine low enough. From this picture you can see that original trans tunnel had to be cut out of the floor, the stock powerglide was a pretty slim unit, but the new Getrag 6 Speed is much larger.
![]()
This is the shot form inside the car, the trans is actually in a good position and the shifter is write where it should be.


These are just more shots showing how everything is going to lineup once its all done. There is going to be quite a bit of room in the engine compartment.
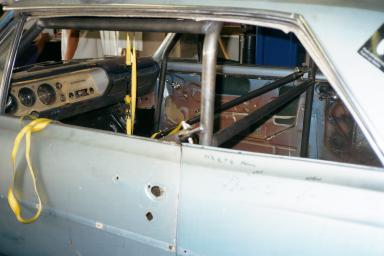
Here are a few shots of the cage, as of right now it is a 6 point cage. I am going to add 2 forward struts that tie into the front suspension in a little while. The cage is seemless chrom-moly with swing out side braces. The cage is brought through the floor and through the frame, not just set on the frame. It is very strong.
![]()
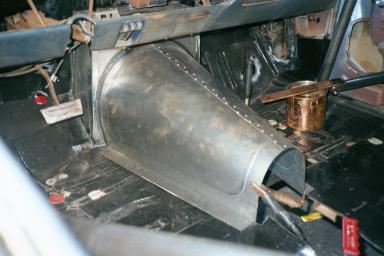
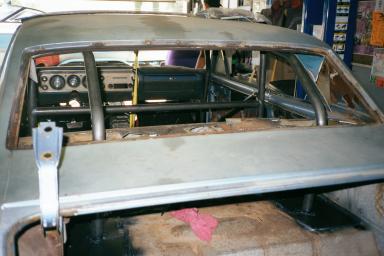
This is how the trans tunnel fit in the car, its pretty large but it is needed for clearance. This is also a picture of what I am currently working on. I am starting in on the body work, starting with shaving the firewall, the way it looks stock is pretty ugly. It is going to look much better smoothed over. And just before I wrote this, I just finished stripping the drivers side of the car down to bare metal. Body work isn't my favorite work but its got to be done. I will update the website soon... hopefully.