GF250 - Removing and restoring the battery cradle
Why: When I bought my second-hand GF, it was obvious that the battery
had leaked at some time in the past. The cradle was starting to rust on
much of its inner surface, and I knew that with such thin/lightweight metal
this could not be ignored.
Disclaimer: This is what I did.... if you
follow these instructions I won't be held responsible for any problems
you encounter or damage that results....
Procedures:
1. Remove seat and side-panels to expose battery and surrounds
2. Make sure to disconnect the EARTH terminal first, before proceeding
further (this will eliminated risks of sparking etc.)
 Then
remove the positive terminal, and the battery breather hose. You could
now choose to also undo the bolts holding the starter relay bracket to
the battery cradle, if you have a right-angle Philips screwdriver or other
appropriate tool - otherwise, wait until you can lift the battery cradle
to gain access. Remove the battery, taking care not to spill any acid!!!
( Use a cloth or gloves when handling batteries).
Then
remove the positive terminal, and the battery breather hose. You could
now choose to also undo the bolts holding the starter relay bracket to
the battery cradle, if you have a right-angle Philips screwdriver or other
appropriate tool - otherwise, wait until you can lift the battery cradle
to gain access. Remove the battery, taking care not to spill any acid!!!
( Use a cloth or gloves when handling batteries).
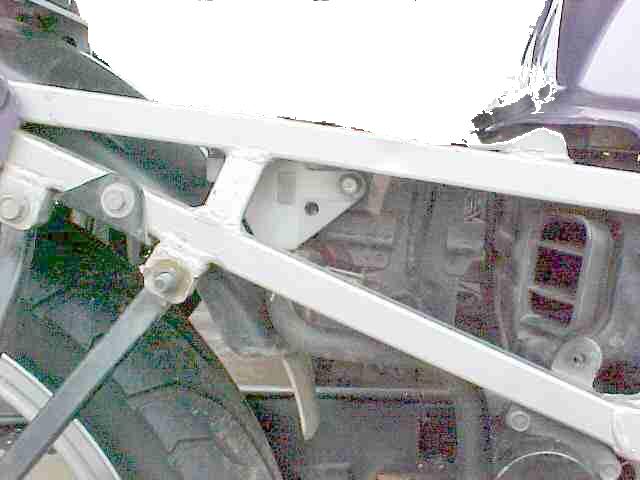
3. Remove the bolts holding the battery cradle and seat rubbers to the
top frame rails
 (
half visible in this photo, on the outer edges). Store the bolts and special
washers (which sit between rubbers and frame) carefully.
(
half visible in this photo, on the outer edges). Store the bolts and special
washers (which sit between rubbers and frame) carefully.
Undo the side mounting bolts (one each side of the cradle, only accessible
when battery removed), and again , store the bolts and special washers.
4. Remove the bolt holding the toolbox to the battery cradle (on
right hand side) and pull the tool box out.
 Then
undo the bolt holding the rear brake fluid canister to the cradle
and push the canister carefully out of the way. The battery cradle can
now be carefully extracted with a bit of juggling.....
Then
undo the bolt holding the rear brake fluid canister to the cradle
and push the canister carefully out of the way. The battery cradle can
now be carefully extracted with a bit of juggling.....
5. The rubber grommets should be carefully pried out of their holes
with a thin but blunt or soft tool.
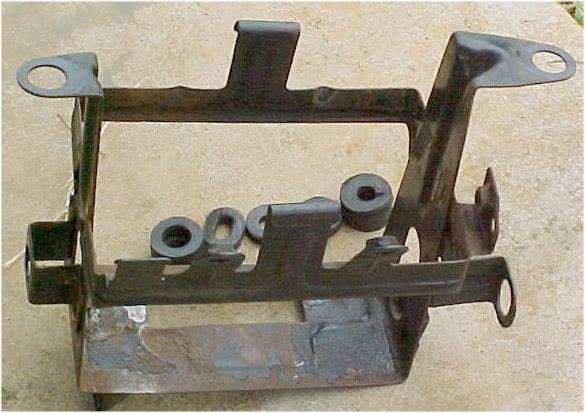 Note
the corrosion, especially around the base, visible once the thin foam pads
have been carefully removed.
Note
the corrosion, especially around the base, visible once the thin foam pads
have been carefully removed.
6. Clean off all oil and dirt, then remove only loose
rust and paint with a wire brush.

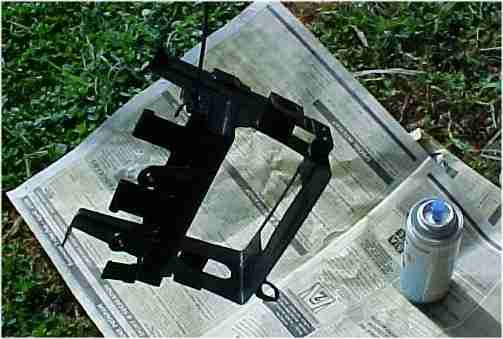
7. Apply an appropriate rust converter, following the manufacturers
directions....most of them contain phosphoric acid, so DON'T drop any on
your cement garage floor.
 The
firm rust will be converted and turn black.
The
firm rust will be converted and turn black.
8. Apply primer with spraygun or can.
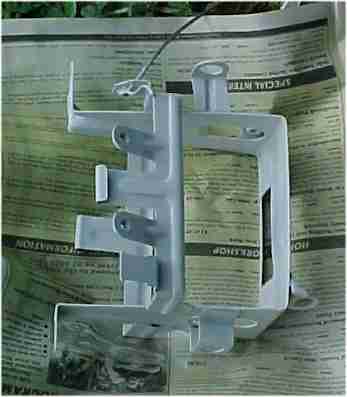
9. Apply paint with spraygun or can.
You now have a cradle probably better than new (why don't these
manufacturers ever seem to use primer??!! -it wouldn't add much weight
to the bike!!).
10. Replace rubber grommets in cradle, and reattach foam pads in cradle,
using appropiate adhesive ( I used builders adhesive)
11. Replace cradle, then battery, in bike by reversing the dismantling
procedure above. Note particularly the way the special washers are reassembled.
Reassembly will be aided by PARTIAL insertion of all the four mounting
bolts before any are tightened. If your bike is prone to vibration, consider
using a lightweight locking fluid on bolts that don't have lock-washers
when reassembling.
