


House Rules from the Desk of Donovan Raidor
Last Updated 14 Feb 2008
For more information about HeroScape,
including High-quality pictures of my custom units,
visit the best source on the net for all things 'Scape at:
HeroScapers.com
| Choosing Armies: | Other Rules: | My Custom Units: | Scenarios: |
| Loyalty Bonus | Taelord | 'Scapers.com Index | A Common Foe |
| Auction Draft | Initiative | 'Scapers.com Gallery | |
| Ordered Chaos | Card-Sized Cards | Custom Biographies | Game Variants: |
| Pass and Pick | Custom Units | The Zaravi | Curse of Ne-Gok-Sa |
Heroscape is a fun yet simple miniatures-based board game made by Milton Bradley. The pre-painted miniatures look fantastic, and the "board" is assembled from a series of interlocking and stackable hex-tiles that can generate any number of unique, 3-dimensional terrains for battle. The lack of complexity in the rules might put off die-hard strategy gamers, but the game is very well-made and nicely balanced overall. My local group of game enthusiasts has play-tested numerous "custom" rules to add more depth to the game's mechanics, such as cover from terrain, alternate movement and order-marker systems, tweaked melee-vs-ranged attack modifications, variant glyph rules, etc. In the final analysis however, our concensus has always been that the vast majority of our "house rules" really aren't necessary. We tend to agree that the game's elegant simplicity is a large part of its charm, and while our "adjustments" might make the game more 'realistic' or 'strategically challenging', they end up changing the feel of the game away from the Heroscape we've grown to enjoy. The only House Rules that we do continue to use on a regular basis primarily involve the 'draft' process of selecting custom armies to use during the scenarios. These are listed here for the use and enjoyment of anyone who feels they add more to the game than they detract. Unless otherwise noted, we play by all of the remaining rules exactly as printed in the Master Game Guide. --ZD--
CHOOSING ARMIES
Loyalty to the Cause -- The lines have been drawn in Valhalla, and many of the warriors in the Battle of All Time have sworn their allegiance not just to a Kyrie General, but to an overall cause. The dark forces of Utgar clash against Jandar’s armies of light in every corner of the war-torn realm. Ullar has thrown his support solidly behind Jandar, but the Generals Einar and Vydar remain uncommitted, allying with Jandar and Ullar in some battles, but selling their support to Utgar in others. When drafting armies in Heroscape, players are rewarded for adhering to these established loyalties (or lack thereof) and penalized for ignoring them. As long as a player drafts only “evil” units (serving Utgar), only “good” units (serving Jandar and/or Ullar), or only “neutral” units (serving Einar and/or Vydar), the player may draft an army totaling up to 10% more than the standard total for the scenario. For example, if a scenario calls for a 300-point army and a player drafts a “good” army of only units serving Jandar (or some units that serve Jandar with some that follow Ullar), he or she may draft an army of up to 330 points total. To represent the difficulty of forcing opposed ideologies to work together, players are penalized 10% of their point total for drafting “good” and “evil” units into the same army. So for the same 300-point scenario, a player drafting some units following Utgar together with any units following Jandar or Ullar could only construct an army of up to 270 points total. Allying an inherently “good” or “evil” army with neutral units (following Vydar and/or Einar) carries no penalties, but having the mercenary “hired-guns” around makes the “army regulars” uneasy enough that there are no bonuses either. Thus, adding Vydar’s (or Einar’s) units to an otherwise all-Utgar army in a 300-point scenario would limit that army to the usual 300 point maximum.
Auction Based Draft -- Friendly debates often arise between players over the point “values” of their favorite units. While the costs published by Milton Bradley are the established norm, many players believe that certain units should cost more (or less) to reflect their actual usefulness. What follows is an optional system that can be used during army assembly to give the players themselves more leverage in deciding the “costs” of the units that will be played.
During the draft process, each player announces the name and cost of the unit they would like to draft next. If no other player wants that unit, then the drafting player adds it to his or her army as usual and the draft continues with the next player. If any other player(s) would also like to draft the unit named, then the unit in question is placed up for auction. Beginning with the drafting player, all interested parties may bid to increase the cost of the unit. Bids must be in at least 10-point increments, starting from the printed cost of the unit. No player may continue to bid if it would cause him or her to exceed their army cost total for the scenario. As soon as one player raises the cost of the unit to a point where no other player is willing to outbid him or her, then that player wins the unit and adds it to their army. Wound markers may be used as cost chits (one per 10-points spent), given to the winning bidder to aid in keeping track of the extra cost until army selection is complete. If the winning bidder was the drafting player, then the draft continues with the next player in draft order as usual. If the winning bidder was not the drafting player, then the winning bidder is also given an order marker (as an arbitrary indicator that they drafted a unit out of order) and the drafting player begins his or her draft again, announcing another unit and restarting the process. When a player with one or more “bid win” order marker(s) is next in the draft order, they lose one of their order markers instead of making a draft choice, and the draft passes to the next player in order instead. The “auction-draft” process continues in this fashion until all players have completed their armies.
As an example, consider a game with 4 players who are each drafting a 200-point army. Draft order is determined, and player “A” announces that he would like to draft a squad of Roman Legionnaires for 50 points. No one objects, so player “A” gains control of one squad of Legionnaires and the draft passes. Player “B” decides he wants Deathwalker 9000 for 140 points. Players “A” and “C” also both want DW9K, so he is placed up for auction, with player “B” making the opening bid at 140 points. Player “A” bids 150, and player “C” quickly raises the bid to 160. Player “A” already has the Romans, and paying more than 150 points for DW9K would put him over his 200-point army limit, so he drops out of the bidding. Player “B” decides that Deathwalker isn’t worth the steep price and lets player “C” have him for the bid of 160. Player “C” takes DW9K, a “bid winner” order marker, and 2 wound markers as chits to remind him of the extra 20 points he spent on his prize (he now has only 40 points left to spend on the rest of his army). Denied his first choice, player “B” resumes the draft by choosing Mimring at 150 points instead. Nobody else wants the dragon, so player “B” takes him and the draft passes. Player “C” should be the next one in the draft order, but since he bid out-of-turn on DW9K, he gets rid of his “bid” order marker instead and the draft passes to player “D”. She picks the Zettian Guards, then an Omnicron Sniper squad (both without objection from the other players) at 70 and 100 points, respectively. Drafting “opposing” units (Utgar and Jandar) hits her with a 10% loyalty penalty and drops her available point total to 180. Since she’s already spent 170, that means her army is done, but she’s happy with the all-‘borg force. Player “C” decides he’d rather have orcs than snakes, and nobody minds him taking a 40-point Blade Grut squad to finish off his 200-point army (along with the price-hiked DW9K at 160). Player “B” is up next, and picks the one remaining squad of Legionnaires. Player “A”, however, also wants the Romans, and bids 60 points for them. Player “B” can’t afford to pay more than 50 points after Mimring, so Player “A” gets the second Roman squad, a “bid” marker, and a 10-point wound chit. Player “B” consoles himself with the Marro Warriors (that no one else wants) at 50 points to complete his 200. Player “A” then ditches his “bid” marker, but gets to draft again since he’s the only one with an incomplete army. He decides to run with the Roman theme and chooses Marcus Decimus Gallus for 100 points. Including the extra 10-points he spent bidding for his second set of Legionnaires, this takes him to 210 points total. However, since all his army cards follow the “neutral” General Einar, the 10% loyalty bonus means he can go up to 220 points with his army, so he’s still legal. All of the armies are complete and the auction-draft is over.
Order in the Chaos -- For more variety than a custom-drafted army, just shuffle all the army cards together and pass them out randomly. Start with the “first draft” player, and deal cards out one per player in draft order until each player’s cost total equals or exceeds their allowed total for the scenario. If the last card dealt to a player causes their army total to exactly equal the limit, then that player’s army is complete. If the last card dealt to a player exceeds their total cost limit, then shuffle it back into the deck. That player is then allowed to complete their army by choosing any one last unit (if any) out of all those still available that will leave them at or below the point cost total allowed for their army. Continue in this manner until all players’ armies have been completed.
If this method is too chaotic for the players’ tastes, it can be toned down with a “synergy” option. After each card is dealt to a player, that player is allowed to choose one additional card (out of all those still available) that is either identical to the one just dealt or has powers or traits designed to work in conjunction with the card just dealt, if possible. Note that the card chosen may not cause the player’s total cost to exceed their army limit. In addition, each player has the right to reject any card dealt to them (after the first) that would cause them to suffer the minus 10% penalty for “opposing” units. Simply return such cards to the deck and deal again until a compatible replacement is found.
Pass and Pick -- One final option for drafting armies is an old “Cosmic Encounter” favorite called ‘pass and pick’. After seating all the players around the battlefield, shuffle all the available army cards together, then deal them all out to the players as evenly as possible (some players may have one more card than others - this is O.K.). After examining all of their options, each player must keep one third of their cards and pass the remainder (rounded up) to the player on their left. From their new selections, each player then keeps two thirds of their total cards and passes the rest (rounded up) to the left. After this final exchange, each player picks their army cards for the game from those cards they now hold and removes the unused army cards from play. In the VERY unlikely event that any player(s) can take ALL of the cards they are holding and still not reach their army point limit, they may choose the remainder of their army by a standard draft out of all the units discarded by the other players.
The Mighty Taelord -- Last but not least, if there is not a 'fortress' on the battlefield, treat "Taelord the Kyrie Warrior" as if his printed cost during army selection is 120 points (not the full 180 points as published on the official card by Mitlon Bradley). Only if there is a 'fortress' (castle) in play do we draft Taelord at his full 'published' cost of 180 points.
TURN ORDER
Rolling for Initiative -- All players roll the 20-sided die, with the highest roller taking the first turn, as usual. However, instead of play simply passing to the left, the second highest roller takes his turn next, followed by the next highest roller, and so on. (We have actually ALWAYS played this way. Since so many other games we play use the roll sequence to determine turn order, we inadvertently misread the rules on this point, and were quite surprised to learn later that this was not what the designers intended.)
CUSTOM CARDS AND UNITS
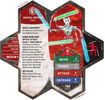
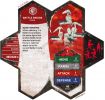
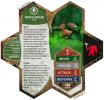
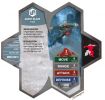
Cards Shaped Like Cards -- Though the army cards that come with the Heroscape game are beautiful to look at, they take up a good deal of table space and are rather difficult to shuffle and deal (not to mention conceal from your opponents during a pass-and-pick, since they are double-sided). To remedy these shortcomings, we use home-made army cards. They are (roughly) the size of standard playing cards and contain all of the relevant game information for the units, but are much easier to handle (and conceal). They are admittedly no where near as pretty as the standard cards, but they get the job done and take up alot less of our limited table-space. [They also have the added bonus of making it VERY easy for us to invent and play-test our own custom Heroscape units, as only minimal time is required to produce an army card that matches the rest of our set.] The file sizes prevent me from posting the images here, but if you would like a printable copy of our versions of the published Heroscape "cards", you can download them from the HeroScapers.com Gallery. [Alternatively, just send an e-mail to me with "Heroscape Cards" in the subject header, and zipped files (.jpg scans) will be e-mailed back to you, usually within one week.] Also, HeroScapers.com member Fl0ydski is currently working on some card-sized cards that are much better looking than my humble versions. If and when they become finalized, I will put a link to them on this page (...with his permission, of course).
Custom Units -- A plethora of Heroscape-sized miniatures (originally intended for use with other game systems) are readily available both online and in gaming stores everywhere. For those with active imaginations, building "homemade" units for play in the Heroscape universe brings WORLDS of variety to the game. Costing such units and ensuring their play balance is fairly time-intensive, but well worth the investment in my opinion. Our local group plays with a few of our own custom units, and I am hopeful that I will eventually be able to make them all available here, but constraints on my time are making that difficult at the moment. In the meanwhile, there are literally hundreds of custom units open for perusal at HeroScapers.com, as well as a large forum community there to aid with feedback in costing and testing your own.
Click here for my Custom Units index at 'Scapers.com (some still being playtested).
|
|
|
|
| |
|
| |
|
|
AGAINST A COMMON FOE
The Enemy of My Enemy... (Makes Good Cannon Fodder on My Front Lines) -- What follows are rules for use with a group of players functioning as a 'team', combining their individual armies against one massive enemy force. The general principle is that each player will draft his or her army to a specific point value, as usual, then all of these armies will be used by the players to cooperatively oppose a larger army equal in value to the sum of all of the players' armies. I like to compose my "Common Foe" armies along theme lines, but this is not absolutely necessary. For example, you could construct an "Orcs and Trolls" army with Grimnak, Tornak, Nerak, Krug, (2x) Arrow Gruts, (2x) Blade Gruts, and (2x) Swog Riders for 600 points total. Two players would then each draft 300-point armies to pit against the Grut force, or 3 players would draft 200-point armies apiece, or 4 players would need 150-point armies each, etc. A combined "Einar and Vydar" army could include Carr, the Krav Maga, Dünd, (2x) Microcorp Agents, (2x) Gorillinators, Marcus, (2x) Roman Archers, and (2x) Legionnaires for a 1000-point grand total. This common foe could then be opposed by two 500-point armies, or three 333-point armies, or four 250-point armies, and so on. So who controls this 'Common Foe' army? The players do, as a group effort.
Each player is given two sets of order markers before the game; one set will be used on their own army cards while the second set is for the 'Common Foe'. Each player's second set of markers only needs pieces numbered "1", "2", and "3" (the "X" marker is not needed, unless it is used for the scenario and/or Special Powers). These 'foe' markers won't be concealed during play, so if there are insufficient 'official' order markers for each player to receive two sets, simple slips of paper labeled "1", "2", and "3" may be used instead. When placing order markers each round, each player puts a set of markers on his or her army cards first, as per the standard rules. Then, each player places a second set of markers on those 'foe' cards that he or she would like to use during the round. Players should take turns setting up their 'foe' markers, but the turn order is not important. While placing these markers, no 'foe' unit may ever have two or more markers on it with the same order number. For example, if Agent Carr already has a "1" marker on his card, no more "1" markers may be put on him, though he can still have a "2" and/or a "3" placed on his card. This rule applies to Common army cards as well. (If the 'foe' army has 2 Gorillinator squads in it and one of them has a "3" marker, then no more "3" markers may be placed on either Gorillinator army card.) If there is no legal place to put a 'foe' marker (i.e., a "2" needs to be set, but all available 'foe' units already have a "2" marker on them), then that marker goes unused for the round. Once all possible 'foe' markers have been placed, the 'foe' army should usually have as many order markers as all of the players combined (not including "X" markers). Players then roll for initiative (turn order) as usual.
During each round, the players take turns moving and attacking with their units as usual. However, after each player completes his or her 'standard' turn, that player immediately takes a turn with a 'foe' unit of his or her choice, before the next player's turn. The player chooses any 'foe' unit with a marker that matches the current turn number, then may move and attack with that unit as if he or she is the 'controller' of the entire 'foe' army. For example, if it is turn 1, after completing a turn with the "1" ordered unit from his own army, that player takes a turn with any 'foe' unit with a "1" marker on its card. 'Foe' order markers should be removed from play (until next round) as they are used, not left on the army cards as in the rules. Note that the first player in turn order (highest initiative roller) will have several choices of which 'foe' unit to use, where the last player (lowest roller) will not have any choice, as there should only be one 'foe' marker of that turn number remaining. If there are no legal options to use during a player's 'foe' turn (no markers of that turn number are left), then that player's 'foe' turn is lost. If a player loses his or her own turn (the ordered unit has been destroyed), they may still take a 'foe' turn as long as there is a valid 'foe' unit to use. If a 'foe' unit needs to roll dice during a player's 'standard' turn (to defend against an attack or use a special power, etc.), the attacker may choose any other player to roll for the 'foe'.
The victory conditions of a 'Common Foe' scenario can vary, but the players are all supposed to be working 'together' to eliminate their shared enemy, the 'foe' army. To represent this, all players must consider the other players' units to be 'friendly'. No player may use his own army units to attack or directly hinder those belonging to another player without that player's permission. During the 'foe' turns however, each player should use the 'enemy' forces to attack the other players' units whenever possible, obviously trying to avoid doing damage to his own army in the process. Players may not move 'foe' figures that are engaged with figures in their own army if such movement would warrant a disengaging attack against the moving figure. Also, while controlling the hostile army during a 'foe' turn, a player does not consider units in his own army to be 'friendly' or 'units you control'. Game rounds for each player will become a balance of using their own units to destroy the 'foe' forces that are the greatest threat to their own armies, while using the 'foe' army to attack units under the command of the other 'allied' players.
During the game, each player keeps a score of all the 'foe' units they've destroyed. When a player destroys the last figure in a unit (and the unit is removed from play), he or she takes the Army Card for that 'foe' and places it face down beneath his or her own units, adding the point cost for that card to his or her score. Even if another player wounded a hero previously, or destroyed other members of a squad, only the player who actually removes the unit from play (by destroying the hero or the last squad figure) can claim the Army Card and add the cost to his or her score. Conversely, if a figure is returned to play by any means (Glyph of Sturla, etc.), the player returning the figure may choose a matching Army Card from any player's score pile and return it to play as well, reducing that player's score accordingly. If the allied players can destroy the all of the 'foe' units before the time limit (if any) expires, then the game ends. The player with the highest point total of surviving units still in play plus score for defeated 'foes' is the winner. Obviously, no player will want to destroy the last 'foe' unit until their own victory is assured, but remember, the other players will be using that same 'foe' to try to even the scores and secure their own lead. If one player is ever winning by a large margin, other players will most likely "gang-up" against that player during their 'foe' turns until balance is restored.
If a player is eliminated from the game (all of his or her units have been destroyed), that player may no longer win. However, he or she may still try to ensure that nobody else wins either, by assuming control of the 'Common Foe' forces. An eliminated player does not place any of their own order markers each round and does not roll for turn order (initiative). Instead, the eliminated player is given all of the 'foe' order markers belonging to all of the players still in the game, and he or she places these markers on the 'foe' units according to the rules above. After each player still in the game takes his or her turn, the ousted player will take the corresponding 'foe' turn instead of that player. The player controlling the 'foe' army may choose any 'foe' unit with the appropriate order marker for the turn, then move and attack with that unit as he or she sees fit. If more than one player has been eliminated from the game, all of the ousted generals share equal responsibility for ordering and controlling the 'foe' forces, either by mutual agreement or by alternating control between them as they deem fair. If the 'Common Foe' forces have destroyed all of the player armies, then the game is a stalemate - all of the players lose.
ZARAVI INCURSION
Come the Zaravi -- The Zaravi are a custom species I've created based on the antagonists from one of my favorite video games of all time. Since they were designed expressly for use with the "Common Foe" rules explained above, they are very powerful units. They were engineered specifically to be used against a team of player forces with overwhelming numbers, and therefor favor a 'quality over quantity' approach. They can be used in standard Heroscape battles and scenarios, but are the most fun (in my opinion) as the 'heavies' in a cooperative beat-down game. The Zaravi follow their own 'General', Vekla, who is actually a playable unit himself. When drafting armies, the Zaravi have faction loyalty purely unto themselves. Only an army containing solely units that serve Vekla (and/or Vekla himself) can qualify for a 10% 'loyalty' bonus to its point total. Any force that contains a Zaravi unit along with those following any of the standard Archkyrie Generals receives a mandatory 10% penalty to its point total. The Zaravi are dimensionally unstable, and their physical bodies constantly fluctuate between their native realm and Valhalla. This gives them a ghostlike 'flight' ability as they drift through the aether of their home plane, allowing them to glide effortlessly across any terrain and even through solid objects or other figures. In addition, their flickering 'incorporeality' gives the Zaravi a limited invulnerability, as swords and arrows often pass through their bodies while they are 'phased-out', leaving them completely unharmed. To reflect these abilities, any figure with its Species listed as 'Zaravi' on its army card is considered to have the Special Power - Zaravi, as described on the Zaravi Species Card below. There are 16 different Zaravi units in all, ready to invade the battlefields of Valhalla...
Click here to see the Zaravi Invaders at 'Scapers.com
(as featured in HS CODEX Magazine, Issue#3!)

The Zaravi --(Excerpt from Thormun's Journal) The Zaravi are a race of sentient beings that have only recently entered into the Battle of All Time. Having humanoid bodies with prominent wings on their backs, Zaravi are similar in general appearance to Kyrie, but much larger in size. Several heads taller than even the sturdiest Kyrie, these strange creatures are not made of living tissue, but rather some kind of malleable crystalline substance. Their eerily glowing eyes and transparent ghostlike bodies have lead many to believe that the Zaravi are the 'netherworld demons' of Valhallan lore. Native to a realm they call the "loophole" or "other side", it is not known how the Zaravi discovered or first arrived in Valhalla. Their intentions, however, are all too clear; the Zaravi are invading. Appearing seemingly out of thin air, the malevolent demons attack and destroy all that they encounter. Leading an army of unnatural "soulspawn", the Zaravi and their lesser demon "puppetmasters" are sweeping across Valhalla, and their numbers appear to be growing. Attacking indiscriminately, the demon hordes have destroyed countless Kyrie settlements, inflicting massive casualties and leaving only burned rubble and poisoned wastelands in their wake.
Apparently oblivious to the battle-lines drawn between the various Archkyrie Generals, the Zaravi have visited their injustices upon each of the Valhallan leaders' domains without prejudice or pretense. In the battle for the Wellsprings, both Jandar's and Utgar's forces have taken sizeable losses from the Zaravi assaults. The Zaravi seem uninterested in the Wellsprings themselves, as the demons do not appear to gain any gifts from the waters. Alarmingly though, Wellsprings in areas desolated by the Zaravi are left toxic and barren - robbed forever of their miraculous powers. The Zaravi seem to be searching for something they refer to as the "zodiac" or "holy" stones, but what they will do with these stones when or if they find them remains a mystery. Regardless of whether or not the demons plan to leave Valhalla once they complete their quest, the Archkyrie Generals may not be able to ignore the cruel invaders much longer. As the death toll continues to rise from the rapidly expanding swath of Zaravi destruction, former Kyrie enemies may soon have to reluctantly join forces against their common foe if they hope to halt the Zaravi Incursion...
OTHER HEROSCAPE VARIANTS
The Curse of Ne-Gok-Sa -- For a different twist on the 'HeroScape' theme, try The Curse of Ne-Gok-Sa. It's a live-action murder-mystery based on the classic party game 'Mafia' or 'Werewolf', but set instead in the Valhallan realm of HeroScape. Enjoy...

Back to Donovan's Desk
or e-mail Donovan