Hiya
Bejon!
Hopefully
one of these ways should get rid of the
flecks for you - if one doesn't work,
don't worry, there are other ways :o)

First,
we're going to try getting rid of the
specks and having a transparent background
for your name to see if that works... if
not, then I'm pretty sure it's Animation
Shop that's the problem.
So,
open up the name you saved as a .gif file
- it will have a solid background colour
on it... that's cool :o)
Here's
mine (I made it bold to show up a bit
better and used a gold pattern 'cos I
can't use plug-ins for some reason, so
yours will look slightly different):

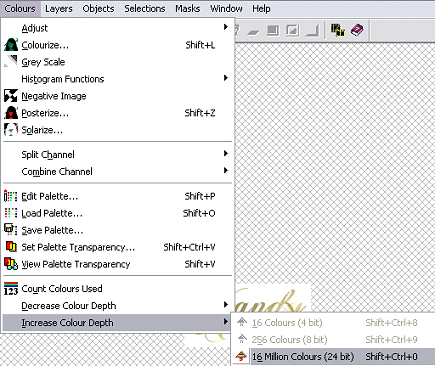
First we need to get all
our colours back, so go to "Colours"
then down to "Increase Colour
Depth" and then across to "16
million Colours"
Now we're going to give it
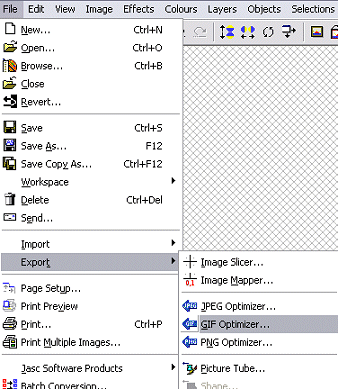
a transparent background. Go to
"File" then down to
"Export" and across to "Gif
Optimiser"
You should get a pop-up
dialogue box looking something like this:
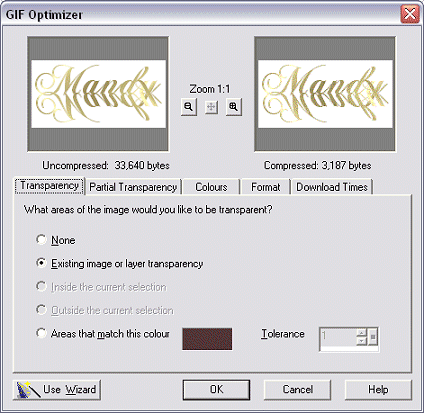
You can ignore most of it
(I do! lol)... the wizard will take
you through everything in a couple of
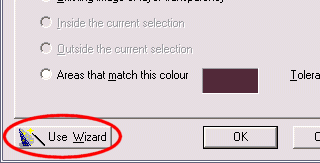
quick steps. In the bottom left hand
corner there's a button with a wizard's
hat and wand - hit that button and the
wizard will kick into action:
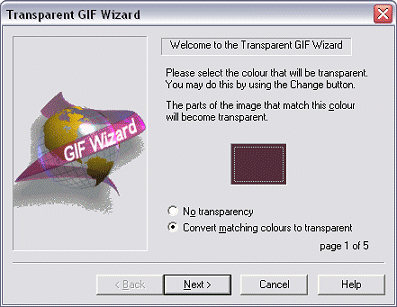
On this screen of the
wizard, you need to tell it the colour of
the background on your image. You
can do this in one of 2 ways. In the
big square in the middle, you can click on
that and choose the colour - but it has to
be the *exact* colour...
Or you can let PSP do the
hard work (and make sure you get the right
colour) - this is the way I always do
it. Just like with all other
programmes in Windows, you can drag
dialogue boxes around by clicking and
dragging the titlebar of the window.
We need to get this window out of the way
so that you can see your image, so click
and drag the titlebar until it's out of
the way and you can see your image:
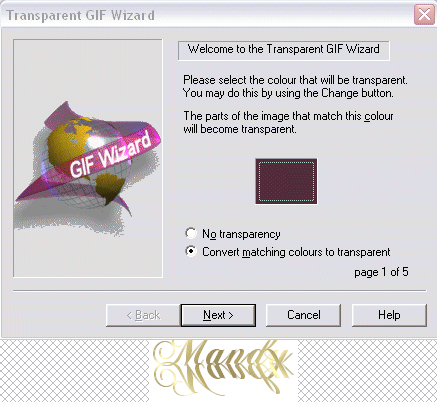
Try hovering your cursor
over your image - you'll notice that it
turns into a dropper. Single left
click anywhere on the solid background of
your image... the colour has now changed
in the dialogue box - that's cool... it's
what we want and we know for sure that
it's definitely the right colour now too
:o)
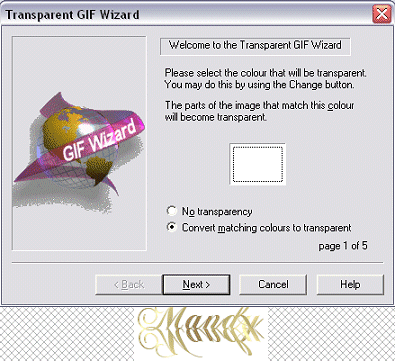
Click
on "next" and you'll go to the
next screen in the wizard:
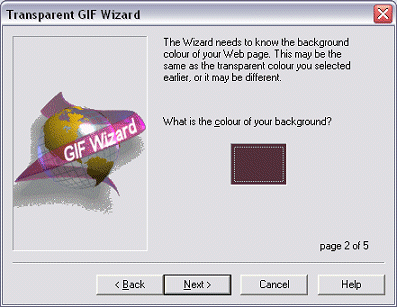
This screen is asking you
what colour the background on your webpage
is. You can only choose solid
colours, so try and choose a colour that
is as close as possible - it doesn't
matter if it isn't exact... I've chosen a
similar solid colour to this background:
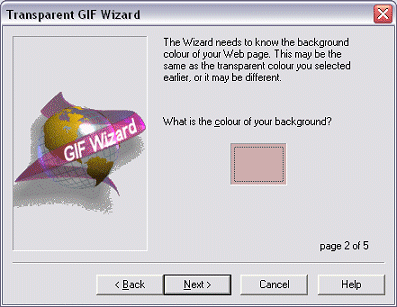
When you've chosen your
colour, hit "next" and you'll go
to the next screen of the wizard.
There are only certain colours that
webpages can display in certain browsers -
this screen is asking you if you only want
to use those colours. We don't, so
choose the "No, choose the best
colours" option, then hit
"Next":
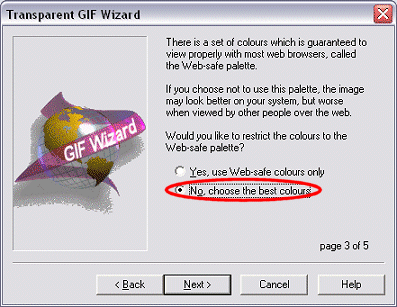
This
screen is asking you about the quality you
want for your image - we want it to look
as clear as possible, so make sure the
scroll bar is as high up as possible, then
hit "Next":
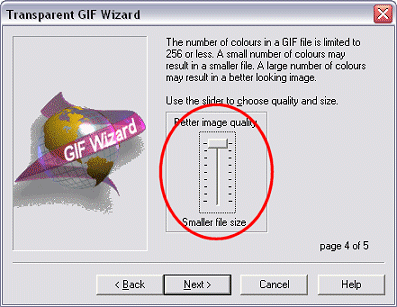
This
screen gives you a preview of how your
image will look. You can zoom in and
out using the "+" and
"-" signs under the preview pane
to show more or less detail. If you
are happy with how it looks, hit
"Finish", if not, just hit
"back" until you get to the
screen where you want to change something
and just follow the steps again until you
are happy with it... there may still be
some flecks around the outside - if there
are, don't worry about it, that just
sometimes happens... if you use a thicker
font it should take off more of the
flecks:
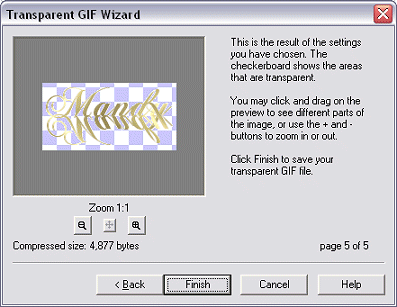
The
next screen asks you where you want to
save it and what you want to call it...
navigate to where you want to save it,
give it a name and hit "OK"
Now
go back to Patti's tutorial and follow the
rest of the steps in her tutorial to
animate it. If you still get the
flecks, don't worry, there's another way
to get around it in PSP and I think
there's a way to get around it in
Animation Shop too but I'll have to have a
bit of a play around with that one 'cos
I've only done it a couple of times :o)