Using
the Magic Wand tool
Now
we're going to try something a little bit
different. We are going to select 3
parts of the image so that whatever we do
to one of the parts, exactly the same
thing happens to all of the selected
parts.
Go
back to your Magic Wand tool

On
your image, single left click on one of
the parts of the image - just like you did
on the 2 circles you've just
filled.

Now
you need to hold down your Shift
key. A tiny "+" will
appear to the side of your cursor - that
means PSP is going to add another section
of the image to the part you've already
selected (the bit with the marching
ants).
While
holding down your Shift key, single left
click on another part of your image so
that you have marching ants around 2
different sections of the image
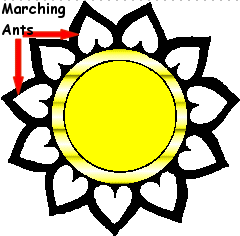
Do
the same again to select your 3rd part of
the image - hold down your Shift key and
single left click on another section of
the image.
You
should now have marching ants around 3
parts of your image.
Go
back to your Flood Fill tool
 and choose whichever colour, gradient or
pattern you want to have in those 3
sections. I'm going to use a pattern
this time.
Click
inside *one* of the selections you've just
made and you'll notice that all 3 of the
parts have been filled in exactly the same
way:

Now
you need to deselect those parts so go to
the Selections Menu and then Select none
(or hit Ctrl D)
As
well as adding different parts to the
selection, you can also take some away
too.
Go
back to your Magic Wand tool again
 ,
hold down your Shift key and select 5
different sections in your image.
I'm going to select the bottom 5

Hmmm.
I've just decided that I don't want to
have those 5 bits all filled in the same
way so I'm going to take some of the parts
out of the selection.
Hold
down your Control (Ctrl) key. You'll
notice that there is a "-" next
to your cursor now (like you had the
"+" when you added the
selections). This means that PSP is
going to take away some of the selected
parts so that they aren't included when
you fill the sections.
While
you are holding down the Control (Ctrl)
key, single left click on one of the parts
you *don't* want selected. The
marching ants will disappear from that
part of your image.
Do
the same again with another section you
don't want selected... this should leave
you with 3 of the original 5 parts of your
image selected.

Go
back to your Flood Fill tool
 and choose another different colour,
gradient or pattern. I'm going to
use a darker shade of solid yellow this
time.
Single
left click in one of the selected parts
and all 3 sections will be filled in the
same way.

You've
finished with these parts now, so you need
to deselect them. See if you can
remember how to do it without looking back
in the tutorial - if you can't, don't
worry... just come back here and have a
look! :o)
Only
4 more sections to go now. Use what
you have learnt in this tutorial to fill
these in any way that you like, using
colours, gradients or
patterns.
This
is what my finished image looks like:
