Open
up image you want to tube.
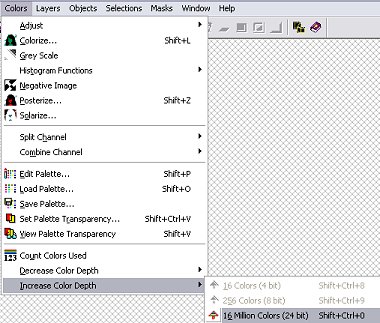
Make
sure there are 16 million colours in
your picture. If not, go to
colours, increase colour depth, 16
million colours
Promote
your graphic to a layer (layers, promote
to layer)
Save
your graphic as a .psp file (there's
method to my madness... honestly!)
Have
a quick check around the outside of your
picture... is there any extra space you
can get rid of before you start making
your tube? There's loads of space
at both sides and at the top of my tube
that I don't like and won't need so I'm
going to crop that out before I
start. This is what I've got now:

Click
on the freehand tool  and use the following settings:

Selection
type: Point to Point
Feather: 0
Antialias: checked
I'm
going to start my tube at the bottom but
you can start wherever is easiest for
you :o)
Using
your freehand tool, single left click
somewhere on the picture (it doesn't
matter where for the moment)... now move
your cursor around your picture without
clicking - you see that line that's
attached from where you clicked to your
cursor? That's what we're going to
be using to make the tube with this
time.
OK,
so to get rid of that line just single
right click (if you've left-clicked at
any point other than that first time
you'll have a line between those 2
points now... just single right click
and hit Undo to get rid of it)
A
little bit of an explanation before we
get stuck in 'cos I won't be able to
take any screenshots to show you this
next bit so I'll do my best to explain
in text what I mean. If you're not
sure, have a bit of a play around with
the tool on the picture first just to
get the hang of it... you can always
re-open your saved .psp file if
something goes wrong!
Soo,
this tool at these settings. What
does it do and what are we going to be
doing with it? Well, in very basic
terms, this tool lets you draw a line
around something that's a really weird
shape (ie anything other than lines,
squares or circles) so that you can
select it and do whatever you need to
with it.
How
do you use it? Well, it takes a
bit of getting used to, but it's a
really useful little tool when you've
got the hang of it!
To
start using it, you take your cursor to
the edge of the picture you want to
select and left click - this is where
you want to start your selection.
From
now on, the tool will be drawing in a
straight line in any direction.
What
about corners and things like
that? Just single left click again
and there will be another
"mark" where you click so that
you can move the line in more directions
from that point. To go in a
circle, you just put lots of these tiny
"marks" all the way around the
circle.
OK,
so you've done that and you've gone all
the way around a section of your picture
and joined it up in a blank bit of space
and you want to stop making these marks
now... but how?!?!
Easy!
Just single right click where the 2 ends
of your line meet and voila! You
have your section selected!! :o)
You
basically just need to remember which
click to do where so a quick summary is:
single
left click to make your "mark"
single right click to finish section and
make selection
Oooh!
That almost rhymes!! Cool!!
lol
OK,
let's get started!


