|
- Make sure all the windows you wish to include in your layout are open. Restore the windows and drag the edges so that the least possible amount of white space is showing around the features of interest.
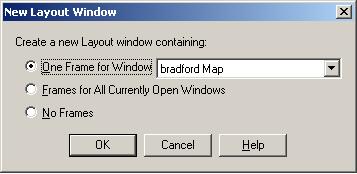
- Select Window > New Layout Window, or alternatively choose the New Layout button on the toolbar. The New Layout dialog box appears.
- If you wish to make a layout containing just one frame, choose the frame from the drop down menu now, and click OK. Creating a layout for one frame is better than printing it directly as you can resize and reorientate it in relation to A4 paper, as well as adding text boxes such as titles.
 If you are including a map in a layout, MapInfo automatically includes its legend. If you are including a map in a layout, MapInfo automatically includes its legend.
- If you already have a number of items which you wish to include in your layout, it is better if no windows other than these are open. Choose Frames for All Currently Open Windows, and click OK. A layout window is produced with all the required frames which may be moved, aligned, and resized.
- If you wish to produce a blank layout, which you may use for text, choose No Frames, and click OK. However, it is probably better to use a word processing package.
|
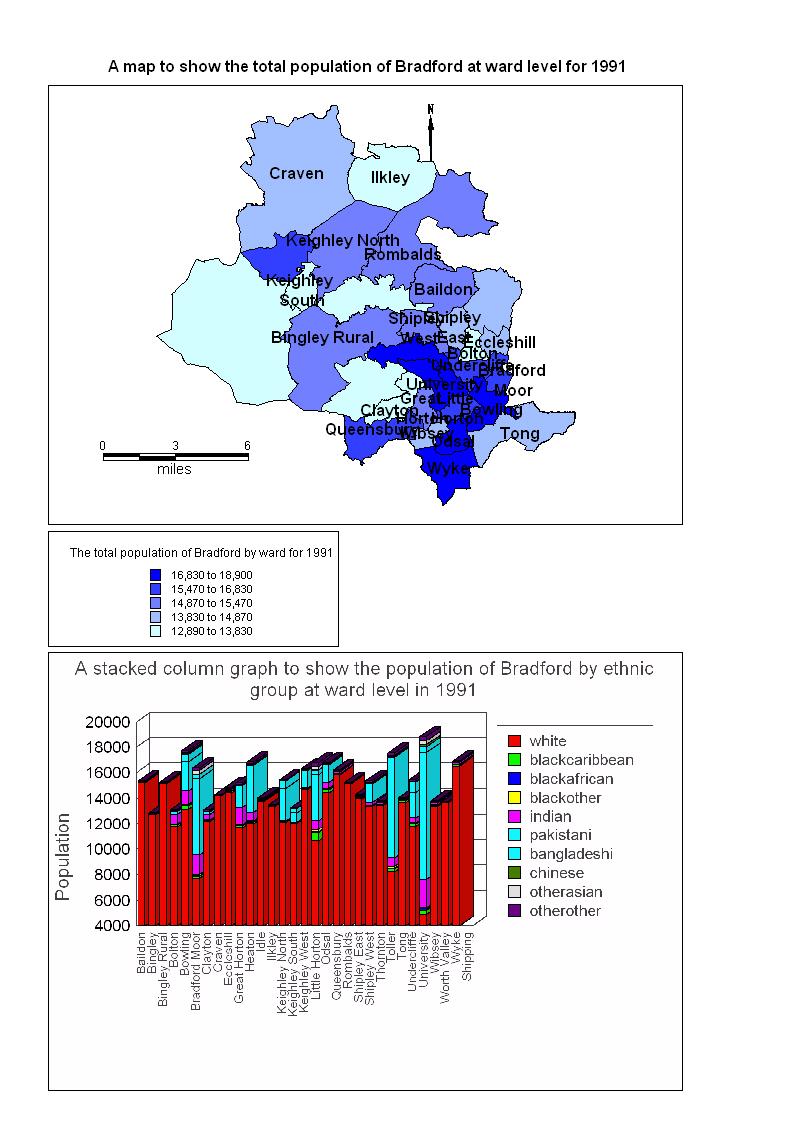
 Scales may be represented in three ways: verbally, such as "one metre equals fifty kilometres", graphically, using a scale bar, and by what is known as a representative fraction, such as 1:50,000. In cartography, it is good practice to include all three representations of scale on a map. However, this is not usually possible for the thematic maps created in software packages such as MapInfo. It is therefore all the more important to include the graphical representation of scale on your maps since the verbal representation and representative fraction are missing.