
Welding the rear-left shock mounting point
In order to weld a new support for the damper at the left rear side first the old
damper had to go out. However, it definitely did not cooperate. After removing the
securing bolt, the second one turned out to be to be rusted in place.
Unable to remove it by friendly means (spanners) or by less friendly means (drill)
finally a friend solved the problem with a grinder.
Then, an easy part was to make a fitting piece of galvanised steel to replace the
rotten part, and drilling a big hole in it. The difficult part however was welding,
or better: getting ourselfes to start doing that. Finally, after taking a lot of
time just thinking of welding, on a rainy sunday morning the job was done.

welding the ft right trailing arm mounting point
When the cars went to APK inspection for the first time, this point that had left
unnoticed was seen by our kind inspector... so some welding was done to strengthen
the car at this point again. Kind of a crowded space and a complicated surface. However
making a piece of metal to fit was not the most difficult thing to do. More problematic
was the rust and tectyl covering all surfaces so that ensuring good electrical contact
for the welder was difficult. Lots of small pieces of welding wire next to the bead
were proof of this...
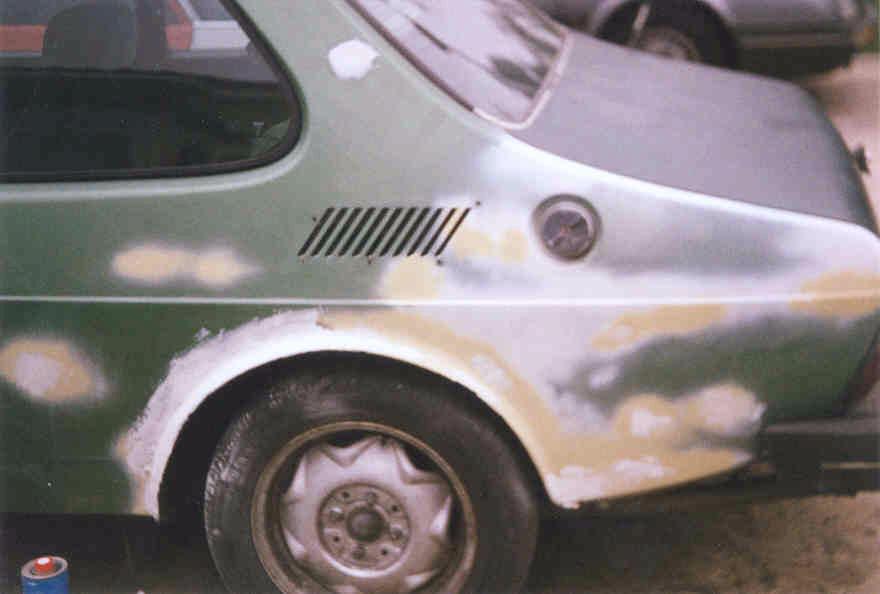
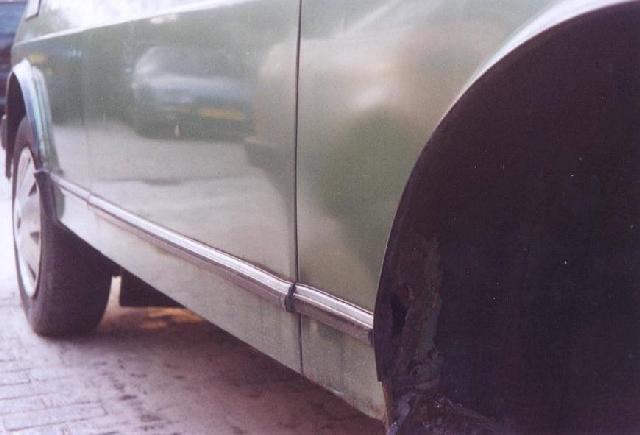
Fixing a few 'small' holes behind the wheelarches
As on many 1978-1981 Saabs rust proofing in this area was not superb and large
holes had appeared in the wheel arch linings, at the line where the wheel arch is welded
to the boot bottom and fender sheets. Generally speaking there are two ways to fix
this: welding a new patch in or patching with glass fibre / polyester.
Due to the easiness of the last option (or the difficulty of welding pieces in
thin sheetmetal) this was chosen. The whole process is rather simple:
Remove all rust, paint and waxoil with a drill-mounted brush and generous amounts
of thinner. The bare metal can now be painted with a stg rust-protective paint
(eg. Hammerite). Inside parts shoul be sprayed generously with waxoil. After drying
and sanding mats of glass fibre weaving are cut to size and polyester resin is
applied, the first mat pushed into the layer and this sequence repeated three times.
After a last layer of polyester the patch is left to harden.

Small dents in the ft-right fender
Next to patching the inside of the wheelarches some small dents have to be removed.
This can be done using filler as well, as they are not really big.
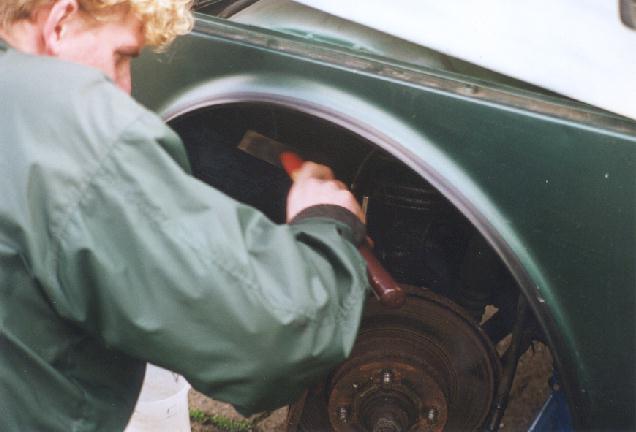
Revising the brakes
Thinking "lets do the easy things first" started with removing the rear brake
caliper, as both rear wheels did not want to turn. (doing so don't forget to
straighten the locking tab that is keeping the caliper mounting bolts fixed.) After taking it apart
disassembling the calipers it appeared the pistons were so stuck in their cylinders
that new calipers + pistons were needed. A reconditioned one appeared to be quite
cheap. Thus the old calipers were written off and replacements bought. Mounting was
really easy as well. After replacing they were bled and ready for use.
This seems to be a typical problems of ft-wheel drive cars with four disk brakes:
the rear ones are so little used they wear too little and rust in place.
The ft brakes are sticking as well, although not as badly as the rear brakes,
and they hold the car very well. However, they needed to be revised to pass the
technical inspection as well. The job paused a long time as we were unable to remove
the 19 mm mounting bolts, as they were rusted in place. First WD 40 penetrating oil
was allowed to do its work for two weeks. Unfortunately, there was no noticeable
effect.
More stringent action was taken and a soldering burner used. Although this worked
perfectly well for removing the brake line the caliper bolts stayed in place.
Finally the bolts were removed by an electrical wrench, supplied by a colleague. In
less than a minute time!...

Replacing rear trailing arm bushings
The rear trailing arm bushings keep the handling of the rear axle as it should be.
The rubber can wear and in that case replacement is easy: the rubber, contained in
a metal casing, is a press-in in the end of the trailing arm. Removal: push out the
middle of the rubber bushing, then make a slit in the remains using a thin saw, and
push this out of the opening. Now use a torch and heat the trailing arm end to make
it expand. When it is hot, quickly insert the new bushing. Upon colling, it will
be stuck in place again.
Fitting a new sealing ring between turbo and exhaust pipe
The square section seal between the turbo and the first part of the exhaust was leaking.
This had to be repaired temporarily for the technical inspection. When refitting a new
ft exhaust pipe the seal will be replaced as well, but it turned out a new pipe is
not easily obtained. So, 'gun gum' was used to close the exhaust again. It sure
created a smoke trail in the first minutes it was driven after this operation...
Fitting a new exhaust
The old exhaust was completely rotted away, so a replacement had to be mounted. A job
like that starts with removing the remains of the old parts, but of coarse those were
securely ruted in place. A morning of patiently hammering the old endpipe and damper
out of the ft pipe yielded an undamaged connection piece, so a 'new' pipe could
be obtained. Good old Elferink
had one left over so that piece was taken home and mounted.
Starting the car (it always starts first time without problems) now results in a
quiet purring from the tailpipe. But hear the sound when the car accellerates...
Replacing the headlights
Another easy job. Small chip in the glass of the headlamp had caused the reflector
to be severely rusted. Replacing a headlamp is just a screw out, screw in job. Too
bad the bolt keeping the trim fixed was so severely rusted. And not only on our car,
but on the donor car as well...
Fixing the headlight main/dipped beam function
This job looked difficult: the illumination worked in a strange way: the car would
either have full beam or no light at all. Thus a wire or relay fault looked obvious,
but finding a broken wire somewhere between dash and light cluster is not that easy.
We started with the easy things first: replace switches and relay. That gave no improvement,
so indeed it was a wire. Accidently wiggling one wire resulted in dipped beam lights
showing so there the searching had to continue. The fault appeared to be the connections
of the yellow wire between (separate) fuse box and the big gray light relay. After some
cleaning all works well again. One item less that can make the car fail it's technical check...
Preventing water ingress in the boot
Working on the car we noticed small puddles of water in the boot and couldn't find
where it came from. It wasn't from the bootlid (no rust in the gutter and seal intact),
and not from water ingress through the rear wheelarches (the car isn't driving yet).
Then we noticed the little drain tubes of the sunroof, ending in the two plastic boxes
behind the interior ventilation grille. So the water is supposed to leave there...
Unfortunately it runs down the side of the boot instead, so some new seal will have
to be improvised. For the time being the little tubes are led out through the ventilation
grille.
Another source of water ingress is the left rear light cluster though. Comparing it
with the right rear light cluster shows the seal between body and light cluster is missing...
Welding the steering column mounting
When having done lots of little jobs we made a prelimary check if the technical
inspection could already been passed. On of the items is that the steering column
should be mounted very rigidly. Checking that, it turned out it was easy to wiggle
this part... Closer inspection learned a mounting point had broken. Probably the
previous owner pushing the car alone, using the wheel...
This job was easily fixed on "welding Sunday" as well...
Repairing the rear window demister
Replacing left and right fusee ball joints
This job was not too easy, as initially the right tools were not present. Starting
with the job is easy: put the car on axle stands, remove the wheels and have a look.
Bolts look rusty, so apply WD 40 and come back one day later. Easy job, as even on
our 20 year old car the bolts holding the ball joints came off easyly after the
pretreatment. They are stainless steel! Nice surprise!
Now the next thing is removing the conical end of the ball joint fom the trailing arm.
According to the book a special tool is needed. And I can confirm: it is!
A phone call to our friendly SAAB dealer (Gol in Veenendaal) convinced him to borrow us
his tool and it was a ten minute job (getting the tool and returning it took almost
two hours though...). Putting the new ones in is even easier, when the jack is put
under the trailing arm to keep the conical part from rotating when fastening the
self-securing nut. Both sides done so one job less on the list!
Replacing the RHS steering ball joint
Basically the same operation as removing the fusee ball joints, but even easier.
Undo securing bolt on steering arm, only a little! Undo nut on ft wheel bearing house. Apply
special SAAB tool FBH (sorry, had to borrow this expression from the Citroen list: means
something as f****** big hammer. Fairly starts with an F too...). Joint comes off.
 Now measure the distance of joint
centre to the end of the threaded part. This determines wheel alignment. Measure this
length on the new part too. The difference is how much the securing bolt on the steering
arm should be moved. Now fit the new joint on the steeing arm until it touches the securing
bolt. Secure. Apply a clamp and firmly hold the conical part in place when fitting
the self-locking nut. Job done (remember to have wheel alignment checked at the next
opportunity as wheel alignment was set in quite a crude way).
Now measure the distance of joint
centre to the end of the threaded part. This determines wheel alignment. Measure this
length on the new part too. The difference is how much the securing bolt on the steering
arm should be moved. Now fit the new joint on the steeing arm until it touches the securing
bolt. Secure. Apply a clamp and firmly hold the conical part in place when fitting
the self-locking nut. Job done (remember to have wheel alignment checked at the next
opportunity as wheel alignment was set in quite a crude way).
Fitting a new glovebox lock
Easy as anything. Straight remove and refit involving one screw only. Any key opens
any lock so no problem there either.
Installing a center console
 Purists won't like
this... however, sometime one has to do something practical (and esthetic as well)
to his old car. In the 99 turbo, a center console was not present yet, meaning
there is no good looking way to install a radio. In the Saab 90 however, such a
console is present. And as the cars are further totally the same, we obtained
the center console from a 90 to be mounted in ft of the gearchange lever.
Now at least the radio looks like it really belongs there...
Purists won't like
this... however, sometime one has to do something practical (and esthetic as well)
to his old car. In the 99 turbo, a center console was not present yet, meaning
there is no good looking way to install a radio. In the Saab 90 however, such a
console is present. And as the cars are further totally the same, we obtained
the center console from a 90 to be mounted in ft of the gearchange lever.
Now at least the radio looks like it really belongs there...
Re-doing the rooflining
When we got the car, the rooflining was hanging down. For those who own a CX as well,
this problem is not unfamiliar. On the CX it was rather easy to reupholster, so
full of optimism the same job was started on the Saab as well. However, on this Saab,
it was not that easy, mainly because of the sunroof...
Removing the headliner was relatively easy, but during removal, the soft glass fibre
backing fell apart. After several attempts to fix it up, the original backing was
thrown out. Idea now was to obtain the backing of a non-sunroof headliner, upholster
it, and, inside the car, cut out the rectangle for the opening and attach it.
This because the fibre backing with the opening would always be too weak to be handled.
(our Saab was fitted with a very wide sunroof, leaving only two centimeters of backing...
So we did, and this worked out quite well. Only problem was that within a week of
reupholstering there was a heavy shower and the sunroof drains could not handle... thus
the cloth got stained.
Unlike the ceiling of a non-sunroof 99, the cloth of this ceiling is tensioned in
the middle, and hanging under the backing, rather than being attached to it, to allow
space for the sunroof to slide. Below two impressions of what the result looked like:


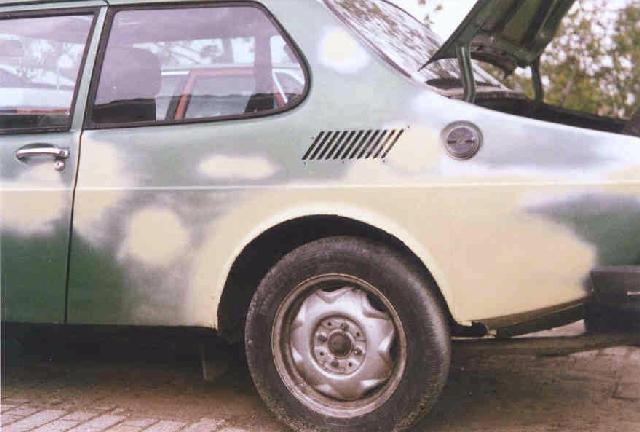
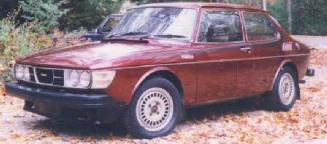
Painting the car
 The only point that can be seen as blasphemy in this restoration... Originally this
99 T was painted Acacia Green (metallic). At the start of the restoration however,
Hannes proposed a darker colour. So after a bit of looking around it became Aston
Martin 'British Racing Green'. A very stylish colour indeed, albeit a bit too dark
to my taste...
The only point that can be seen as blasphemy in this restoration... Originally this
99 T was painted Acacia Green (metallic). At the start of the restoration however,
Hannes proposed a darker colour. So after a bit of looking around it became Aston
Martin 'British Racing Green'. A very stylish colour indeed, albeit a bit too dark
to my taste...
Anyway, the paint was bought and awaiting a smooth sanded body to accept its
application. Having the car ready in the summer of 2001 however, funds started to
be a bit somewhat exhausted, and so was time. So other options were considered. Like
doing the spraying ourselves (where, and when?) or... just using a paintroller and
applying acompletely different paint than the one we had bought...
This is where the Blasphemy word comes in ;-) At the local Do-it-ourselves shop a
soft 'Olive' green was bought, and this was tried out. The result is actually
quite acceptable. So now the question is: leave it like this, or ?
Fitting three new 'turbo' badges
For some mysterious reason, some of the external distinguishing characteristics
of this 99 Turbo were lost: no alloy wheels but steel wheels with hubcaps. And no
'turbo' badges on the hood and tailgate. We feared they might be difficult to obtain,
but Elferink found a set lying
around somewhere...
After repainting the black sides and polishing the faces, they are ready for mounting,
that is: after the car is resprayed.
Fitting a new ft spoiler
Probably due to the Dutch habit of putting sleeping policemen everywhere some
damage is visible at the bottom of the ft airdam. A replacement spoiler was not
available from Elferink so now three options remain open:
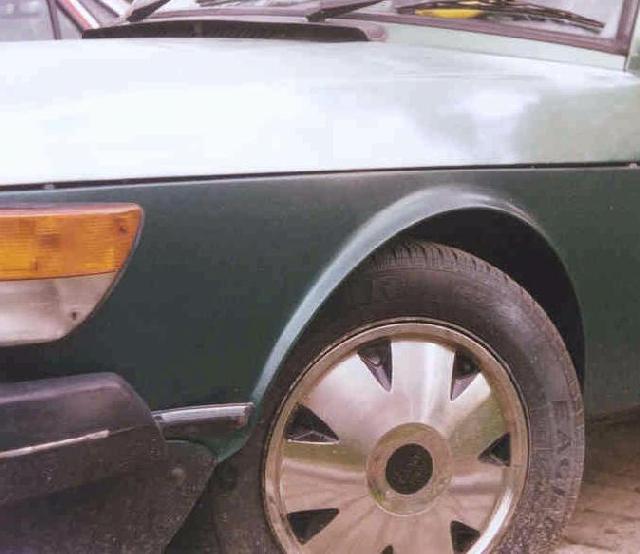
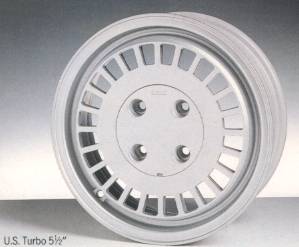
Fitting good looking wheels
At this moment, the car is equipped with steel wheels with hubcaps. I still wonder
how that came to be... Although they do not look too bad, especially not after
polishig and repainting alloys will be fitted soon.
Originally the car was sold with two different types of alloys:


After the paint job, the car looks more or less good (although it still has to be
polished to hide the looks of the unorthodox painting technique...
Upcoming jobs include: finishing the paintwork (adding little items like the air
inlet cover and the little retracting sunroof spoiler), detailing the engine bay,
blackening the bumpers, mounting the flange protection strips, changing the wheels,
fitting the restored rooflining, connecting the heated seats, fixing the right
mirror, repairing the ft spoiler, checking the alternator and the cold start
auxiliary air valve and connecting the headlight washers. Not to mention cleaning
the interior...