Shortcuts for Photoshop are in (Bold brackets).
And the tools like 'Magic Wand' 'Dodge tool' 'Brush' and 'Pencil' are in almost every good graphic programmes like photoshop and paint shop pro. Just search around and you can make a brilliant doll using any tools!
If you need any help feel free to e-mail me at:
mazmetron@googlemail.com
For ideas on hair styles check out my Hair Library
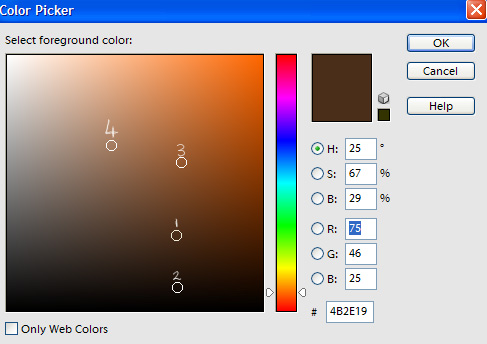
Spectrum:
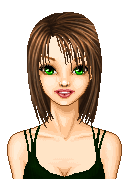
Step 1:
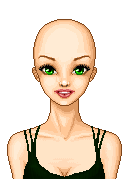
Get your base and doll your clothes (Or you can do them after - whichever. I prefer to do my hair after!) And create another layer for your doll's hair (Ctrl + N + Shft)
The base I have used is by: Apitchou
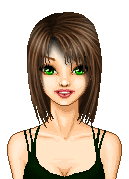
Step 2:
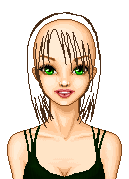
Pixel the outline of your hair using a 1pixel width pencil tool (N) (Colour 1 in the spectrum at the top)
Step 3:
Fill in your lines with the same colour and any adjustments can be made here easily!
Step 4:
I use the magic wand tool (W) with the settings blank (No contiguous, anti-aliased, no use all layers) and click on the hair, this selects it all (Hopefully)
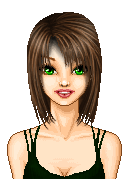
Step 5:
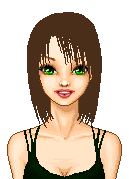
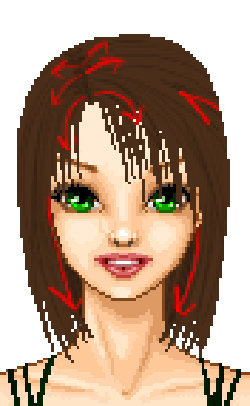 Using a 1 pixel brush tool (B) (The hardest one) select a darker colour than your original hair colour (Colour 2) and (at 100%) use the brush tool to draw in the lines on the hair.
Try to do the stands not every pixel but pick out blocks of hair and then go over them later lightly. This creats a simplified look but doesn't look as fake as every stand trying to be drawn!
Keep on layering up the dark strands until it looks good and then move onto the next step!
Step 6:
Now it's the same again but with a lighter than your original hair colour! Go for a lighter but brighter colour first (Colour 3) and then a greyer tone after (Colour 4).
Like before keep on layering it up in the gaps between the dark strands.
Concentrate on the red area of the hair to create the affect of light shining on the hair. Add as much as you feel you want to do!
Step 7:
Using the Dodge tool (Mine was set at 20px, a soft brush and the exposure set at around 60% but it depends upon your desired affect and the size of your doll) go around the dolls head like before to emphasise the highlights
The two differnt ones I have done are using Midtone highlights and Highlight... highlights... It just depends what affect you want so play around! You can always hit the undo button!
Step 8:
Add and edit to your hearts content! Here I used the Burn tool on the top and bottom and, abviously, added the hair's shadow.
To add a shadow creat a new layer and shift it underneath the hair layer and using the brush tool again get a black colour and use about 60% opacity and a soft brush too. Keep on going until you get it right. You can adjust the opacity of the whole layer afterwards if it goes too dark.
Step 9:
To 'feather' the hair and create a softer look use the brush tool to soften the fringe. Dom't go outside the real lines or else it'll bodge up the gif so if you havn't got a steady hand use the magic wand tool with the all layers turned on, click the background then select inverse.
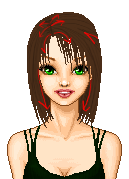
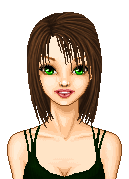
And that's it! I hope my tutorial was even the slightest bit usful and please send any dolls made using this tutorial to the address at the top and I'll post them here! And I'll welcome anyone to point out mistakes I've made or improvements I could do and suggestions for other tutorials!
Thanks for reading!