Ceestar's Photoshop Thingy..
Hey...just a quick run through of how to make animated gif
with Adobe Photoshop 3.0, but it ought to work with any layering program.
I've used a CP9 (One Piece) banner with flashing text as an example,
there is no finished product cause I was only dragging through
the steps as an example.
Finished products are down the bottom.
It's basically the words 'CIPHER POL 9' flashing, one letter
at a time.
Sorry the photos are bad quality, I used paint to scale them ...
Blue writing is the way I did, in
other words if you got a large picture and want to use that exact same picture
to make a smaller banner.
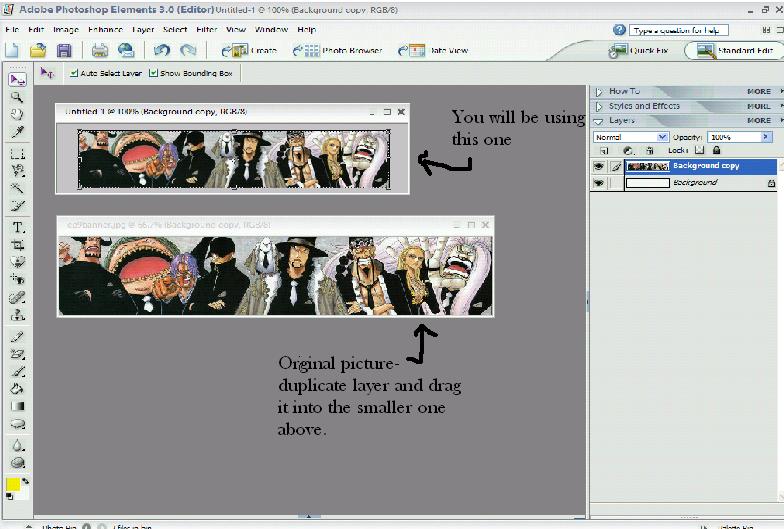
1. Grab the picture you want to use and slap it into
photoshop.
Create a new/blank document with the size you want the finished product to
be in.
Duplicate the layer of the original picture, and drag it into your new document.
Fit and resize where necessary.
The original is a lot bigger than the size
limit for most forums, so I decided to make the smaller one somewhere around 400
by 100-150
The original is 836 by 126
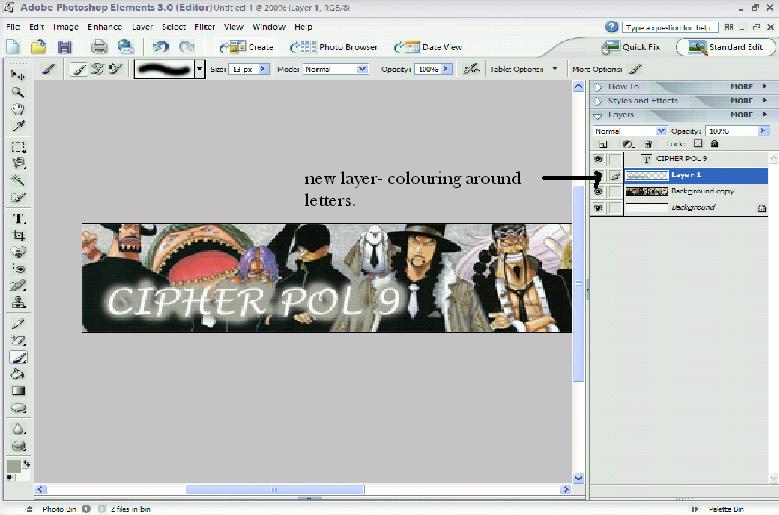
2. Time to add in your text.
Write whatever it is you want to glow
CIPHER POL 9- in my case
Go to layer --> New layer
Place this layer underneath your letters, and pick a nice colour to go with the
colour of your text. Get a small spray brush and just outline the letters so
they are easier to see- you may need to zoom in and a styling tablet makes like
much easier here.
The colouring in this banner are rather dull, so my text will be white with a gray-ish/silver outline
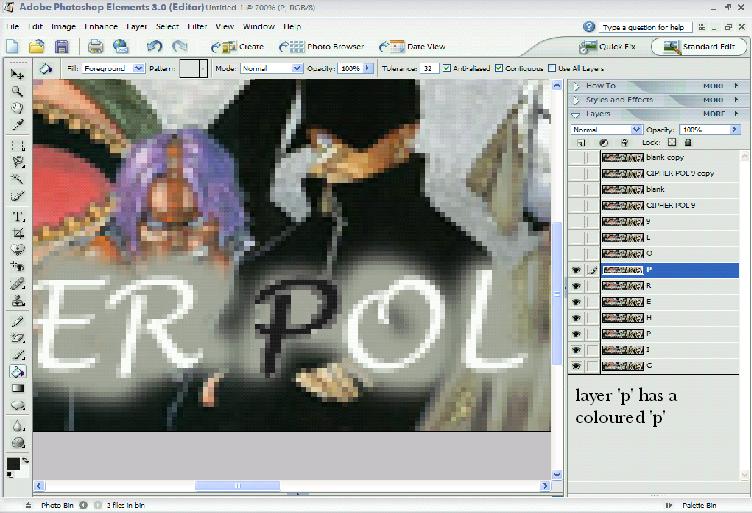
3. Now for the part you can't do on paint.
Once you are happy with how it looks (if you want a border you'll need to do that now..), delete the layer named 'background' if you have one. You could have deleted it at the start but I forgot...
So now you should have everything on one layer...now duplicate
it!
Right click on the layer and duplicate it as many times as you need- one layer
for each letter, and two more.
TIP: You may want to rename each layer to it's allocated
letter, and the two spares you'll name FULL and BLANK
Duplicate FULL and BLANK once more each. With the two FULLs and BLANKs, order
then like this--> (all the letters) FULL BLANK FULL BLANK.
As you can see, I had to duplicate my
layer 14 times.

4. What makes it flash!
Click on each of the little 'eyes' on the side of your layer so that that layer is invisible. Leave the first layer (the 'C')
Colour in the first letter and then move onto your second letter (MAKE SURE YOU ARE ON THE SECOND LAYER) and colour that one.
NOTE: Each layer should ONLY have it's allocated letter! EXCEPT!! ...
With the two FULL layers, colour every layer. With the two BLANK layers...leave them.
So that what it should look like now, don't mind the quality...it's zoomed in.
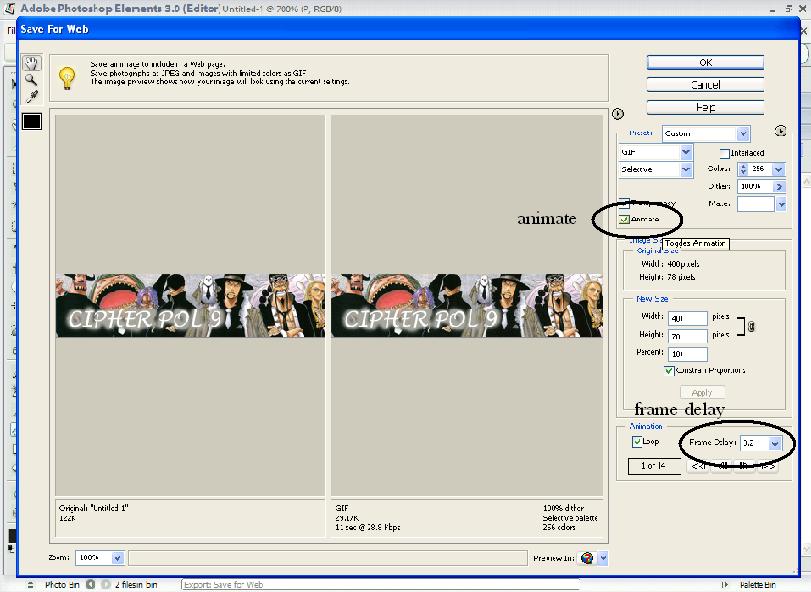
5. The Final Steps!
Once you have done all that, go to File --> Save for Web
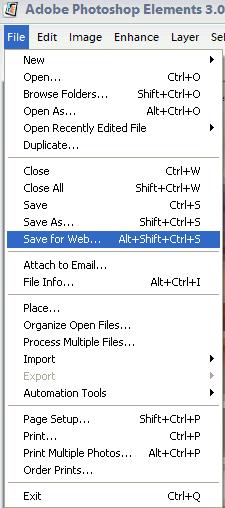
Hit 'Animate' and then choose how long you want each frame
(layer) to stay for. If you want a particular frame to stay longer, duplicate
it.
Don't pay any mind to the two versions shown, doesn't matter at this point.
CONGRATS! YOU'RE DONE!
As I said before, I don't actually have a completed version on the CP9 banner, simply because I only half made that one for screenshots for this tutorial. However, here are some of the completed ones that use the exact same method (only smaller so they can be used as links to sites):
![]() This Sanji one is pretty straight forward, as I said exactly the same as the
tutorial's method.
This Sanji one is pretty straight forward, as I said exactly the same as the
tutorial's method.
![]() With this Shikamaru one I just made a scribble in the back instead of actually
going around the letters.
With this Shikamaru one I just made a scribble in the back instead of actually
going around the letters.
![]() I made this for the Paulie fanlisting.
I made this for the Paulie fanlisting.
![]() This one is different but the method is pretty much the same, but instead of the
layers going -> Z - O - R - O - FULL - BLANK -FULL -BLANK
This one is different but the method is pretty much the same, but instead of the
layers going -> Z - O - R - O - FULL - BLANK -FULL -BLANK
It went like this: BLANK- Z - ZO - ZOR - ZORO - ZOR - ZO - Z - BLANK
If you have any questions, feel free to ask me