
|
 |
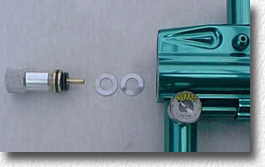 |
LPR AdjustmentThe output pressure of your HP system should be 850 psi, you will not get optimum performance from the gun with a lower pressure. This 850 will be regulated down to around 550psi by the guns in-line reg. The Low Pressure Reg (LPR) inside the gun should be set to 6 bar (90psi). |
| To increase or decrease the LPR pressure, remove the LPR piston and add or subtract the thin shims behind the spring pack. | |
Ram Adjustment |
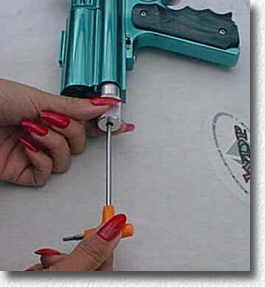 |
| and eventually the gun will stop firing and you will hear a 'clicking' noise. When you hear this 'clicking' turn the snap ring one 1/3 to 1/2 turn anti-clockwise. Your ram snap ring is now in the correct position and your problem will have been deleted. It is far easier to complete this task with a Ram Adjuster Tool, this tool holds the ram body in place while you adjust the snap ring, it also makes removing the Ram a lot easier. | |
Other Ram AdjustmentsThere's a trick to making sure your ram is in the best position in the gun to gain maximum gas efficiency and consistancy. Firstly, open the breech and push the Ram back into the chamber, do this carefully so you don't chop the O-rings. Screw the Ram all the way in and close the Breech so that the bolt pin is now fitting into the groove at the end of the hammer. Then start to tighten the Ram again, after every partial turn, open and close the breech. You are trying to set the Ram so that it opens and closes with a click. This is the ideal position as the bolt pin is sitting on the most rearward point of the hammer. This means that the bolt is fully closed, and the gas hole in the bolt is perfectly in line with the gas hole on the main body, ensuring that all the gas which is released goes down the barrel to propell the ball. |
 |
Dwell AdjustmentThe Angels Valve Dwell is factory set on each gun individually, the only reason you would have for adjusting this is if you have adjusted the input pressure of the gun or if you have altered the working pressure of the L.P.R. inside the gun. To ensure the Dwell time is set correctly first set the gun at a constant velocity, eg. 300fps. Then Turn the Dwell pot (the lower one inside the grip frame) all the way anti-clockwise. Your gun will now be at its least gas efficient setting. Gradually turn the |
| pot clockwise, while firing the gun over a chronograph, you will hear the noise signature of the gun reduce, when the chrono reading starts to decrease turn the pot back anti-clockwise a few degrees and ensure your chrono reading is consistant, the Angel is now at its most gas efficient setting. If you turn the valve dwell down too much you will starve the valve of enough gas to propell the ball at the specified velocity. If the Dwell is set too high the gun will sound very loud and the user will get less shots out of thier gas source. | |
| There are 2 adjustable Pots , in the form of small dials, mounted on the main circuit-board inside the Angels grip frame. The top one electronically adjusts the rate of fire from 6 to 15 shots per second, turn clockwise to increase and anti-clockwise to decrease. The second pot adjusts the valve dwell time (how long the valve stays open for). This controlls the guns gas efficiency. The longer the valve is allowed to stay open the less pressure is needed to propell the ball, allowing you to get more shots from your gas source. The dwell time is independant of the rate of fire. |
Dump Seal Lubrication |
 |
 |
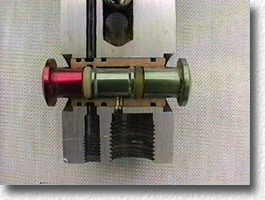
The 14 way valve and Spoolare 2 Angel parts that you will very rarely need to replace. Many Angel users still believe that if they experience a leak from the vent holes at the top of the gun, there is a 14 way problem. This is not so, 99 times out of 100 there is simply a chopped O-ring on the Ram, or there has been a petrolium based lubricant used on the gun which has attacked the Ram seals. |
| Users should always check the Ram seals before anything else, if the leak persists after having changed the seals, check the seals again, it is possible that you have chopped one of the new seals while replacing the Ram. | |
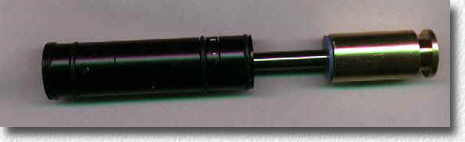 |
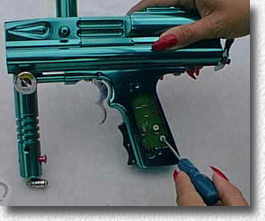
| The Angels Ram is powered by the 14 way valve at 80-90psi, the snap ring is situated at the back of the ram, and is visible when the Angels back-plate is removed. |
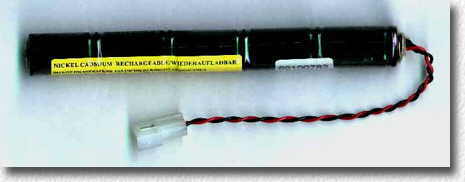 |
| The Angels rechargable Nicad battery is good for 20,000 shots off one charge (5000 when using the VL2001). Always remember to charge the battery for 14 hours upon receipt of the gun, to set the batterys memory cells. |
Other MaintenanceThe Angel is designed to be a relatively low maintenance marker, unlike other guns it is neither necessary or advisable to strip and clean the gun after evry tournament, this will only cause damage to seals as components are removed and then re-installed. For general lubrication just disconnect the microline hose, then drop 2-3 drops of auto-lube into the hose and re-connect, when you gas the gun the lube will travel through the system, lubricating all necessary area's. If you have removed any main components, eg. 14 way valve, ram, or LPR, it is advisable to re-lubricate these with silicone grease before re-installing. One more thing, don't oil the bolt, it's supposed to run dry. |
Trigger AdjustmentTo shorten the trigger stroke adjust item 110 in your manual clockwise, to increase tension adjust item 110 anti-clockwise, remember that the screw must be locktited after adjustment. |
Please feel free to email me if you find any broken links or if you have any suggestions regarding the Links on this page and I will attempt to verify and correct the information within the week.