I have to date only used aluminum and Zinc alloys in my castings. Not exactly ideal materials for a backing plate but I figured I had nothing to loose by trying the backing plate in aluminum. Heck I could use the experience anyhow!

|
I have to date only used aluminum and Zinc alloys in my castings. Not exactly ideal materials for a backing plate but I figured I had nothing to loose by trying the backing plate in aluminum. Heck I could use the experience anyhow! |
|
|
 |
 |
|
|
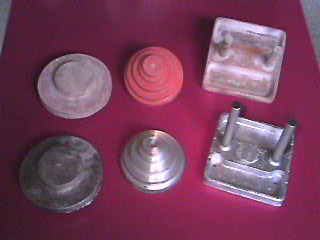
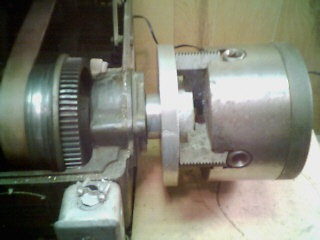
1. Fist things first, we start with a pattern and the
raw casting. The casting we are using is the one on the far left. The other two castings
were to resurrect my drill press. The large hub was used for the set-true feature
of the Buck 6 jaw chuck. There is also a hub on the other side which was machined
to match the spindle on my lathe, in this case 1½" 8 tpi. |
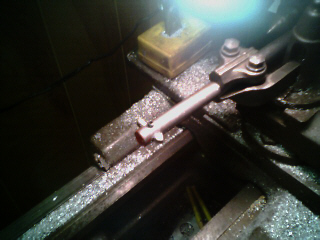
2. Here is my boring bar/internal threading tool. Installed is the 60° threading bit. This is what I used to thread the spindle threads into the backing plate. | ||
 |
 |
||
|
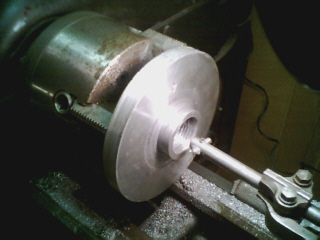
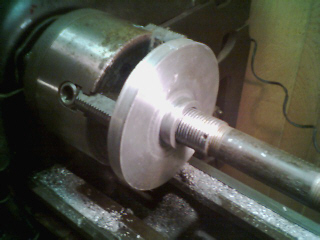
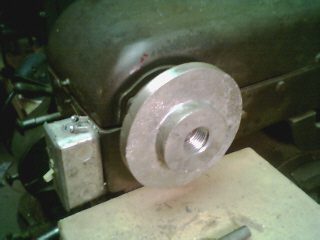
.3. Here I have faced off the back of the chuck and the
hub for a mating surface on the spindle of the lathe. I then bored the center and
have started threading. Notice that the threads start about ½" into the plate
so they won't interfere with the mating of the hub when screwed onto the spindle. |
4. Before starting the backing plate, I created this "replica"
of my spindle threads. It was on a 1" cast iron pipe coupling. The small hole
at the base of the threads is a screw used to prevent the coupling from spinning
on the pipe. Once I got a reliable fit here, I next tested the unit on the spindle
of the lathe. |
||
 |
 |
||
|
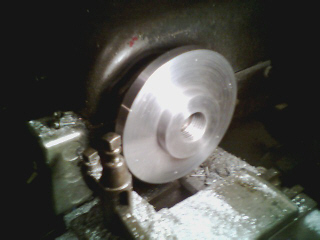
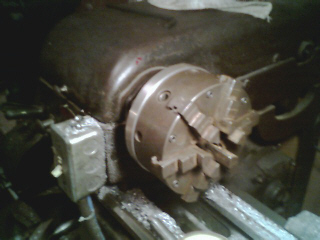
5. Well the first try did the trick. Threaded on nicely
and seated with a satisfactory clunk! Notice I left it mounted in my four jaw chuck,
just in case. This way alignment was maintained should I have needed to return to
threading again. |
6. After releasing the four jaw chuck I put the backing plate back on the lathe for facing and truing it up the hub. | ||
 |
 |
||
|
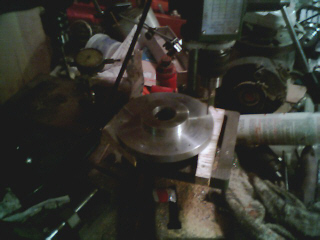
7. Here it is faced trued and the location of the mounting
holes transferred using locating punches. |
8. I then moved to the drill press and drilled and taped the holes for cap head bolts. | ||
 |
|||
| 9. And there you have it. I have used it a couple dozen times so far and the aluminum seems to be holding up just fine. The true-set feature is fantastic. Now to restore that chuck..... Let's see that's number 23456 on the list of projects to go. | |||
|
|