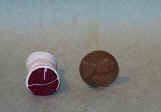
Cooked Roast Class

Supplies Needed:
2 parts terra cotta Fimo and 1 part red Fimo
1/8" ball of ochre Fimo and 1 part Transparent Fimo
Long cutting blade and thick sewing thread
Home oven or toaster oven
Pasta Machine or rolling pin (something you can use to get the clay super thin)
|
- Mix 2 parts terra cotta and 1 part red clay. Continue to mix until you get one uniform
colour. It should be a deep red colour. Wash hands!
- Mix 1/8" ball of ochre to 1 part transparent clay. Continue to mix until you get
one uniform colour. It should be a light browny colour!
- Roll terra cotta/red clay into a long snake that measures 5/8 in diameter. Cut snake
into 1" long cylinders.
- Cut log in half (the long way). Repeat for all roasts you’re making.
- Flatten transparent mix with a pasta machine or rolling pin until you get it very thin.
(Approximately 1/32" thick)
- Lay the transparent clay in between the cut in half logs to form a sandwich. Trim off
any excess clay that overlaps the edges. Add the top back on so you have a log again.
Repeat for all roasts. Wherever you want a streak of fat is where you a sheet of clay.
- Wrap another piece of transparent clay ¾ of the way around the whole log for the fat on
the outside of the roast. Trim off any excess fat with knife.
- Wrap thick sewing thread a few times around each end. Cut thread and repeat for all
roasts.
- Score checkerboard lines on each end to give the roast a rough texture. Bake at 275
degrees for 15 minutes
Instructions provided to Miniature Collectors Club: by Debbie Benninger of D& K Tiny Treasures
As the Author I would appreciate it if you ask for my consent prior to
posting this or any other of my instructions on any websites, message boards, newsletters,
or any other public arena. Thank You!

