Asanas
Asanas are the popular form of physical exercise. Together with pranayama they are the most recognizable form of yoga her in the west. This involves such familiar poses as the headstand, the full lotus, and the sun salutation.
many of thepostures are associated with chakras
, centersof energy and awareness in the body.
 Step by Step
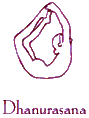
Lie prone on the floor. Stretch your legs back, tops of the feet on the floor. Spread your hands on the floor under your shoulders. Hug the elbows back into your body.
Press the tops of the feet and thighs and the pubis firmly into the floor.
On an inhalation, begin to straighten the arms to lift the chest off the floor, going only to the height at which you can maintain a connection through your pubis to your legs. Press the tailbone toward the pubis and lift the pubis toward the navel. Narrow the hip points. Firm but don't harden the buttocks.
Firm the shoulder blades against the back, puffing the side ribs forward. Lift through the top of the sternum but avoid pushing the front ribs forward, which only hardens the lower back. Distribute the backbend evenly throughout the entire spine.
Hold the pose anywhere from 15 to 30 seconds, breathing easily. Release back to the floor with an exhalation.
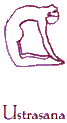
Step by Step
Lie prone on the floor. Stretch your legs back, tops of the feet on the floor. Spread your hands on the floor under your shoulders. Hug the elbows back into your body.
Press the tops of the feet and thighs and the pubis firmly into the floor.
On an inhalation, begin to straighten the arms to lift the chest off the floor, going only to the height at which you can maintain a connection through your pubis to your legs. Press the tailbone toward the pubis and lift the pubis toward the navel. Narrow the hip points. Firm but don't harden the buttocks.
Firm the shoulder blades against the back, puffing the side ribs forward. Lift through the top of the sternum but avoid pushing the front ribs forward, which only hardens the lower back. Distribute the backbend evenly throughout the entire spine.
Hold the pose anywhere from 15 to 30 seconds, breathing easily. Release back to the floor with an exhalation.
 Shavasana is one of the most valuable poses in yoga practice. When we work so hard to stir up our vrittis or mind stuff, to awaken the kundalini force within, it is optimal to allow the body and mind to rest, and for the kundalini, prana and chitti or consciousness to rest and settle in our other energy fields. Shavasana is useful not only on a physical plane , but it also works on the subtle levels. Shavasana is also, as with many Eastern practices, our way of preparing for death, not necessarily the death of the body, but the surrender of ego attachment, which prevents us from our own daily immortality.
After asansa practice, whether mild or strenuous, the physical body has been twisted, stretched, challenged and vitalized. It is important to relax after this and allow the muscles to rejuvenate, to allow the physical body to reduce its tightness and the muscles to relax. In this pose, the spine is able to relax into its natural state. The pelvis is also able to relax. Breathing and heart rate slow down. The inner organs can relax in this pose and the breathing becomes unfettered. It is time to reduce the stress factors in our minds and bodies going back to the source. Although it does not take the place of deep sleep, Shavasana for five to ten minutes can reduce stress and fatigue and prepare the body and mind for other work as well as for rest.
Shavasana, in spite of its' passive appearance is one of the most difficult poses to master. To put the mind and the body in a state of deep relaxation takes practice. It is important to allow this time for relaxation and nothing else. You have twenty-three hours and fifty minutes left in the day for thinking and engaging the capriciousness of the mind and the body. In this pose, it is important to try to become the observer of the breath, mind and body and not identify with it. This posture is a conscious sleep, not to be confused with real sleep. One should not allow oneself to fall asleep in this posture.
Shavasana is one of the most valuable poses in yoga practice. When we work so hard to stir up our vrittis or mind stuff, to awaken the kundalini force within, it is optimal to allow the body and mind to rest, and for the kundalini, prana and chitti or consciousness to rest and settle in our other energy fields. Shavasana is useful not only on a physical plane , but it also works on the subtle levels. Shavasana is also, as with many Eastern practices, our way of preparing for death, not necessarily the death of the body, but the surrender of ego attachment, which prevents us from our own daily immortality.
After asansa practice, whether mild or strenuous, the physical body has been twisted, stretched, challenged and vitalized. It is important to relax after this and allow the muscles to rejuvenate, to allow the physical body to reduce its tightness and the muscles to relax. In this pose, the spine is able to relax into its natural state. The pelvis is also able to relax. Breathing and heart rate slow down. The inner organs can relax in this pose and the breathing becomes unfettered. It is time to reduce the stress factors in our minds and bodies going back to the source. Although it does not take the place of deep sleep, Shavasana for five to ten minutes can reduce stress and fatigue and prepare the body and mind for other work as well as for rest.
Shavasana, in spite of its' passive appearance is one of the most difficult poses to master. To put the mind and the body in a state of deep relaxation takes practice. It is important to allow this time for relaxation and nothing else. You have twenty-three hours and fifty minutes left in the day for thinking and engaging the capriciousness of the mind and the body. In this pose, it is important to try to become the observer of the breath, mind and body and not identify with it. This posture is a conscious sleep, not to be confused with real sleep. One should not allow oneself to fall asleep in this posture.
 To do this pose, lie on the floor on your stomach. Bend the knees and grab hold of the ankles. Inhale, and lift the legs, chest, and head off the floor. Lift the legs up and back to create the opening in the chest and shoulders. Point the feet toward the head, and bring the big toes to touch. Then work on trying to get the heels to touch and, ultimately, the thighs to touch, bringing the entire length of the legs together as one. Lift the head up without crunching the neck back. Keep the arms strong and straight. Hold the pose and breathe. As you exhale, slowly release the body down to the floor, making sure not to drop the body suddenly.
 Hanumanasana
Come to Downward Facing Dog position, inhale and bring the right foot forward to a lunge position, with palms on the floor. Lower the left knee to the floor. Keeping the palms on the floor, on an exhale, straighten the knee of the right leg so the foot is flexed. The hips may need to be drawn back in order to get the front leg straightened. Once the front leg is as straight as possible, breathing freely and evenly, begin to slide the front leg forward. At the same time, allow the back leg to straighten and move back.
The hips are to remain squared to the front; avoid having the left hip turn out. Bring the leg back after staying in the position for a while. Repeat on the other side with left leg coming forward.
Be patient. It usually takes a long time to master this position. Once you have attained the straight legs position, with your buttocks on the floor, raise your hands, fold them in front of the chest, and balance. Advanced pupils may raise the hands above the head, stretch up, put the palms together, and balance.
In Hanumanasana the hip flexor muscles are being stretched as well as the hamstrings. Hanumanasana is also a back bend, when the full position is attained.
Alignment Notes and Common Problems
1. The chest and the hips both face forward. The tendency is to have the hips turn out. You will get lower down this way, but it incorrect alignment. It is better to come up higher and work on squaring the hips so that eventually you will master coming down lower, in the correct alignment, enabling you to attain the full benefits of the pose.
2. Shoulders should remain as relaxed as possible.
3. Breathing fully and allowing the breath to flow through you smoothly and evenly is extremely important. This position is challenging for most people. Holding the breath in this position will increase the chances of injury. If the breath becomes uneven and not calm, do not push deeper into the pose. Stabilize the breath, then continue to work on the pose.
4. Make sure the back foot is pointed and is in line with the back knee (not sticking out).
5. In the advanced variation, when hands are above the head in prayer, the arms stretch back behind the ears. Arms are long and active, fingers together; face and gaze are forward.
Props
One can use a folded blanket between the buttocks and the ground for added support. Blocks can be used underneath the hands. The back foot can be flexed and pressing into a wall. This allows one more control over the squaring of the hips. Blocks can be used under the feet to help slide the legs into the split, but only if one is almost in a full split.
General Notes
1. It is normal for it to be easier to go deeper into the pose on one side than the other.
2. Some days you will be able to go deeper than on other days.
Hanumanasana
Come to Downward Facing Dog position, inhale and bring the right foot forward to a lunge position, with palms on the floor. Lower the left knee to the floor. Keeping the palms on the floor, on an exhale, straighten the knee of the right leg so the foot is flexed. The hips may need to be drawn back in order to get the front leg straightened. Once the front leg is as straight as possible, breathing freely and evenly, begin to slide the front leg forward. At the same time, allow the back leg to straighten and move back.
The hips are to remain squared to the front; avoid having the left hip turn out. Bring the leg back after staying in the position for a while. Repeat on the other side with left leg coming forward.
Be patient. It usually takes a long time to master this position. Once you have attained the straight legs position, with your buttocks on the floor, raise your hands, fold them in front of the chest, and balance. Advanced pupils may raise the hands above the head, stretch up, put the palms together, and balance.
In Hanumanasana the hip flexor muscles are being stretched as well as the hamstrings. Hanumanasana is also a back bend, when the full position is attained.
Alignment Notes and Common Problems
1. The chest and the hips both face forward. The tendency is to have the hips turn out. You will get lower down this way, but it incorrect alignment. It is better to come up higher and work on squaring the hips so that eventually you will master coming down lower, in the correct alignment, enabling you to attain the full benefits of the pose.
2. Shoulders should remain as relaxed as possible.
3. Breathing fully and allowing the breath to flow through you smoothly and evenly is extremely important. This position is challenging for most people. Holding the breath in this position will increase the chances of injury. If the breath becomes uneven and not calm, do not push deeper into the pose. Stabilize the breath, then continue to work on the pose.
4. Make sure the back foot is pointed and is in line with the back knee (not sticking out).
5. In the advanced variation, when hands are above the head in prayer, the arms stretch back behind the ears. Arms are long and active, fingers together; face and gaze are forward.
Props
One can use a folded blanket between the buttocks and the ground for added support. Blocks can be used underneath the hands. The back foot can be flexed and pressing into a wall. This allows one more control over the squaring of the hips. Blocks can be used under the feet to help slide the legs into the split, but only if one is almost in a full split.
General Notes
1. It is normal for it to be easier to go deeper into the pose on one side than the other.
2. Some days you will be able to go deeper than on other days.
 ETYMOLOGY: MATSYENDRA is a term referring to the lord of the fish, and ARDHA means half.
GENERAL GUIDELINES: MATSYENDRASANA and ARDHA MATSYENDRASANA are asana-s bearing this name because the great yogi MATSYENDRANATHA used to practice them most of his time.
ARDHA MATSYENDRASANA is a pose unique in Hatha Yoga, as it transmits to the spine two ways of spinning, to the left and to the right.
EXECUTION AND SUBTLE ENERGY EFFECTS:
In order to practice hatha yoga you need to have experienced supervision; also, being part of a yoga practice group helps. Some asanas have medical counter indications - we urge you not to consider this site a guide to the practice of hatah yoga. We chose not to publish this information on the SivaSakti.COM website; you can find it in the yoga classes organized by our school.
BENEFICIAL EFFECTS
This pose stretches all the muscles and ligaments of the spine.
It prevents the abnormal curves of the spine, and in case they already exist, they will be cured through perseverant practice.
It also prevents or remedies the ossification of the fifth lumbar vertebra.
It prevents the arthritis crisis, pain in the back and even certain forms of sciatica.
Through its benefic action on the chain of sympathetic ganglions placed along the spine, this asana tones the whole organism.
Another notable effect of this asana is the rejuvenation of the physical body.
Its influence on the suprarenal glands and on the thyroid is beneficial.
The compression of the abdomen tones the inner organs, stimulates them and increases the digestive fire.
The constipation is eliminated.
This pose tones the sympathetic nervous system and refreshes the organism.
ETYMOLOGY: MATSYENDRA is a term referring to the lord of the fish, and ARDHA means half.
GENERAL GUIDELINES: MATSYENDRASANA and ARDHA MATSYENDRASANA are asana-s bearing this name because the great yogi MATSYENDRANATHA used to practice them most of his time.
ARDHA MATSYENDRASANA is a pose unique in Hatha Yoga, as it transmits to the spine two ways of spinning, to the left and to the right.
EXECUTION AND SUBTLE ENERGY EFFECTS:
In order to practice hatha yoga you need to have experienced supervision; also, being part of a yoga practice group helps. Some asanas have medical counter indications - we urge you not to consider this site a guide to the practice of hatah yoga. We chose not to publish this information on the SivaSakti.COM website; you can find it in the yoga classes organized by our school.
BENEFICIAL EFFECTS
This pose stretches all the muscles and ligaments of the spine.
It prevents the abnormal curves of the spine, and in case they already exist, they will be cured through perseverant practice.
It also prevents or remedies the ossification of the fifth lumbar vertebra.
It prevents the arthritis crisis, pain in the back and even certain forms of sciatica.
Through its benefic action on the chain of sympathetic ganglions placed along the spine, this asana tones the whole organism.
Another notable effect of this asana is the rejuvenation of the physical body.
Its influence on the suprarenal glands and on the thyroid is beneficial.
The compression of the abdomen tones the inner organs, stimulates them and increases the digestive fire.
The constipation is eliminated.
This pose tones the sympathetic nervous system and refreshes the organism.
 For beginners:
Stand with left fingertips to the wall reaching upwards. Reach back with the right hand and take hold of the right ankle. Inhale and begin to draw the right arm away, creating a nice taut bow between the right ankle and the right arm. The lifted arm on the wall will stabilize the asana as well as prevent the body from falling too far forward. Breathe deeply in this pose for several breaths, the release.
...Or...
Lie on the floor on your abdomen. Stretch the left arm forward, fingertips reaching long in front of you. Bend the right knee and reach back with the right arm and take hold of the right ankle. On an inhale lift the left arm and draw the right heel away, causing the right thigh to lift off the floor as in Dhanurasana (bow pose). The navel presses into the floor as does the left thigh. Try not to let the right hip lift too high off the floor, instead the movement stems from the thigh. Relax the shoulders. Breathe several breaths here, then release.
For advanced students:
Begin the same way as the first example, but instead of taking hold of the ankle, reach the right arm back and take hold of the right foot. As you begin to raise the leg and draw the arm back rotate the shoulder so the elbow moves upward. You should end with the elbow pointing straight up. Work to relax the right shoulder down away from the ear. Keep dropping the right hip down and the right shoulder forward. For students wishing to continue, reach your left arm back and take hold of the right foot with the same shoulder rotation as the right arm. Continue to press down in the inner edge of the left foot. Keep straightening the left leg. Relax the shoulders and breathe deeply for several breaths before coming out of the pose.
For beginners:
Stand with left fingertips to the wall reaching upwards. Reach back with the right hand and take hold of the right ankle. Inhale and begin to draw the right arm away, creating a nice taut bow between the right ankle and the right arm. The lifted arm on the wall will stabilize the asana as well as prevent the body from falling too far forward. Breathe deeply in this pose for several breaths, the release.
...Or...
Lie on the floor on your abdomen. Stretch the left arm forward, fingertips reaching long in front of you. Bend the right knee and reach back with the right arm and take hold of the right ankle. On an inhale lift the left arm and draw the right heel away, causing the right thigh to lift off the floor as in Dhanurasana (bow pose). The navel presses into the floor as does the left thigh. Try not to let the right hip lift too high off the floor, instead the movement stems from the thigh. Relax the shoulders. Breathe several breaths here, then release.
For advanced students:
Begin the same way as the first example, but instead of taking hold of the ankle, reach the right arm back and take hold of the right foot. As you begin to raise the leg and draw the arm back rotate the shoulder so the elbow moves upward. You should end with the elbow pointing straight up. Work to relax the right shoulder down away from the ear. Keep dropping the right hip down and the right shoulder forward. For students wishing to continue, reach your left arm back and take hold of the right foot with the same shoulder rotation as the right arm. Continue to press down in the inner edge of the left foot. Keep straightening the left leg. Relax the shoulders and breathe deeply for several breaths before coming out of the pose.
 Getting into Pincha Mayurasana
A block may be used to keep the forearms grounding down and the shoulders and elbows in line. Place the block against the wall, thumbs in front, first finger alongside.
Come into downward facing dog legs with forearms on the floor. Look forward towards the top edge of the block.
Step one foot in, bend the knee. The other leg stays straight acting as a lever. On an inhale, kick the leg overhead and let the other leg follow.
Come to balance with the heels reaching up the wall, forearms pressing down, shoulders moving away from the floor.
Practice balancing in the center of the room away from the wall.
Getting into Pincha Mayurasana
A block may be used to keep the forearms grounding down and the shoulders and elbows in line. Place the block against the wall, thumbs in front, first finger alongside.
Come into downward facing dog legs with forearms on the floor. Look forward towards the top edge of the block.
Step one foot in, bend the knee. The other leg stays straight acting as a lever. On an inhale, kick the leg overhead and let the other leg follow.
Come to balance with the heels reaching up the wall, forearms pressing down, shoulders moving away from the floor.
Practice balancing in the center of the room away from the wall.
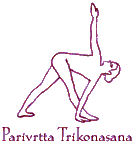 Revolved triangle improves flexibility in the hips, shoulders, legs and back. Revolved triangle improves balance, focus and core body strength.
From five pointed star, turn the right toes to the right wall and the left toes slightly inwards. Turn the torso to face the right wall, twisting at the hips.
Bring the left hand down to the floor, and if possible crossing to the right side of the right foot. Reach the right hand up towards the ceiling, bringing the arms into a straight line, with the shoulders one on top of each other. Look at the right wall or up at the ceiling.
Press into the feet, pulling up the knee caps, keeping the legs strong and straight.
Breathe and hold for 3-6 breaths.
To release: inhale pressing into the feet, lifting up with the left hand and untwisting the hips moving back into 5 pointed star.
Repeat on other side
Revolved triangle improves flexibility in the hips, shoulders, legs and back. Revolved triangle improves balance, focus and core body strength.
From five pointed star, turn the right toes to the right wall and the left toes slightly inwards. Turn the torso to face the right wall, twisting at the hips.
Bring the left hand down to the floor, and if possible crossing to the right side of the right foot. Reach the right hand up towards the ceiling, bringing the arms into a straight line, with the shoulders one on top of each other. Look at the right wall or up at the ceiling.
Press into the feet, pulling up the knee caps, keeping the legs strong and straight.
Breathe and hold for 3-6 breaths.
To release: inhale pressing into the feet, lifting up with the left hand and untwisting the hips moving back into 5 pointed star.
Repeat on other side
 Instructional Steps:
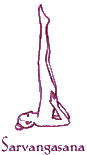
Lie flat on your back, with your feet together, stretching the torso long.
(Optional) Using a belt, loop the belt and thread your upper arms into the belt and bring the belt just above your elbows on your upper arm (a strap around the upper arms will keep your elbows from splaying). Make sure you are on a non-slip surface to keep arms and elbows in place.
Inhaling, lift both legs together towards the ceiling to a perpendicular position. Raise the legs together gracefully until they are on about a 45-degree angle to the ground. Then lift the buttocks, trunk and legs up to a 90-degree position, and raise the body upward in a gradual way.
Students with less flexibility can use the floor to help go up until the legs are straight.
Advanced students can lift the legs straight up.
Rest the elbows on the ground firmly and support the back with both the palms and fingertips spread out wide pointing towards your buttock. Tuck your tailbone in and keep pulling the abdominal muscles in, rooting the tailbone in and up to keep the pelvis from tipping backward. Draw navel-point in and reach tailbone towards the heels. Let the legs separate a bit and turn them strongly inward (inner thighs rolling to the back of the legs), then stretch the tailbone up and squeeze the inner thighs together, stretching your cervical and thoracic regions.
Bend the elbows, striving to keep them shoulder-width apart, and place the hands on the upper back to assist in lifting the torso. Straighten the trunk with the hands until the chin is well set in the hollow of the neck, not locked. Keep your hands pressing firmly into the back, the heals of your hands reaching towards your shoulder blades and fingers facing up towards your head to keep the elbows from splaying out.
Roll each shoulder under to increase the weight onto the shoulders, and lift your thoracic spine in a vertical position. The arms and shoulders should primarily support the weight of the body; the head is light against the floor.
Bring the breastbone towards the chin, aligning the chin with the center of the breastbone, but don�t lock your chin into your neck. Relax the neck and draw the palate (roof of the mouth) back away from the chin.
Extend the groin and inner legs, feet up, and tighten the back thigh muscles to keep the legs vertical. Move the sacrum in, the pubis and tailbone up. Lengthen inner legs, heels and balls of feet as you ground down through the shoulders and elbows.
Stay and breathe.
On the exhale, gradually move the palms towards the hips and let the body come down slowly to the floor for a smooth return. When the hips touch the ground, slowly lower the legs, bending the knees if you need to protect your lower back. Place your palms on the floor on both sides of the body and unroll your body, vertebra by vertebra, to the floor. Release your hands from the back, extend your legs on the floor and unfold as one unrolls a carpet. When your entire back touches the floor, straighten the knees slowly and lower your legs and rest, moving off the blankets.
Instructional Steps:
Lie flat on your back, with your feet together, stretching the torso long.
(Optional) Using a belt, loop the belt and thread your upper arms into the belt and bring the belt just above your elbows on your upper arm (a strap around the upper arms will keep your elbows from splaying). Make sure you are on a non-slip surface to keep arms and elbows in place.
Inhaling, lift both legs together towards the ceiling to a perpendicular position. Raise the legs together gracefully until they are on about a 45-degree angle to the ground. Then lift the buttocks, trunk and legs up to a 90-degree position, and raise the body upward in a gradual way.
Students with less flexibility can use the floor to help go up until the legs are straight.
Advanced students can lift the legs straight up.
Rest the elbows on the ground firmly and support the back with both the palms and fingertips spread out wide pointing towards your buttock. Tuck your tailbone in and keep pulling the abdominal muscles in, rooting the tailbone in and up to keep the pelvis from tipping backward. Draw navel-point in and reach tailbone towards the heels. Let the legs separate a bit and turn them strongly inward (inner thighs rolling to the back of the legs), then stretch the tailbone up and squeeze the inner thighs together, stretching your cervical and thoracic regions.
Bend the elbows, striving to keep them shoulder-width apart, and place the hands on the upper back to assist in lifting the torso. Straighten the trunk with the hands until the chin is well set in the hollow of the neck, not locked. Keep your hands pressing firmly into the back, the heals of your hands reaching towards your shoulder blades and fingers facing up towards your head to keep the elbows from splaying out.
Roll each shoulder under to increase the weight onto the shoulders, and lift your thoracic spine in a vertical position. The arms and shoulders should primarily support the weight of the body; the head is light against the floor.
Bring the breastbone towards the chin, aligning the chin with the center of the breastbone, but don�t lock your chin into your neck. Relax the neck and draw the palate (roof of the mouth) back away from the chin.
Extend the groin and inner legs, feet up, and tighten the back thigh muscles to keep the legs vertical. Move the sacrum in, the pubis and tailbone up. Lengthen inner legs, heels and balls of feet as you ground down through the shoulders and elbows.
Stay and breathe.
On the exhale, gradually move the palms towards the hips and let the body come down slowly to the floor for a smooth return. When the hips touch the ground, slowly lower the legs, bending the knees if you need to protect your lower back. Place your palms on the floor on both sides of the body and unroll your body, vertebra by vertebra, to the floor. Release your hands from the back, extend your legs on the floor and unfold as one unrolls a carpet. When your entire back touches the floor, straighten the knees slowly and lower your legs and rest, moving off the blankets.
 PREPARATION
(It's recommended to use some type of padding for the head, hands and forearms in this pose; a folded mat or blanket work well.)
Kneeling on the floor, clasp your hands so that the fingers interlace right up to the base of each finger. Creating a cup in between the palms, as if you were gripping a tennis ball. The pinkie finger on the right hand is tucked inside so that an even edge is created on the base of the hand. Most important is the space between the elbows. The distance should be no wider than the shoulders. It is very important to keep this spacing intact for the duration of the pose. The space can be measured many ways, the final desired result should allow the head to fit in the apex of the triangle created with the sides of the head grazing the forearms.
Keeping your arms firmly planted into the ground, place the top of your skull onto the mat so that it is nestled up against your cupped hands. It is important that the crown of the head becomes the base of the pose not the forehead or back of the head. The crown of the head can be found by placing the right palm of the hand on the forehead and allowing the fingers to spread over the crown of the head, where the tip of the middle finger lands is basically the crown of the head. This point should line up with the ears as well.
With the crown of the head on the floor, extend the legs so that you are on the toes similar to the leg position in Downward Facing Dog. Slowly begin to walk the feet toward the head. When you feel the hips lining up with the shoulders, the shoulder coming over the ears, stop and breathe. Bring the attention to the shoulders. It is very important that the shoulders are lifted and spread as wide as possible and as far from the floor as possible. When the center of the head is down, you should be able to see the ceiling similar to seeing the floor in Tadasana.
With the shoulder blades lifted and moving firmly up the back engage Mulabandha and on the inhale lift the straight leg above the head. A straight legged ascent is ideal so that the blood flow to the brain is even. However if it is not possible, first bend the lifted knees to the chest and on the inhale straighten and lift the legs over the head.
If a wall is needed, place the head no more than two to three inches from the wall and follow steps one through four. Positioning yourself next to the wall prevents the back from swaying and the ribs and pelvis from popping out.
ALIGNMENT
The whole weight of the body should be on the head, until this is perfected, make sure the weight is evenly distributed over both forearms and the crown of the head. If perfect balance is achieved it is said to feel weightless. Similar to the feeling we have when standing. We do not feel the intense pressure on the joints of the feet and ankles when standing, this should be the sensation in headstand.
The back of the head, the trunk, the back of the thighs and the heels should be in a line perpendicular to the floor and not inclined to one side. The throat, chin and breast bone should be in line. The tops and bottoms of the hands should also be on top of each other. This way the cupped hands will not adversely affect the position of the head.
The trunk from the pelvis to the waist should be kept perpendicular. If the pelvic area or the floating ribs are jutted forward or back it translates to the head and neck, bringing the body out of balance and putting too much weight onto the neck and/or all the weight onto the forearms causing the arms to strain.
The legs should be joined and ankles should be together with the toes pointed. The inner edges of the legs should be constantly lengthening toward the ceiling. Both sides of the body should be even and working together to lift the legs and trunk upward.
COMMON PROBLEMS
The elbows either start in a position that is too wide or are allowed to splay open causing for poor weight distribution and loss of balance, and possible neck damage.
Legs and torso are too far forward, back, left, or right causing strain on the neck and/ or shoulders.
Legs are not engaged; Mulabandha not lifting, allowing too much pressure to come onto the skull.
Breathing is not even, causing pranic blockage and general discomfort.
ADJUSTMENTS
Suggest a lift in the shoulders.
Place a fist in between the legs to encourage activation of inner legs which results in lift.
Place a leg on the spine helping to correct the alignment of the entire body while gently lifting from the ankles.
PROPS
The wall for balance, even for advanced students when trying variations.
Block between legs, placed by a partner to feel lift in the inner legs.
Padding for the head, neck and arms.
There should be a constant lift upward that is happening, engaging Mulabandha in this pose is very in creating and feeling this lift. The gaze should eventually be brought to the tip of the nose.
The time one stays in Headstand varies. A beginner should stay for at least 25 breaths, intermediate 50-75 breaths and more advanced students can stay in for 100 breaths or up to ten minutes.
When coming down, it is best to keep the legs straight and slowly descend touching the toes on the floor, bending the knees. Without lifting the head, come to Child's Pose for at least 5 breaths. If straight legs are impossible, bend the knees to the chest and come into Child's Pose.
It is not advised to practice this pose if one is menstruating, has high blood pressure, heart problems, detached retinas, or ear problems. If one has a neck injury, it is advisable to have it looked at before coming into full balance. Pregnant women should be supported in this pose either with the wall or a partner. If discomfort occurs, come down.
PREPARATION
(It's recommended to use some type of padding for the head, hands and forearms in this pose; a folded mat or blanket work well.)
Kneeling on the floor, clasp your hands so that the fingers interlace right up to the base of each finger. Creating a cup in between the palms, as if you were gripping a tennis ball. The pinkie finger on the right hand is tucked inside so that an even edge is created on the base of the hand. Most important is the space between the elbows. The distance should be no wider than the shoulders. It is very important to keep this spacing intact for the duration of the pose. The space can be measured many ways, the final desired result should allow the head to fit in the apex of the triangle created with the sides of the head grazing the forearms.
Keeping your arms firmly planted into the ground, place the top of your skull onto the mat so that it is nestled up against your cupped hands. It is important that the crown of the head becomes the base of the pose not the forehead or back of the head. The crown of the head can be found by placing the right palm of the hand on the forehead and allowing the fingers to spread over the crown of the head, where the tip of the middle finger lands is basically the crown of the head. This point should line up with the ears as well.
With the crown of the head on the floor, extend the legs so that you are on the toes similar to the leg position in Downward Facing Dog. Slowly begin to walk the feet toward the head. When you feel the hips lining up with the shoulders, the shoulder coming over the ears, stop and breathe. Bring the attention to the shoulders. It is very important that the shoulders are lifted and spread as wide as possible and as far from the floor as possible. When the center of the head is down, you should be able to see the ceiling similar to seeing the floor in Tadasana.
With the shoulder blades lifted and moving firmly up the back engage Mulabandha and on the inhale lift the straight leg above the head. A straight legged ascent is ideal so that the blood flow to the brain is even. However if it is not possible, first bend the lifted knees to the chest and on the inhale straighten and lift the legs over the head.
If a wall is needed, place the head no more than two to three inches from the wall and follow steps one through four. Positioning yourself next to the wall prevents the back from swaying and the ribs and pelvis from popping out.
ALIGNMENT
The whole weight of the body should be on the head, until this is perfected, make sure the weight is evenly distributed over both forearms and the crown of the head. If perfect balance is achieved it is said to feel weightless. Similar to the feeling we have when standing. We do not feel the intense pressure on the joints of the feet and ankles when standing, this should be the sensation in headstand.
The back of the head, the trunk, the back of the thighs and the heels should be in a line perpendicular to the floor and not inclined to one side. The throat, chin and breast bone should be in line. The tops and bottoms of the hands should also be on top of each other. This way the cupped hands will not adversely affect the position of the head.
The trunk from the pelvis to the waist should be kept perpendicular. If the pelvic area or the floating ribs are jutted forward or back it translates to the head and neck, bringing the body out of balance and putting too much weight onto the neck and/or all the weight onto the forearms causing the arms to strain.
The legs should be joined and ankles should be together with the toes pointed. The inner edges of the legs should be constantly lengthening toward the ceiling. Both sides of the body should be even and working together to lift the legs and trunk upward.
COMMON PROBLEMS
The elbows either start in a position that is too wide or are allowed to splay open causing for poor weight distribution and loss of balance, and possible neck damage.
Legs and torso are too far forward, back, left, or right causing strain on the neck and/ or shoulders.
Legs are not engaged; Mulabandha not lifting, allowing too much pressure to come onto the skull.
Breathing is not even, causing pranic blockage and general discomfort.
ADJUSTMENTS
Suggest a lift in the shoulders.
Place a fist in between the legs to encourage activation of inner legs which results in lift.
Place a leg on the spine helping to correct the alignment of the entire body while gently lifting from the ankles.
PROPS
The wall for balance, even for advanced students when trying variations.
Block between legs, placed by a partner to feel lift in the inner legs.
Padding for the head, neck and arms.
There should be a constant lift upward that is happening, engaging Mulabandha in this pose is very in creating and feeling this lift. The gaze should eventually be brought to the tip of the nose.
The time one stays in Headstand varies. A beginner should stay for at least 25 breaths, intermediate 50-75 breaths and more advanced students can stay in for 100 breaths or up to ten minutes.
When coming down, it is best to keep the legs straight and slowly descend touching the toes on the floor, bending the knees. Without lifting the head, come to Child's Pose for at least 5 breaths. If straight legs are impossible, bend the knees to the chest and come into Child's Pose.
It is not advised to practice this pose if one is menstruating, has high blood pressure, heart problems, detached retinas, or ear problems. If one has a neck injury, it is advisable to have it looked at before coming into full balance. Pregnant women should be supported in this pose either with the wall or a partner. If discomfort occurs, come down.
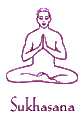 Sit on a folded blanket or mat with your sitting bones toward the center of the mat, so that your pelvis isn't tilted too far forward. Cross your legs comfortably, knees and lower legs off the mat. Feet should be pointed slightly rather than flexed (along the line of your shin), which relaxes the leg muscles allowing the knees to release further down into the ground. Use your hands to pull the flesh away from your buttocks so that you are sitting up on the sitting bones (ischial processes). Sit as tall as possible, with the lower part of your back forming a gentle arch. If you lower back is rounded or your knees are higher than your pelvis, you need a thicker blanket. Lengthen the tailbone down into the mat and draw the lower belly in and up. Place your hands, palms upward, on your thighs with the arms perpendicular to the floor. Close your eyes and concentrate on the rhythm and flow of your inhalation and exhalation. On each exhalation allow your body to release further down into the earth, and feel your own intimate connection with the universe. Feel the lightness of the spine as it appears to float upward, and feel the lightness in your heart on each inhalation.
 Kneel on the floor with your knees hip width and thighs perpendicular to the floor. Rotate your thighs inward slightly, narrow your hip points, and firm but don't harden your buttocks. Imagine that you're drawing your sitting bones up, into your torso. Keep your outer hips as soft as possible. Press your shins and the tops of your feet firmly into floor.
Rest your hands on the back of your pelvis, bases of the palms on the tops of the buttocks, fingers pointing down. Use your hands to spread the back pelvis and lengthen it down through your tail bone. Then lightly firm the tail forward, toward the pubis. Make sure though that your front groins don't "puff" forward. To prevent this, press your front thighs back, countering the forward action of your tail. Inhale and lift your heart by pressing the shoulder blades against your back ribs.
Now lean back against the firmness of the tail bone and shoulder blades. For the time being keep your head up, chin near the sternum, and your hands on the pelvis. Beginners probably won't be able to drop straight back into this pose, touching the hands to the feet simultaneously while keeping the thighs perpendicular to the floor. If you need to, tilt the thighs back a little from the perpendicular and minimally twist to one side to get one hand on the same-side foot. Then press your thighs back to perpendicular, turn your torso back to neutral, and touch the second hand to its foot. If you're not able to touch your feet without compressing your lower back, turn your toes under and elevate your heels.
See that your lower front ribs aren't protruding sharply toward the ceiling, which hardens the belly and compresses the lower back. Release the front ribs and lift the front of the pelvis up, toward the ribs. Then lift the lower back ribs away from the pelvis to keep the lower spine as long as possible. Press your palms firmly against your soles (or heels), with the bases of the palms on the heels and the fingers pointing toward the toes. Turn your arms outwardly so the elbow creases face forward, without squeezing the shoulder blades together. You can keep your neck in a relatively neutral position, neither flexed nor extended, or drop your head back. But be careful not to strain your neck and harden your throat.
Stay in this pose anywhere from 30 seconds to a minute. To exit, bring your hands onto the front of your pelvis, at the hip points. Inhale and lift the head and torso up by pushing the hip points down, toward the floor. If your head is back, lead with your heart to come up, not by jutting the chin toward the ceiling and leading with your brain. Rest in Child's Pose for a few breaths.
Kneel on the floor with your knees hip width and thighs perpendicular to the floor. Rotate your thighs inward slightly, narrow your hip points, and firm but don't harden your buttocks. Imagine that you're drawing your sitting bones up, into your torso. Keep your outer hips as soft as possible. Press your shins and the tops of your feet firmly into floor.
Rest your hands on the back of your pelvis, bases of the palms on the tops of the buttocks, fingers pointing down. Use your hands to spread the back pelvis and lengthen it down through your tail bone. Then lightly firm the tail forward, toward the pubis. Make sure though that your front groins don't "puff" forward. To prevent this, press your front thighs back, countering the forward action of your tail. Inhale and lift your heart by pressing the shoulder blades against your back ribs.
Now lean back against the firmness of the tail bone and shoulder blades. For the time being keep your head up, chin near the sternum, and your hands on the pelvis. Beginners probably won't be able to drop straight back into this pose, touching the hands to the feet simultaneously while keeping the thighs perpendicular to the floor. If you need to, tilt the thighs back a little from the perpendicular and minimally twist to one side to get one hand on the same-side foot. Then press your thighs back to perpendicular, turn your torso back to neutral, and touch the second hand to its foot. If you're not able to touch your feet without compressing your lower back, turn your toes under and elevate your heels.
See that your lower front ribs aren't protruding sharply toward the ceiling, which hardens the belly and compresses the lower back. Release the front ribs and lift the front of the pelvis up, toward the ribs. Then lift the lower back ribs away from the pelvis to keep the lower spine as long as possible. Press your palms firmly against your soles (or heels), with the bases of the palms on the heels and the fingers pointing toward the toes. Turn your arms outwardly so the elbow creases face forward, without squeezing the shoulder blades together. You can keep your neck in a relatively neutral position, neither flexed nor extended, or drop your head back. But be careful not to strain your neck and harden your throat.
Stay in this pose anywhere from 30 seconds to a minute. To exit, bring your hands onto the front of your pelvis, at the hip points. Inhale and lift the head and torso up by pushing the hip points down, toward the floor. If your head is back, lead with your heart to come up, not by jutting the chin toward the ceiling and leading with your brain. Rest in Child's Pose for a few breaths.
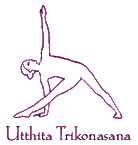 Stand with your feet two to three feet apart. Put your hands on your hips. Keep your knees straight and lift your arms sideways to shoulder level.. Draw in a deep breath as you slowly lower your right hand to the side of your right thigh. and raise your left arm, palm facing front, fingers pointing upward..
Exhale as you guide your right hand as far down the right leg as it will stretch, maintaing your left arm upwards. Bend sideways and not forward. Hold this position for a few seconds. Inhale as you straighten up slowly . Assume your original position. Do the same, but this time, to the opposite side.
Stand with your feet two to three feet apart. Put your hands on your hips. Keep your knees straight and lift your arms sideways to shoulder level.. Draw in a deep breath as you slowly lower your right hand to the side of your right thigh. and raise your left arm, palm facing front, fingers pointing upward..
Exhale as you guide your right hand as far down the right leg as it will stretch, maintaing your left arm upwards. Bend sideways and not forward. Hold this position for a few seconds. Inhale as you straighten up slowly . Assume your original position. Do the same, but this time, to the opposite side.
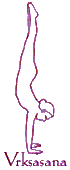 Come onto your hands and knees facing a wall. Bring your fingertips about one foot away from the wall and press the palms into the floor. Spread your fingers wide apart and rotate your upper arms out, bring this crease in the inner elbows to face forward to keep the chest open. Curl your toes under and straighten your legs coming into a short, modified Downward Facing Dog pose. Start to walk your feet in towards your face and lift the shoulders away from the ears, letting them move down the back. Bend your right knee and lift your right heel off the floor. Keeping the left leg straight, bring your left big toe on the floor. to get acquainted with the lifting up of the leg, just raise and lower the leg a few times. Then add small hops off the floor and back like donkey kicks. When you are ready inhale , raise the left leg and hop with the right leg at the same time, straightening the right leg as soon as it leaves the floor, bringing both legs to rest up the wall. Lift head and gaze beyond your hands.
In the pose, work to straighten the elbows, keep moving the shoulders away from the ears, lengthen through the tailbone. Pull the abdomen in and try to move the feet further up the wall. Try to line up your shoulders, hips, knees and feet. You can experiment with coming to balance taking one foot off the wall at a time and then trying both together . (A good prop to use when practicing this way is a belt around the upper arms to keep the arms in line with the shoulders and keep the elbows from bending into the weight of the body). Hold as long as possible, then release down.
Continuing Practice
After you have mastered jumping up one leg at a time, try jumping with both legs together. Prepare the same way coming into a short Down Dog, bend both knees, lifting both heels up and take small hops keeping both feet together. Try to jump bringing the heels to the sit bones, knees facing up, then try to straighten legs overhead and hold. An even further place to take this is to try and jump with both legs together keeping the legs straight and then eventually, not jumping at all, simply lifting both legs up off the floor together and taking them overhead. When you feel ready, take the practice away from the wall to the middle of the room. Work on starting with small donkey kicks trying to suspend the lifted movement for a moment before coming down. As you build strength in the arms and shoulders you will be able to lengthen the suspension and eventually take the legs to hand stand.
Although the word Guru means weighty, another translation of the word is "one who removes darkness", the Guru leads us to the light. Practicing Hand Stand posture we realize that ultimately we are weightless, we are pure energy. When we let go of our fears and move into realms that are new to us, we realize that we are not who we thought we were. That is what a teacher is, one who shows us who we really are. Teachers come in all forms, as people, as Asanas, even as trees. When we start to have glimpses of who we really are, then we can start to recognize our purpose here in this life. Andreas Feininger said, "I think about the purpose of all life and ask myself: What is the purpose of a tree? What is the purpose of an animal? What is the purpose of man? And it occurs to me that perhaps the purpose of all living things is simply living - to play our nature-assigned role in the great drama of life; to participate, be it ever so modest a scale, in the orderly unfolding of the cosmos. Unknowingly, if a tree; instinctively, if an animal; with full awareness, if man... to be of open mind and free of prejudice, feeling, though human, related to the animals and plants, a cog in the machinery of the universe, a humble yet vital part, privileged to wield immense power, yet honor-bound to respect the rights of other living things. And above all, to treasure the gift of life."
Come onto your hands and knees facing a wall. Bring your fingertips about one foot away from the wall and press the palms into the floor. Spread your fingers wide apart and rotate your upper arms out, bring this crease in the inner elbows to face forward to keep the chest open. Curl your toes under and straighten your legs coming into a short, modified Downward Facing Dog pose. Start to walk your feet in towards your face and lift the shoulders away from the ears, letting them move down the back. Bend your right knee and lift your right heel off the floor. Keeping the left leg straight, bring your left big toe on the floor. to get acquainted with the lifting up of the leg, just raise and lower the leg a few times. Then add small hops off the floor and back like donkey kicks. When you are ready inhale , raise the left leg and hop with the right leg at the same time, straightening the right leg as soon as it leaves the floor, bringing both legs to rest up the wall. Lift head and gaze beyond your hands.
In the pose, work to straighten the elbows, keep moving the shoulders away from the ears, lengthen through the tailbone. Pull the abdomen in and try to move the feet further up the wall. Try to line up your shoulders, hips, knees and feet. You can experiment with coming to balance taking one foot off the wall at a time and then trying both together . (A good prop to use when practicing this way is a belt around the upper arms to keep the arms in line with the shoulders and keep the elbows from bending into the weight of the body). Hold as long as possible, then release down.
Continuing Practice
After you have mastered jumping up one leg at a time, try jumping with both legs together. Prepare the same way coming into a short Down Dog, bend both knees, lifting both heels up and take small hops keeping both feet together. Try to jump bringing the heels to the sit bones, knees facing up, then try to straighten legs overhead and hold. An even further place to take this is to try and jump with both legs together keeping the legs straight and then eventually, not jumping at all, simply lifting both legs up off the floor together and taking them overhead. When you feel ready, take the practice away from the wall to the middle of the room. Work on starting with small donkey kicks trying to suspend the lifted movement for a moment before coming down. As you build strength in the arms and shoulders you will be able to lengthen the suspension and eventually take the legs to hand stand.
Although the word Guru means weighty, another translation of the word is "one who removes darkness", the Guru leads us to the light. Practicing Hand Stand posture we realize that ultimately we are weightless, we are pure energy. When we let go of our fears and move into realms that are new to us, we realize that we are not who we thought we were. That is what a teacher is, one who shows us who we really are. Teachers come in all forms, as people, as Asanas, even as trees. When we start to have glimpses of who we really are, then we can start to recognize our purpose here in this life. Andreas Feininger said, "I think about the purpose of all life and ask myself: What is the purpose of a tree? What is the purpose of an animal? What is the purpose of man? And it occurs to me that perhaps the purpose of all living things is simply living - to play our nature-assigned role in the great drama of life; to participate, be it ever so modest a scale, in the orderly unfolding of the cosmos. Unknowingly, if a tree; instinctively, if an animal; with full awareness, if man... to be of open mind and free of prejudice, feeling, though human, related to the animals and plants, a cog in the machinery of the universe, a humble yet vital part, privileged to wield immense power, yet honor-bound to respect the rights of other living things. And above all, to treasure the gift of life."
 From Adho Mukha Svanasana (Downward Facing Dog) inhale, stepping the right foot forward bending the knee, turning the left foot out about 45 degrees. Right foot should be parallel to your mat with the heel of the right foot intersecting the instep of the left. Right foot presses firmly but lightly into the floor, all four corners of the foot making even contact. Toes are relaxed, no gripping. Feel the energy rising, running up the leg muscles. You have made your initial connection to Divine energy.
Front knee bends so the thigh is parallel to the floor and the knee, pointing forward, lines up directly over the ankle and big toe. Be careful that the knee doesn't splay out to the left or right. Right hip moves back, right buttock cupping under. Back leg muscles are active and lifting. Knee is straight but not locked. As the outside of the left foot presses into the floor, the instep lifts, creating a strong arch. You should be feeling the energy of the connection between your foot and floor running up both sides of the leg. Inside of the left leg lifts as strongly as the outside, opening the left hip. Left buttock moves under. Equalize the weight on each leg. Feel the power of your legs as they support and ground you. Hips as square as possible, facing forward over the right leg. Inhale and exhale for several breaths with your hands on your waist. Apply Mulabandha to help buoy energy and body upward.
Inhale and raise arms overhead, palms together in prayer. Upper arms are rolling outward while forearms are rolling in. Elbows are straight but not locked. Exhale and bend the front knee a little further while simultaneously lifting the torso higher. Inhale and straighten the front leg. Exhale and try to bend the front knee still further while maintaining alignment and lift in the torso.
Chest is lifting, collar bones and sternum expanded. The heart is open and joyful. Front ribs remain soft and aligned with the torso, not jutting out which shortens the lower back. Shoulder blades move down the back toward the waist. Both sides of the body are parallel. Center the torso over both legs. Abdomen is soft.
Finally, lengthen the neck as you inhale and gaze at your fingertips and beyond. Keep earlobes away from your shoulders. Jaw and throat are soft, no strain. Smile inwardly to your inner guru (which is none other than yourself!), keeping your expression smooth and serene. Breathe evenly and freely with no constriction. Constriction closes the heart and blocks energy. Relax, breathe and most of all, enjoy assuming the role of the mighty warrior with his valiant heart.
On an inhale, straighten legs, reverse feet and repeat on other side.
Benefits:
Strengthens legs, back , shoulders, and arms. Develops strength, stamina and stability throughout the entire body. Increases flexibility in hips, back, and shoulders. Encourages opening in chest. Brings about awareness of energy derived from correct grounding. Not recommended for those with high blood pressure or heart problems.
From Adho Mukha Svanasana (Downward Facing Dog) inhale, stepping the right foot forward bending the knee, turning the left foot out about 45 degrees. Right foot should be parallel to your mat with the heel of the right foot intersecting the instep of the left. Right foot presses firmly but lightly into the floor, all four corners of the foot making even contact. Toes are relaxed, no gripping. Feel the energy rising, running up the leg muscles. You have made your initial connection to Divine energy.
Front knee bends so the thigh is parallel to the floor and the knee, pointing forward, lines up directly over the ankle and big toe. Be careful that the knee doesn't splay out to the left or right. Right hip moves back, right buttock cupping under. Back leg muscles are active and lifting. Knee is straight but not locked. As the outside of the left foot presses into the floor, the instep lifts, creating a strong arch. You should be feeling the energy of the connection between your foot and floor running up both sides of the leg. Inside of the left leg lifts as strongly as the outside, opening the left hip. Left buttock moves under. Equalize the weight on each leg. Feel the power of your legs as they support and ground you. Hips as square as possible, facing forward over the right leg. Inhale and exhale for several breaths with your hands on your waist. Apply Mulabandha to help buoy energy and body upward.
Inhale and raise arms overhead, palms together in prayer. Upper arms are rolling outward while forearms are rolling in. Elbows are straight but not locked. Exhale and bend the front knee a little further while simultaneously lifting the torso higher. Inhale and straighten the front leg. Exhale and try to bend the front knee still further while maintaining alignment and lift in the torso.
Chest is lifting, collar bones and sternum expanded. The heart is open and joyful. Front ribs remain soft and aligned with the torso, not jutting out which shortens the lower back. Shoulder blades move down the back toward the waist. Both sides of the body are parallel. Center the torso over both legs. Abdomen is soft.
Finally, lengthen the neck as you inhale and gaze at your fingertips and beyond. Keep earlobes away from your shoulders. Jaw and throat are soft, no strain. Smile inwardly to your inner guru (which is none other than yourself!), keeping your expression smooth and serene. Breathe evenly and freely with no constriction. Constriction closes the heart and blocks energy. Relax, breathe and most of all, enjoy assuming the role of the mighty warrior with his valiant heart.
On an inhale, straighten legs, reverse feet and repeat on other side.
Benefits:
Strengthens legs, back , shoulders, and arms. Develops strength, stamina and stability throughout the entire body. Increases flexibility in hips, back, and shoulders. Encourages opening in chest. Brings about awareness of energy derived from correct grounding. Not recommended for those with high blood pressure or heart problems.
HOME