|
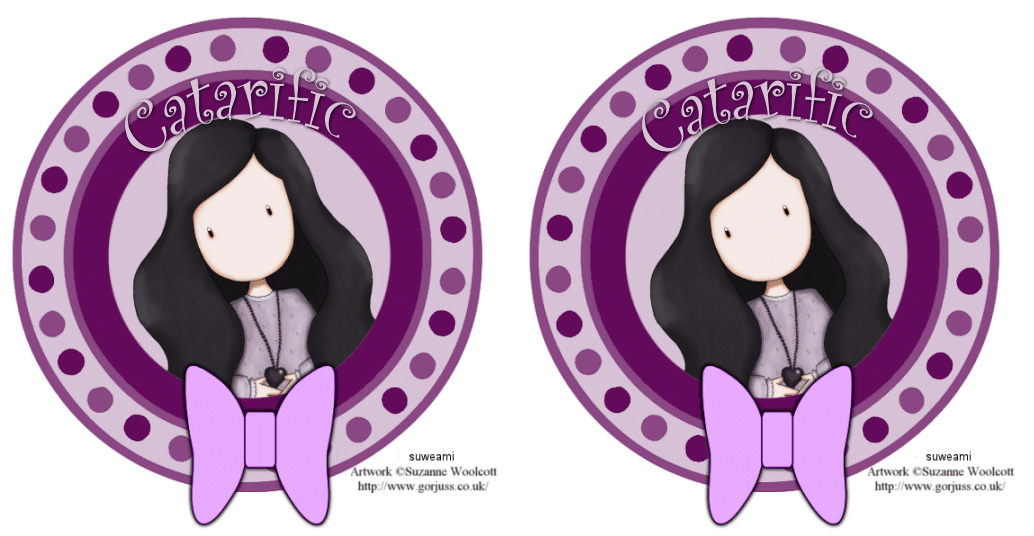
Blinkie Go Round Tag
Supplies Jasc/Corel's Paint Shop Pro any version. Tube of Choice - For this tutorial, I used a delightful image created by Suzanne Woolcott. You can purchase her wonderful art in tube and full form at AMI which stands for Artistic Minds, Inc. Please remember, when creating your signature tags, to only use permission art and to apply the copyright information on the tag which would include both the artist's name and online gallery link. If you have purchased a commercial image, do add your license number as well. Supplies for download - Blinkie round and round mask template and bow created by me. Optional Elements - such as tubes, preset shapes, or brushes for added design style.
SETTING USED IN THIS TUTORIAL
Magic Wand Settings Mode: Add/Shift, Match Mode: RGB Value, Tolerance 26, Contiguous checked, Feather: 0, Anti-Alias checked and outside selected. Drop Shadow Settings Vertical Offset 2, Horizontal Offset 2, Opacity 80 Blur 5, Color Black CREATING THE BASIC TAG USING THE MASK TEMPLATE Step 1 Open up your tube graphic, the noisy flower mask, and a new transparent image 630 width by 630 height. At the Material Palette, select a deep, solid color for your basic tag. Flood fill the transparency with that color. Step 2 Go to Layers/New Mask Layer/From Image. At the source window's drop down menu, locate the round and round mask template with source luminance and invert mask data checked. Click ok. Step 3 Go to Layers/Merge/Merge All (flatten). Step 4 Left click the magic wand and use the settings from above. Left click the magic wand inside the inner most circle to select it.Make your tube graphics active and go to Edit/Copy. Make the tag image active and go to Edit/Paste as New Layer. With the mover tool, move the tube graphic inside the the selection. The full sized graphic DOES NOT need to fit inside the circle, just the top portion should fit. Step 5 If the top portion of the tube graphic is too large, go to Image/Resize using the percent option, bicubic and resize all layers NOT checked. Move the top portion inside the selection, go to Selections/Invert and click the delete key. Go to Selections/Select None. Go to Layers/Merge/Merge Visible. Step 6 Open up the bow psp graphic. You will notice it is a light gray color. What you will need to do is colorize the graphic so that it coordinates with your tag. To do that, left click on a color from your graphic with the color picker tool. This color should not appear in the top color box at the Material Palette. Left click the top color box and when the color selection window opens, write down the hue and saturation amount. Go to Adjust/Hue and Saturation/Colorize and type in your amounts. You should get a color close to that which you desire. Step 7 Make the bow image active and go to Edit/Copy. Make the tag image active and go to Edit/Paste as New Layer. Left click the mover tool and move the bow below the image as you see mine. Step 8 Go to Layers/New Raster Layer and Add your Text. Once you add your text, do apply a drop shadow by going to Effects/3D Effects/Drop Shadow and use the settings from above. Step 9 Add your copyright information and go to Layers/Merge/Merge All (flatten). Step 10 Go to Image/Resize using the percent option at 90%, bicubic and resize all layers checked. Step 11 Go to Layers/Merge/Merge All (flatten). Step 12 Left click the crop tool, and going from left to right and down, draw a rectangle around the area you wish to keep, eliminating any extra white palette. Once the rectangle is drawn, double left click within the rectangle or left click the check mark at the crop ribbon. CREATING THE BLINKIE EFFECT Step 1 Go to Layers/Duplicate. Open up the layer palette. Left click the eye on the top layer to close it off. Let's work on the bottom layer first. The layer that is active will always be highlighted in dark blue. Step 2 Select a second color that coordinates with your tag for your blinkie effect. This color should be in the top color box at the Material Palette. Left click your magic wand and left click on every other small circle surrounding the tag. Left click the flood fill tool and fill these selections with the color you selected in this step. Go to Selections/Select None. Step 3 Open up the layer palette. Open up the top layer, by left clicking the red X on the eye. Close off the bottom layer. Make sure you are now on the top layer - it will be highlighted in dark blue. Step 4 Left click the magic wand, and this time, left click on the alternating circles to select them. If you look on your bottom layer, you will see where you flood filled in Step 2. This time, on the top layer, you want to flood fill those circles that weren't flood filled previously. Again, you will fill the selections with the same color you used in Step 2. Once the circles are filled with this color, go to Selections/Select None. Step 5 Save this file as a psp or psd file. We will finish off the animation in animation shop. Click here to continue.
|
