|
Designer Template Tag
Supplies Jasc/Corel's Paint Shop Pro. Mura Pro Copies Filter. Penta.Com Color Dot filter. Tube of Choice - For this tutorial, I used a delightful image created by Suzanne Woolcott. You can purchase her wonderful art in tube and full form at AMI which stands for Artistic Minds, Inc. Supplies: Circle psp file and Circular Text created by me and Rainbow Coffi Ribbons. The full collection of Rainbow Coffi's awesome images is housed at PSP Playground. Anyone can join, free of charge.
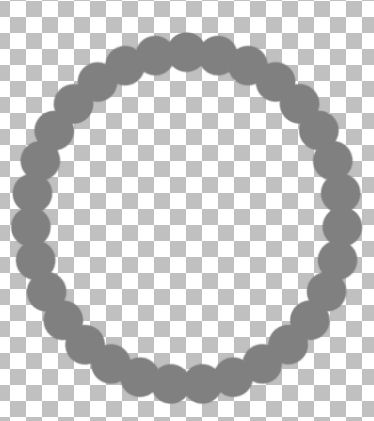
SETTINGS USED IN THIS TUTORIAL Magic Wand: Mode: Add/Shift, Match Mode: RGB Value, Tolerance 0, Contiguous checked, Feather: 0, Anti-Alias checked and outside selected. Step 1 Open up the circle1 template. Go to Effects/Plugins/Mura Meister/Copies and select Encircle. Use the default settings but do change the top three: Number 31, Shift X 45, Shift Y 48. Everything else will stay as is.
Step 2 Left click the Raster Deform Tool. You will see once you click it, your image has a rectangle with various nodes, surrounding it. What we will do is make our circle larger. To do that, hold down the left mouse button and left click on the bottom node. Holding down the left mouse button, pull the circle downward to stretch it. Left click the top node and pull the circle upward to stretch it. Hold down the left side node and stretch it to the left. Hold down the right side node and stretch it to the right. When you are done stretching - you should have the same image but at a much larger scale as you see here. When you are done stretching, just left click on any of the tools on the tool bar and the raster deform tool rectangle will disappear.
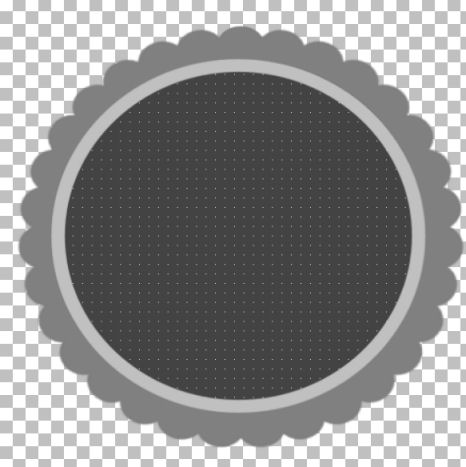
Step 3 Go to Layer/New Raster Layer. At the Material Palette, in the bottom color box, set it to dark gray #434343 and the top color box set to null (no color). Left click the preset shape tool set to circle (or ellipse) with show nodes and create on vector checked. Draw a large circle on top of the circular pattern. Once drawn, left click the layer palette, go to the Vector Layer, right click and left click on convert to raster layer. Step 4 Left click the Raster Deform tool and left clicking the top, bottom and side nodes, place the top circle so that it fits on part of the circular pattern while part of the pattern is still showing around the circumference. You want to make sure that none of the transparency in the middle of the circular pattern is showing from below. Once you have the top circle stretched, left click on any of the tools on the tool bar to make the raster deform rectangle disappear. Step 5 Go to Effects/Plugins/Penta.Com/Color Dot and use these settings:
Go to Layers/Merge/Merge Visible. Step 6 At the Material Palette, make the top color box light gray #c0c0c0 and have the bottom color box set to null (no color). Left click the preset shape tool set to ellipse with the same settings as before but change the width to 15.15. Draw a topper over the tag. Once drawn, left click the layer palette, go to the Vector Layer, right click and left click on convert to raster layer. Step 7 Left click the Raster Deform tool and left clicking the top, bottom and side nodes, place the topper so that it fits evenly on top of the tag. See below. Left click on any of the tools on the tool bar to make the raster deform rectangle disappear.
Step 8 Open your layer palette, and change the blend mode of the topper layer to dissolve. Move the opacity setting to 44. You should now have two layers - the top layer - which is the topper and the bottom layer, which is the tag portion. Step 9 Open your tube image and select a color from it that you want for your main tag template. Go to Adjust/Hue and Saturation/Colorize and move the settings until you have a color that will work with your tube graphic, First we will colorize the top layer by going to Adjust/Hue and Saturation/Colorize. Do the same thing for the bottom layer. DO NOT MERGE THE TWO LAYERS. Step 10 Open up the layer Palette and left click on the eye of the bottom layer to close it off. All you want showing is the topper layer. Left click the magic wand inside the topper and go to Selections/Modify/Expand 2. Step 11 Open up your tube graphic and go to Edit/Copy. Make the tag image active and go to Edit/Paste as New Layer. Move the tag image within the selection and go to Selections/Invert. Click the delete key and go to Selections/Select None. Step 12 Go to Layers/Arrange/Move Down so that the image is below the topper. Open up the layer palette and left click the X on the eye on the bottom layer to open it up. Go to Layers/Merge/Merge Visible. Step 13 Open up the circular text. Copy and paste it on the tag. You can either have the text directly on the tag or surrounding the tag by using the raster deform tool and either making the text graphic bigger or smaller. Just either pull the nodes outward to make the circular text image wider or move the nodes inward, to make the circular text image smaller. Once placed, colorize the text with the same color you used for the tag. Step 14 Go to Layers/Merge/Merge Visible. Step 15 Go to Image/Resize using the percent option at 85% or smaller, bicubic and resize all Layers checked. Step 16 Select one of the Rainbow Coffi bows and copy and paste it to the tag and resizing as necessary. Step 17 Add your text and copyright and go to Layers/Merge/Merge All (flatten). Step 18 Left click the crop tool and draw a rectangle around the area you wish to keep, eliminating any excess white palette. Double left click within the rectangle. Save your tag as a jpg.
We hope you enjoyed this tutorial. Purrs, Nikki, Nichie and Sue
|