|
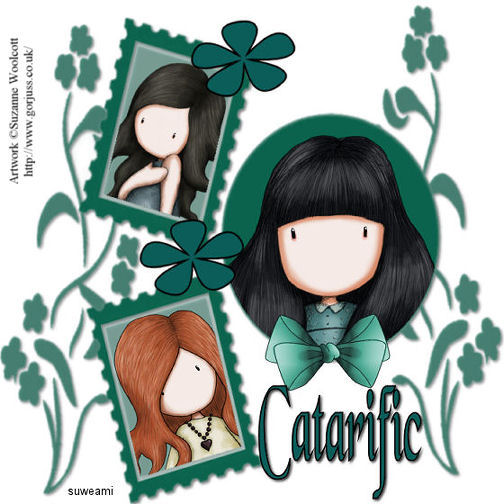
Doodle Mask Tag 2
Supplies Jasc/Corel's Paint Shop Pro any version. Tubes of Choice (3) - For this tutorial, I used the delightful images created by Suzanne Woolcott. You can purchase her wonderful art in tube and full form at AMI which stands for Artistic Minds, Inc. Please remember, when creating your signature tags, to only use permission art and to apply the copyright information on the tag which would include both the artist's name and online gallery link. If you have purchased a commercial image, do add your license number as well. Supplies for download - Doodle Mask created by me and the beautiful bows created by Rainbow Coffi. The full collection of Rainbow Coffi's wonderful tube images is housed at PSP Playground. Anyone can join, free of charge. To obtain the full collection of Rainbow Coffi's superb graphic tubes, do join PSP Playground, where Rainbow Coffi's and many other wonderful artist tubes are shared. Optional Elements - such as tubes, preset shapes, or brushes for added design style.
SETTING USED IN THIS TUTORIAL
Magic Wand Settings Mode: Add/Shift, Match Mode: RGB Value, Tolerance 12, Contiguous checked, Feather: 0, Anti-Alias checked and outside selected. Drop Shadow Settings (1)Vertical Offset 2, Horizontal Offset 2, Opacity 80 Blur 5, Color Medium Gray (#808080) (2)Vertical Offset 2, Horizontal Offset 2, Opacity 80 Blur 5, Color Black CREATING THE BASIC TAG Step 1 Open up your three tube graphics, the doodle mask, and a new transparent image 700 width by 700 height. At the Material Palette, select a deep, solid color for your basic tag. Flood fill the transparency with that color. Step 2 Go to Layers/New Mask Layer/From Image. At the source window's drop down menu, locate the doodle mask with source luminance and invert mask data checked. Click ok. Step 3 Go to Layers/Merge/Merge Group. Step 4 Go to Effects/3D Effects/Drop Shadow and use the #1 drop shadow settings. The color for this drop shadow is medium gray #808080. Step 5 Go to Layers/Merge/Merge All (Flatten). Step 6 Left click the magic wand using the settings from above. Left click the magic wand into the circular portion of the tag to select it. Step 7 Make one of your tube graphics active and go to Edit/Copy. Make the tag image active and go to Edit/Paste as New Layer. With the mover tool, move the tube graphic inside the the circle, within the selection. The full sized graphic DOES NOT need to fit inside the circle, just the top portion should fit. Step 8 If the top portion of the tube graphic is too large, go to Image/Resize using the percent option, bicubic and resize all layers NOT checked. Move the top portion inside the selection, go to Selections/Invert and click the delete key. Go to Selections/Select None. Go to Layers/Merge/Merge Visible. Step 9 Make your second tube graphic active. Go to Image/Rotate/Free Rotate with direction left, free and 20 degrees. Go to Edit Copy. Step 10 Left click the magic wand on the bottom stamp frame to select it. Go to Edit/Paste as New Layer. With the mover tool move the image inside the selected stamp frame. If the Image is too large, resize it as you did in Step 8. Go to Selections/Invert and click the delete key. Go to Selections/Select None. Go to Layers/Merge/Merge Visible. Step 11 Make your third tube graphic active. Go to Image/Rotate/Free Rotate with direction right, free and 20 degrees. Go to Edit Copy. Step 12 Left click the magic wand on the top stamp frame to select it. Go to Edit/Paste as New Layer. With the mover tool move the image inside the selected stamp frame. If the Image is too large, resize it as you did in Step 8. Go to Selections/Invert and click the delete key. Go to Selections/Select None. Go to Layers/Merge/Merge Visible. Step 13 Open up the bows and select one for your picture. Resize the bow to 80%. Copy and paste the bow as a new layer and place it at the bottom of your circular frame. Step 14 Go to Layers/Merge/Merge Visible. Step 15 Add any additional elements to your tag for decoration. Step 16 Go to Image/Resize using the percent option at 80%, bicubic and resize all layers checked. Step 17 Go to Layers/New Raster Layer and add your copyright information. Step 18 Go to Layers/Merge/Merge All (flatten). Save this file as a jpg and you can use it as a template to create more tags. Step 19 For each new tag you create, go to Layers/New Raster Layer and add your text. Go to Effects/3D Effects/Drop Shadow and use the (2) settings from above. This setting uses the color, black. Go to Layers/Merge/Merge All (Flatten) and save each tag with a different name. We hope you enjoyed this tutorial. Purrs, Nikki, Nichie and Sue
|
