|
POSTAGE STAMP DESIGN TAG
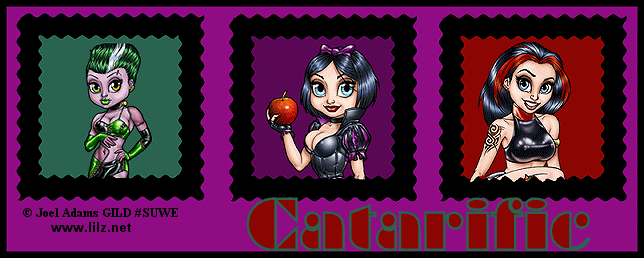
Supplies Jasc/Corel's Paint Shop Pro Versions 8, 9 or 10. Tubes of Choice (3). The tube images I am using are commercial licensed images created by Joel Adams. You can purchase Joel Adams delightful art work in both tube and image form through CILM. CILM stands for Creative Image Licensing and Management and it is through CILM that you can purchase not only Joel Adam's wonderful images in full or tube form but the work of many other outstanding artists as well. Favorite Font of choice. Please remember, when creating your signature tags, to only use permission art and to apply the copyright information on the tag which would include both the artist's name and online gallery link. If you have purchased a commercial image, do add your license number as well. Do not mix images by various artists. When using more than one image on your tags, do use those only by the same artist. SETTING USED IN THIS TUTORIAL Magic Wand with this setting: Mode: Add/Shift, Match Mode: RGB Value, Tolerance 22, Contiguous checked, Feather: 0, Anti-Alias checked and outside selected. Step 1 Open a new transparent image 350 width by 350 height. And open another transparent image 300 width by 300 height. Also have your three tube graphics open. Step 2 We will begin with the 350 by 350 transparent image. At the Material Palette, in the top color box, select black. Flood fill the 350 by 350 transparent image with this color. Step 3 Go to Image/Resize using the percent option at 80%, Bicubic and Resize All Layers NOT checked. Step 4 Go to Effects/Distortion Effects/Wave and use these settings: For both Horizontal and Vertical Displacement: Amplitude 1 Wave Length 8 and for Edge Mode, have transparent checked. Step 5 Duplicate this image (Shift and D keys) two times so you now have a total of three black stamp images. Step 6 We will now work with the 300 x 300 transparent image. At the Material Palette in the top color box, select a deep color from one of your graphics. Flood Fill this transparency with the color you selected. Step 7 Repeat Steps 3 and 4. Step 8 Make your smaller stamp image active and go to Edit/Copy. Make one of your black images active and go to Edit/Paste as New Layer. Go to Layers/Merge Merge Visible. Step 9 Repeat Steps 6 through 8 two more times - each time selecting a different color for your smaller postage stamp. When you have made all three stamps we are ready to proceed. Step 10 Let's reduce the size of each of your completed stamps by 85%. Go to Image/Resize using the percent option at 85%, Bicubic and resize all layers checked. Step 11 Open a new transparent image 800 x 300 and flood fill with any color that will coordinate with all three colors of your stamps. Step 12 Copy and paste each of your stamps to the 800 x 300 image. Once you have all three stamps on the 800 x 300 image, left click the mover tool and move each of the stamps side by side, spaced evenly throughout the tag, leaving room at the bottom of the tag for the text and copyright information. When you have the stamps placed, go to Layers/Merge/Merge All (flatten). Step 13 Go to Image/Add Borders and when the border selection window opens up, select color black, symmetric and border width 8. Step 14 Left click the magic wand and use these settings: Mode: Add/Shift, Match Mode: RGB Value, Tolerance 22, Contiguous checked, Feather: 0, Anti-Alias checked and outside selected. Left click the magic wand within the interior stamp pattern (the one that you had flood filled with color) to select it. Step 15 Make one of your tube graphics active and go to Edit/Copy. Go back to your tag and go to Edit/Paste as New Layer. DO NOT DESELECT. Left click the mover tool and move your image within the magic wand selection so that it fits within that selection. If your image is too large to fit, go to Image/Resize using the percent option, Bicubic and resize all Layers not checked. Reduce the image down so that it fits within the selection. Move your tube image to the bottom portion of the selected stamp so that the pattern at the bottom of your tube image fits within the pattern at the bottom of the stamp. Step 16 Go to Selections/Invert and click the delete key. Go to Selections/Select None. You will see your image now fits exactly within the selected portion of the stamp design pattern and that you do not need to use a square edge when applying an image in this way. Step 17 Repeat Steps 15 and 16 two more times so that you now have all your graphics placed on all your stamp patterns. Step 18 Go to Layers/Merge/Merge All (flatten). Go to Image/Resize using the percent option at 80%, bicubic and Resize all Layers checked. Step 19 Go to Adjust/Sharpness/Sharpen. Step 20 Add your text and copyright information. Save your tag as either a jpg or gif. We hope you enjoyed this tutorial and will give it a try! Purrs, Nikki, Nichie and Sue
|
