
The Boy Scouts of America Handbook
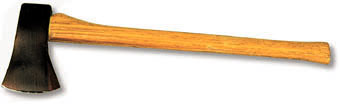
a) Name the parts of the ax.
See left, the list or diagram should include: knob, belly heel, bit, blade, toe, face, head, eye, shoulder, butt or poll, & handle.
b) Name the different types of axes.
There are many: Forrester, Hand Axe, Tomahawk, Hatchet, Double-Bit, etc.
c) Explain the proper way of passing an ax and other safety factors.
The key is common sense. Hold the tool in such a way as to control the head and blade. Do not hold or grasp the blade. If it is a heavy tool, grasp it by the handle with the head toward the ground, and blade pointed in. See the books for diagrams. Say thank you once you have control if being given the tool.
d) Demonstrate how to sharpen an ax.
Place the tool securely in a vice, or field expedient vice. Use a metal file to put a new edge on the blade by travelling in the cutting direction of the file. Perform as many sharpenning actions to both sides of the blade. Once you have a good blade, with all the knicks out, and appropriate for the tool, dress the blade with a wetstone. Again, use the same number of actions to both sides of the blade. Use circular motions to dress the blade. Finally, give your tool a light coat of oil to protect the metal. Keep your tool sheathed and clean.

The first step is to remove the old or broken handle safely. Take the tool and place it in a vice securely. Using a hammer and possibley a chisel, remove the old handle. Take a look to the left. There you can see some guidance as to wood-grain selection of your new handle. Once you have a good handle selected, lightly tap it into place in the axe. Then use a wedge, a piece of metal or plastic designed to separate the wood of the handle and "wedge" it into the head. Pound the wedge in with a hammer. Some examples of metal wedges are above to the left. Once this is done, and the head is secure on the handle, your tool is ready for use. Remember, an improperly placed or loose head is a serious safety hazard. It can fly off and seriously hurt or kill someone.

I hear a lot of leaders anymore saying that Pioneers are too young to handle long-handled axes. This is untrue. I was safely using long handled axes at the age of 8. It is up to the adult to pass on to the child the respect and skill required to use tools effectively. An adult that will not do this is either ignorant of proper usage themselves, or lazy.
Kids, do obey all rules regarding tool usage laid down by parents and leaders. If they say no, it means no.
Ensure proper chopping areas or safety zones. It is not the roped off chopping area that is important, it is the proximity to others that is essential to safety.
Use the pictures here and in other sources as a guide and have fun chopping!!
