Instruction to use of OleDBPro with Visual C++ version 5 or later
Step 1 -- Installation of the latest MS Platform SDK.
To use OleDBPro in Visual C++ development
environment, you may need to get the latest Microsoft Platform SDK from the web site,
http://www.microsoft.com/PlatformSDK, or from a newly
distributed CD disk with MS Platform SDK, and install the SDK in a directory of your
computer.
Step 2 -- Configuration of header and library files (*.h and *.lib files).
After a copy of the latest MS Platform SDK is installed in your computer, you need to set up a development environment for your Visual C++ following the below procedures:
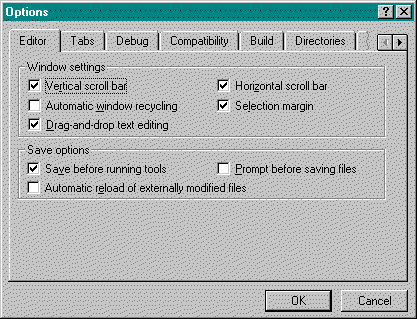
Bring up the below dialog by clicking the Options under the main menu Tools after starting an instance of Visual C++.
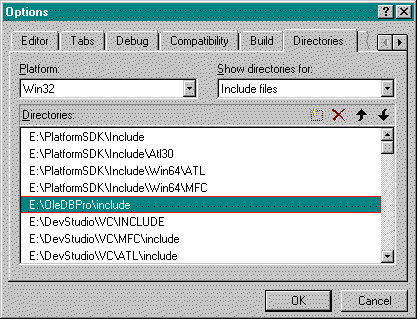
Click the tab Directories, and select Include files from the combox Show directories for as shown in the below dialog.
As indicated in the above picture, set your Visual C++ development environment including the directories, E:\PlatformSDK\Include, E:\PlatformSDK\Include\Atl30, E:\PlatformSDK\Include\Win64\ATL, E:\PlatformSDK\Include\Win64\MFC, and E:\OleDBPro\include. All of these directories contains all of header (*.h) files. In this example, the installed Platform SDK is stored in the directory of E:\PlatformSDK. Additionally, you need to make sure that the above five directories are put on the top of the list box Directories.
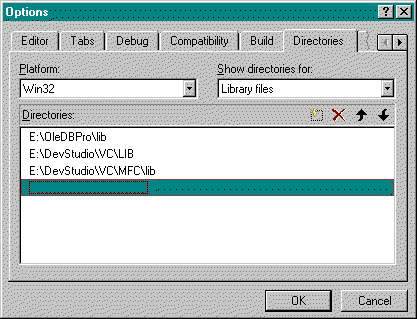
Set your Visual C++ development including the library files as indicated in the following.
In this example, the library file of OleDBPro is stored in the directory of E:\OleDBPro\lib. After configuring the header and library files, you are ready to compile a console sample inside the directory of E:\OleDBPro\Samples, for example.
Step 3 -- Compiling an example.
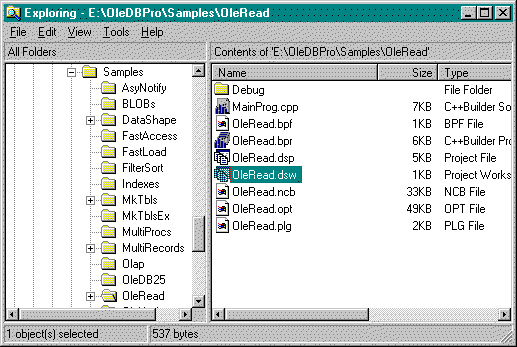
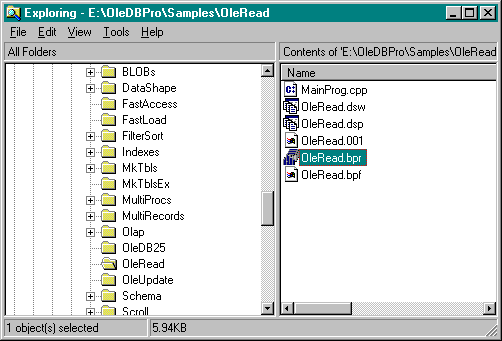
As shown in the following picture, doubly click a *.dsw file and bring up a project to Visual C++ development. In this example, you simply doubly click the file OleRead.dsw in the directory of E:\OleDBPro\Samples\OleRead.
If you set Visual C++ development correctly, Visual C++ will compile the sample project successfully after pressing the key F7 or clicking Build OleRead.exe under the menu Build in this example.
Step 4 -- Coping OleDBPro dynamic link libraries (dlls) into a system directory.
After successfully compiling a sample project, Copy OleDB25D.dll (debug) and OleDB25R.dll (release) into the window system directory, C:\Winnt\System32 for NT or C:\Windows\System32 for Win9x.
Step 5 -- Test of a generated exe file from Visual C++.
After putting the dlls into the system directories, you can test your generated exe file by click Execute OleRead.exe under the menu Build in this example.
Instruction to use of OleDBPro with Borland C++ Builder 5 or later
