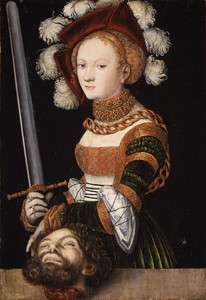
German
Flirtation

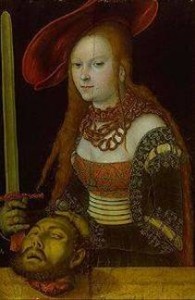
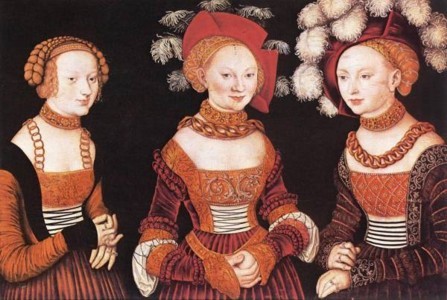
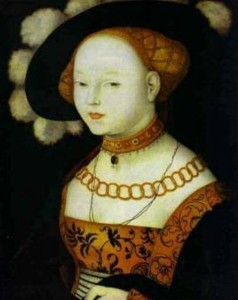
Firstly I would recommend looking at as many pictures as possible. Make a list of the features you like i.e. fitted sleeves with small slashes, lots of guarding on the shirt etc. Then see if there is a portrait that fits this description even closely. I did this but then had to look at what fabric I had and had to make some adjustments to my original plans. Oh, and you will see lots of RED in portraits, must be popular, and the occasional green too.
Fabrics to use
most plain weaves work for me. Linen, silk are ok, but velveteens are
great. I just used a plain weave gabardine and piece of red brocade.
I could only afford 1 metre of the brocade so I had to figure the best way to
use it. A classic example of using something expensive with something
cheaper to good effect.
The trim was
fused pearls that had to sewn on by hand and gold braid, 2 different kinds for
the skirt and the sleeves. Lace did not seem to be a trim of choice for
the Germans.
The Bodice
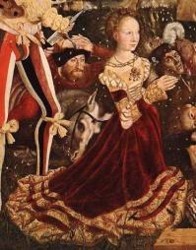

After you have
made the dress sans sleeves the breast band needs to be fitted. Again a
friend is needed, preferably the same one that taped you, to fit the breast
band. This is a very interesting process and had a friend and myself in
stitches of laughter as she tried to pull and pock at my breasts and pin,
without stabbing me, to get the band in just the right spot. One side ends
up stitched in and hooks on the other side, although I have seen them pined in
also. I used trouser hooks that have a multi fitting option as my breast
size varies with my cycle.
The lacing over
the stomach is threaded through small-nonsplit rings sewn into the sides of the
opening. Offset so they are spiral laced, but ladder lacing is seen
in portraits also.
The opening of
the skirt is lined up under one side so that is were you open it up to get in.
A hook and eye fasten the skirt and ties down the skirt-opening if required.
It is also best to have the breast band opening on the same side for access.
As a rule of
thumb breast bands were gold, but I have seen them in red also. They can
be beaded, (Germans were big on beading), embroidered, couched or made of a
beautiful piece of brocade. I have seen sari braid and other types of
braid used for breast bands with lovely effects in recreations. Also the
breast band is a part that could occasionally replaced to update the dress with
out making a whole new dress. Or maybe just to catch the eye of a young
man?????
The Skirt
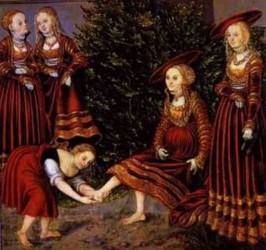
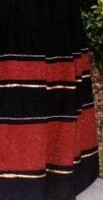 Look at pictures for the proportions on the guarding widths.
Basically I did mine so that it was widest at the bottom and then the bands got
gradually smaller as it got closer to the waist. The skirt can be cut on
gores or just a flat piece and cartridge pleated in. The first option is
great for a dance skirt so you have lots of hem and little at the waist. I
prefer the second option because of the fabric used, and I still have a nice
full skirt. The cartridge pleating has at least 3 rows of stitching to
help hold the pleats in place, more if you can get the proportions right.
My skirt was cut
as a long straight piece and then cartridge pleated in. Mostly because of my restrictions of fabric.
It was probably more correct to cut these skirts as gores and then work
the guarding in to the skirt, or you could cut the guarding on a circle also and
piece it together. This method gives you a greater fullness at the hem and less
at the waistline. This method also
should be cartridge pleated. This
method achieves the best results.
German ladies
wear no corset with the breast band style of dress, but more than make up for it
with underskirts. I was wearing 4 underskirts with this dress, but 2
underskirts seemed to be the minimum. This was so they could have a very
ornate first underskirt, the one you would see if you were to lift the skirt of
your frock. And then the second underskirt was to help keep the first
underskirt clean from dust. you can see a lot of woodcuts and such of
German ladies holding their skirts up revealing a pretty underskirt. they
did not use hoops.
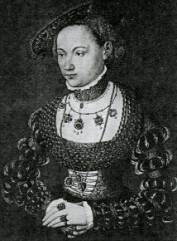
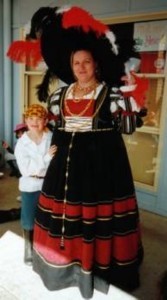
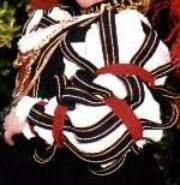 My sleeves were twice as long as my arms so they pushed up into
the lantern shape you saw in the photo. If you are going to do any that
have slashes that you want to puff out then the length of the sleeve will have
to be altered to accommodate this extra effect. The armbands on which the
slashes are sewn were graded so they fit my arms at the points I wanted them.
The slashes were sewn in and the bands were all lined also. The slashes
were also graded in length and amount i.e. less and shorter slashes close to the
wrist and more and longer at the shoulder. When these were finished they
were stab stitched to the bodice.
Sleeves can also
be done very simply as just armbands that simply slip on over your chemise, it
looks really cool. Or made detachable with ties at the shoulder. Or
fitted upper and lower arms with fine ribbon lacing them together in a longwise
lacing. Your choice really.
Fairly standard
chemise. Draw string neck, but extra long sleeves for the slashing.
You could also have a high-necked chemise if you wanted.
Partletts could be worn or make a high necked chemise.
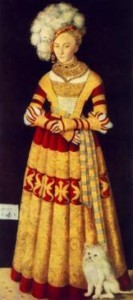
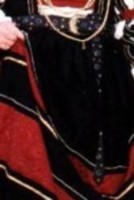 The belt in the photo with my son is actually for an Italian or
Elizabethan, not a German. I have seen some ladies wear them this way.
Usually a long leather belt or one made of the same fabrics as the dress,
sometimes in stripy fashion, with a nice buckle is more appropriate, or they can
be tied also.
 Germans, men and women loved wearing lots and lots of big gold
chains. I had to pin it out on the shoulders to keep it in place.
The other necklace I am wearing with the pearl drops is very close to one I
spotted in a portrait so I was thrilled to find it. Chokers were also big
with the Germans. Just like the breast band they were usually gold, but
occasionally black, and always with jewels sewn into them. Pearls hanging
of the bottom seemed popular also. Earrings of drop pearls on hoops
were common, occasionally you will find a portrait showing a small bow tied onto
the hoop. But apart form that earrings didn't seem to be very fancy. Small ornaments like earrings were also suspended from the hats.
I have no idea why put they did this.
Firstly ostrich
plumes, and lots of them were almost an essential for any German headdress.
The one I am wearing is HUGE. 76 cm across. The brim is in 2 parts that
over lap. Basically semi circles that extend a bit further for the over
lap. It can also be done in quarters. And a hole cut in the centre
for you head of course. I used mounting board used for framing pictures,
nice and stiff and cheap enough. It
is partially held together by large hat pins through the fabric that itís
covered in. I just used a cheap cotton drill to cover mine.
Velveteen looks wonderful too.
This is an
extreme hat and while there are depictions of hats this large, I would recommend
something a bit smaller. I have a hard time getting through doorways in
this one. But I never get sun burnt.
Under the hat a
coif was worn and they were almost always very ornate.
The crown is a
sort of origami thingy. I will try to explain it, sorry I don't have a
picture for you.
Origami thingy
for the hat.
It will end up
square. So whatever length you want the sides to be that should be your width to
start with and the length is 4 times you width. Iron a fold down the
centre lengthwise. Then iron creases in the half across and then at the
quarters. So you have it creased into quarters along it. All the
creases should be on the same side. Now it gets tricky. At each of
the quarter creases you need to fold back the point from the centre along each
edge and iron so that it looks like you have a lot of arrows all pointing the same
way
<-<-<-<- Then you start folding it all in on itself so
that it ends up looking like a square with an X in the middle. Sorry this
is really a hands on thing and hard to explain on the net. Anyway
carefully stitch down the joins of the X on one side and about an inch from the
corner on the other side.
Once you have
all of that done place your crown on the brim centrally over the hole for you
head and pin it in. Then carefully cut out the underside that isn't
stitched on the folds and stitch into the opening of the hat. You can then
line the crown.
Feathers can be
arranged along the brim of the hat so they are on the edge only or so they come
from just under the crown. Again I advise looking at portraits for
inspiration. And here at least ostrich feathers are expensive so you may
only use 2 or 3.
You can finish
the centre of the crown with a small pompom of the same colour as the hat, or a
nice button.
There are other
ways of making slightly different German hats that involve using felt hat
blanks, but as I havenít made one I canít really elaborate much on it
suffice to say a section needs to be cut from the crown that is like a four
pointed star for shaping. And then
embellished.
Extras
A goller can be
worn with this style of dress also. A goller is a small shoulder cape that
doesnít extend far beyond the points of the shoulders.
Conclusion
Table of Art Works Used
1. Judith with the Head of Holofernes, Lucas Cranach the Elder 1530 Oil on wood, The Metropolitan Museum of Art New York
2. The Martyrdom of St Catherine, Lucas Cranach the Elder 1506 Lime-tree, 126 x 139,5 cm Gemšldegalerie, Dresden
3. Bath of Sheba L ucas Cranach the Elder 1526
4. Young Matron Lucas Cranach the Elder early 1500s
5. catherin ???
6. ???
7. The Saxon Princesses (Sibyl, Emilia and Sidonia of Saxe). c.1530. Lucas Cranach the Elder Oil on wood. Kunsthistorisches.
8. Baldung Girl Lucas Cranach the Elder 1530
All intellectual content, composition, layout, designs and photographs, unless otherwise noted are copyright 2007 to Deborah Lane ©, or, copyright 2003 to Deborah Murray © also known as Mistress Oonagh O'Neill ©. All Original renaissance art works and artefacts are not copyright to Deborah Murray, and are shown for educational use only . If you see something you'd really like to use, please contact me!