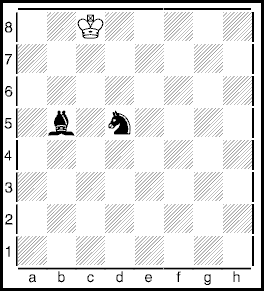
Diagram 1: THE CAGE
After watching a 190(BCF) with over an hour on the clock be forced to accept a draw after failing to force a mate, it occurred to me that in a match condition with only a few minutes on the clock the chances are I'd fail too.
Luckily given a little study the situation becomes reasonably easy. The attacker needs only to remember a couple of basic positions:

This is the position the attack aims to achieve. The enemy king is trapped on six squares unable to break free. Black wins by taking the d7 square with his King forcing the enemy king back further and the bishop manoeuvre Ba6-c8 followed By Kc7. Then mate is forced by Ne7-c6.
The general plan against accurate defense is:
If the cage position is remembered, then forcing mate is very simple. The only step in the plan which is difficult against accurate defense is driving the opponents king from the wrong corner to the right one. The following three positions show how to do this:

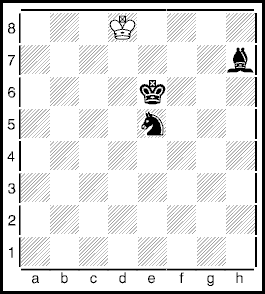
Logically the corner square must be taken by the Knight, the next by the bishop. Black will make progress by Ne5-d7 attacking the next dark square (f8).

It now becomes clear why under match conditions even Grandmasters have failed to force mate. Blacks pieces cannot keep the king on the back rank. In fact white can escape not only to the 7th rank, but to the 6th! The bishop appears to be a long way away doing nothing. It is here that the game often slips from blacks fingers.

Now white has only one try left for escape. Other moves can be met with sensible moves e.g. 4. Kd8 Kd6 or 4. Kb7 Bd3 (5. Kc6 Bc4 then 6. ...Bb5).