
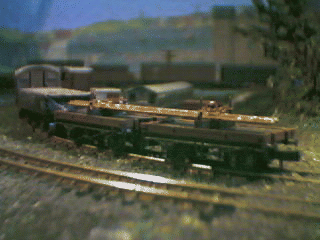
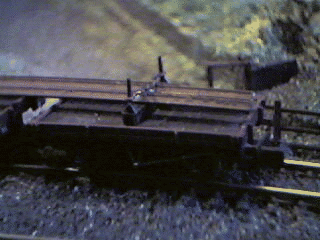
Bolster wagons are run in fixed pairs, with two wagons being `permanently' coupled and the `inner' sets of buffers removed, the coupling arrangement between the wagons being sufficient to keep the wagons apart. The main problem encountered when running bolster & flat wagons is that they tend to derail easily when being propelled over pointwork & crossings. This can be avoided by adding a little weight to the models, I glue small pieces of lead fishing weights (suitably flattened with a hammer) under each wagon. Bolster wagons will also benefit from having a metal load rather than one made from plastic strip or balsa wood, For this Bolster Pair I have used a few offcuts of second hand Code 80 N gauge rail which was damaged (Sleepers & rails had parted company breaking the `rail chairs') This was cut to fit the wagons and using a slow setting Cyanoacrylate adhesive (Humbrol Super glue thick) to attach 10 links of fine gold chain over the bolster wagons uprights and the the top of the rail load, making sure that the rail load is not glued to the wagons only the chain. This allows the load to move correctly when on curves without moving far enough to protrude beyond the end of the wagons. The rail load was then painted with acrylic paints `rust' and `burnt umber'. These models are in the que for numbering and weathering before being released into service.

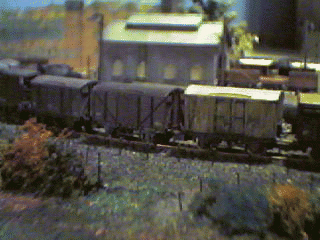
10ton 10ft wheelbase ventilated goods van in `N'gauge. This is just one of the many available `N'gauge wagon types, there are many variants of each purchaseable wagon type, either bought as Kits or Ready to Run then painted, weathered, numbered and detailed as required for the particular railway company, line or region being modelled. It also appears to be common practice amongst `N'gauge modellers to purchase a wagon chassis kit & scratchbuild the vehicles body or fit a seperately bought Body kit EG: PECO produce a very nice 9ft wheelbase Wooden solebar wagon chassis kit which can be used to great effect with one of the available Body kits to produce accurate models of older `Pre-Grouping' wagon types that are unavailable as Ready to Run items, these are also very usefull for modellers who wish to scratch build N gauge stock, but who do not have the time to also scratch build the numerous chassis required for prototypically long rakes of stock, like coal wagons, open plank wagons, or the numerous and varied goods vans of which the railway companies built many thousands to several different `diagrams' over the years.
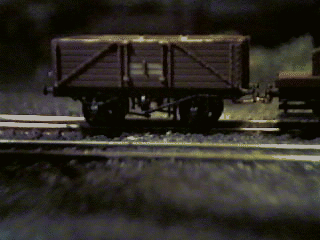
7 plank open wagon with 9 foot wheelbase wooden solebar chassis. This is one of the older `Pre-Grouping' wagon types available as a kit (Peco KNR-220) This one has been modified `Kitbashed' with the standard couplings and coupler pockets being omitted, and My own `home brewed' fine chain link couplings and coupling hooks made from stiff wire fitted. The kits original spoked wheels (Plastic) have been used as they look much better than fitting solid disc wheels to such a nice wagon. As I intend to run this wagon as empty I have also attached (With slow setting super glue) a few grams of lead weights to the underside of the wagon chassis adding some much needed weight, This helps to keep it on the track when negociating crossings & pointwork. This particular model is seen after it's first coat of paint during the `beating up' stage, it will be heavily weathered before being released into service on Stoneybridge Railway.
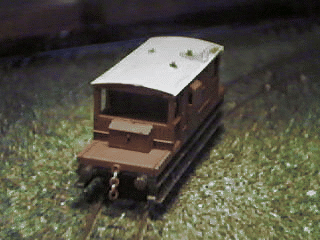
(10-Jan-1999) S.R. 15ft brake van, during building & testing, seen here in its first coat of acrylic paint with one of my `home brewed' fine chain couplings fitted. This model has also been fitted with an operational `tail lamp'. Before removing the kit parts from the `sprue' I very carefully drilled a 0.8mm hole through the lamp iron on the sandbox front by marking it with a small pin and then using a PCB drill turned between finger & thumb. It is illuminated by a 1.2mm diameter `Micro Bulb' hidden inside the sandbox painted with `signal red' acrylic. As the lamp is only rated as a 3 Volt bulb I have also hidden a resistor inside the guards van to protect the bulb from being worked `over voltage' when the track voltage is above 3 Volts. I am experimenting with different methods of power collection from the track, when I am happy that it is fully functional & reliable it will be painted, detailed and released into service on `The Stoneybridge Railway'.
Theres not really any `Art' to it, I think there are only two `rules' when weathering wagons, or indeed any models, and even these are not by any means fixed rules, merely guidelines that can help you to produce more realistic models.
Rule 1: Work from Photographs! Try to work from a photo of the exact vehicle you are trying to make, If you cannot find a photograph or image of the exact vehicle, look for something in the same group, class or type and use it as a reference to see which bits were worn, rusty or dirty on the real thing. This is much better than trying to guess, When modelling historical prototypes a Black & White image is better than none and can often show finer detail than early colour photographs.
Rule 2: Apply weathering in THIN coats! Real wagons are mainly one colour when new, but that doesn't last for long, especially when modelling from the days of steam. All railway vehicles, especially goods stock, rapidly accumulated dirt from the harsh environments in which they worked, the various `layers' of grime being washed into corners & seams between boards by the rain, which also `cleaned' some of the muck off the roofs & wagon bodies giving them differing `shades' and `hues' of the original colour. There is also general wear & tear to think about, things like worn edges on foot steps & below doors.

If you are modelling an old wagon that may have done thousands of miles in service, chances are it would have been repaired a few times. `Replaced' planking on the sides & ends of vans & plank wagons, and on the floors of open wagons, are easily modelled by simply repainting the individual planks after giving the whole model 3 or 4 coats of light weathering (with varying colours), then after the `repaired' bits have thoroughly dried continue with more coats of differing coloured weathering until the model looks work-stained enough. When modelling steel built wagons, like the 16 Ton mineral wagon shown above, remember to make the dents and prepare the `rusty bits' before painting! Dents are easily made by warming up the plastic in warm water for a few minutes (Do not use boiling water, as you can warp some parts by overheating, the general rule is; if it's too hot for your hands, it's too hot for your plastic.) Then carefully press the plastic `outwards' from inside the wagon with any blunt item.
I use a selection of screwdrivers and `wax carving' tools to produce dents of varying sizes and shapes. I then use the tip of a scalpel blade to `roughen up' areas that are going to be rusty. Once painted the roughened areas give the paint a `lumpy' or 'bubbled' look, then you simply dry brush your chosen `rust coloured paint' onto the rough patches then weather as you would any other wagon. I would advise a bit of practice on some scrap plastic or `styrene sheet' before attacking your models as it is easy to split or shatter some of the plastics used in making N gauge kits. The most important thing is to try to keep the plastic warm so it is more pliable and less likely to break, this is achieved by simply dunking it back into warm water for a few minutes. (this also applies to plastic kits in other scales)
I have found that using acrylic paints gives a better Matt finish and is much easier to use for weathering than enamel or oil based paints, Acrylics are water based so can be easily thinned or mixed, they dont smell as bad in use as they are free of toxic chemicals and they dry quicker. I do use Humbrol Enamels for underframes. I have been using `All Purpose Acrylic Craft Paint' bought cheaply at a local book/craft shop in Poole, for some time now with reasonable results. You can also use Talcum powder to transform glossy enamels into a matt finish by lightly sprinkling talc over the wet enamel paint the talc can also be used in several light coats to produce a slightly roughened finish on Flat/Smooth surfaces and will fractionally lighten the hue giving a sun bleached appearance, the excess is simply hoovered off once the piece is completely dry. Enamel paint can take longer to completely dry when talc has been used. The whole model is then `sealed' with a light spray of clear satin varnish, and a final weathering coat can be applied once the varnish sealing coat has fully dried.
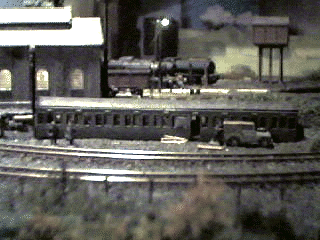
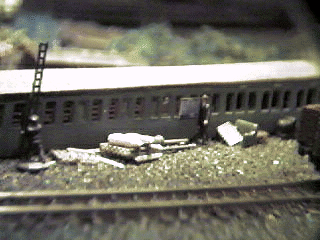
Damaged coaches that are not fit for use on the railway can always be put to good use as grounded coach bodies, which were often used as store rooms, offices or even as the staff canteen. This was often a cheaper alternative to erecting a building especially where it was a temporary arrangement for engineering staff.
