Very simple tutorial
Fences
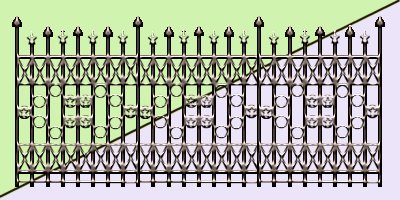
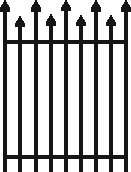
This is the fence that this tutorial is for.
Scroll down to the bottom to see what you can
do once you have the principles of making the fencing.
One more thing before I forget:) All of these graphics have been
set
at a lower resolution, flattened and at grey scale so the page will
load faster,
You will NOT have a white background on yours.
open new image 200x200 transp. 16 million
make layer named throw away
choose shape tools, square, with a black foreground, stroked, at
line width 2
starting at 10,10 draw your square to 190,190
this is just for lining up your fence .. you will be getting rid
of this later:)
If you can line things up nice and even you don't even have to make
this square.
It will also be easier if you work in zoomed one time .. at least
it is on my eyes:)
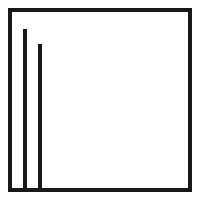
Now create new layer (main fence) and with your line
tool set at Single line, stroked, 2 draw a line from 25, 30 to 25,
190
draw another line from 40,45 to 40, 190
Making these lines is really the only "hard" part that there is.
Using your magic wand select the taller of the lines, hold down
the shift key and click the second shorter line with the magic wand.
Tolerance should be set at 0 feather 0
With these two lines selected choose copy then paste as new selection.
Line these two lines up with the bottom "throw away" line, trying
to make
sure that they are as even as possible. Now do this again,
paste as new
selection, lining up even, and then one more time. You should
have this now:)
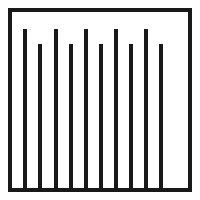
Control D to deselect just in case you have any marching ants.
Now use your magic wand and touch the last line (fence, not throw
away)
and when it has marching ants then hit delete. You only want
4 tall lines and 4 shorter lines.
Your are now done with the outer square (throw away) so do just that
with it:) open your
layers pallet and highlight it right click and choose delete.
Use your line tool and draw a line from 25, 60 to 146, 60 (use same
settings as before)
again at 25, 175 to 146,175
Now use your magic wand and click on one of the lines, you should
get marching ants on
all your lines .. go to selections, modify, expand (1) click ok.
With your paint can (filler)
set to solid color click inside one of the lines .. they should
all get just a little larger.
Do you know why I had to do this .. because I messed up and didn't
want to rewrite and
make new pictures:) LOL Well, I thought it was funny
and thought you should know the truth:)
Control D to deselect:) ok back to making the fence.
The best thing to do right now is Shift D, you will now have 2 copies
of this .. save one of them
as a BASE FENCE .. then when you get ready to make another one You
have all the boring
stuff done:)
Make new layer, top line. Working in this layer draw a line
from 20,28 to 30,28
Copy that little line and paste as new selection move it to the
top of the next line.
Do this (paste as new selection) to each fence post.
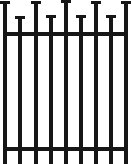
Now merge visible (layers, merge, merge visible)
You might want to save it here too:)
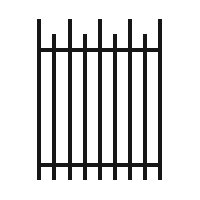
Make new layer, spikes
Now use your pre shapes tool and choose Triangle, filled, line width
at 1.
Set your mouse at 19,17 and draw the triangle to 31,27
LOOKING GOOD!!! now copy that spike and paste as new selection on
to the
top of each line on the fence:) When you get all done merge
the visible layers again.
Make a new layer, middle lines, this will be for the top and bottom
lines that connect
to each post.
Take your line tool, stroked at 2 line width with antialias checked
25,60 to 40,90 .. ok now
the next one is a little trickier because we are going to work the
line backwards. Place your
cursor at 40, 60 when it is there click and draw it to the left
and down .. your numbers are
going to change and you want to stop at 25, 90 .. once you start
it you will see what I mean.
Don't worry you only have to do this once:) Now since you did this
on another layer you can
just COPY and then paste it as new selection until it looks like
this.

Now ... hit copy then paste as new selection and move it down
to the bottom and line it up like this picture is.
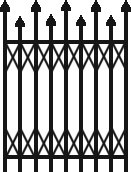
Now place two more lines on the fence, one under the top X's and
one over the bottom X's.
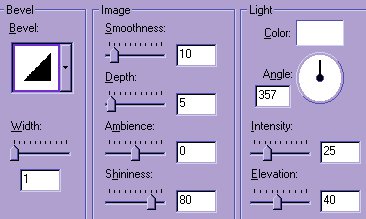
You can stop here if you like and do an effect of ...
(MAKE SURE IT IS ALL MERGED VISIBLE FIRST:) ..
Image, effect, inner bevel with the preset of metallic.
I used these settings but you can use what you like.
Now you have this.
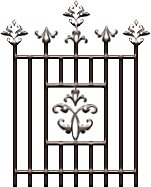
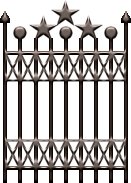
Well guys and gals that is the basic fence. If you want
to make it your own
then add things .. here are a few that I made. If you
want to do more
to it then don't add the bevel until you are ready to:)
When you are done go file .. export, as tube. It should all
be right you just need
to name it (or them:) I name mine all with sw_fence1, sw_fence2
and so forth.
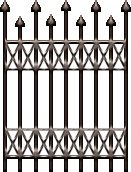
This is a really simple tutorial as you can see, it just shows what
you can make with
nothing but a bunch of lines and maybe a font or two.
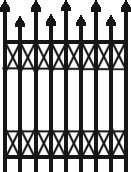
When you want to connect the fence you can lay one over the top of
the other one,
I have included pictures so you can see:)

Graphic made by Dee
This tutorial is Copyright © 2000, 2001 by Sherrie all
rights reserved
it may not be copied or reposted in any way without express
written permission of Sherrie.