Previous Page_
 _Next Page
Soldering Boxes
Here are a few hints on hinging.
Working with the tube type hinge can sometimes be a real pain. The two main things that are bad about it is:
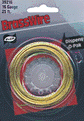
- When bending the inner tubing it almost always breaks. Instead use 16 gauge brass wire. And bend it into an 'L' shape stick one end into the hole and there you go.
- The other thing is how to solder the outer tube on with out filling in the ends. To solve this little problem, get a round tooth pick and break it in two. Then shove the pointy end into one of the ends of the outer tube. Repeat for the other, (see picture on the right below). You can hold onto the wooden end like a corn-on-the-cob holder. Now when you start to solder, you can solder right up to the edge without worrying. It also allows you to tin the tube if this is the effect that you want.
- Apply white out onto the knuckle of the joint to prevent it from sticking together, and be sure to use as little flux as possible.


This is what a "door-type hinge" stained glass box hinge looks like with the white out on it (or in this case pink out).

Soldering a box chain can sometimes be an adventure. These are the steps I do to solder a chain perfectly each time.
- Stretch out a piece of chain on a surface that doesn't burn well: a tile, a smooth cutting board stone, a stone floor tile etc.
- Carefully lay out one drop of flux at the end of the chain.
- Drop a ball of solder on the end of the chain, as shown in the picture below.

- Let it cool down. Then hold the end with either a hemostat or a tweezers (the kind that you have to squeeze to open it).
- Place some flux on the ball, and then some on either the inside corner of the box, or, if there's a seam convenient, solder it there. It's always a better idea to solder on a seam; it's a lot stronger there.
- Then solder the chain at a 45 degree angle. With the solder already attached to the chain, it makes it that much easier to solder in place.
- Once cool, remove the tool. Then place the box on it's side with the lid open to where you want it. The lid should lay about 1/2" beyond the back of the box, or when you open the lid, it should comfortably fall open and not feel like it is going to fall back down.
- Find a seam or a corner of the lid, (corner if the lid is a "5 piece" lid). Measure out the chain with your hand by physically placing the chain where it's supposed to go. Count an extra link or so up then cut the chain there.
- Repeat step 3.
- Now you're ready to solder the other end to the lid. I found the easiest way to do this is to lay the box on it's back, so the lid is resting on the table, and so that there's slack in the chain. Flux the area, and solder the chain in place.
- Now that it's soldered on, test the lid. Does it fall open to much, or not enough? If so you may have to keep adjusting it until it feels right. Make sure you're careful not to keep the soldering iron on the chain too long or the glass may crack due to thermal shock.

Back to Tips and Observations Index


Home |
About Me |
Aliens |
Foil |
Miscellaneous |
Shop |
Projects |
Shopping List |
Links |
Awards
WIN MY AWARD
If you have any comments, ideas or questions, please email me at esavad@home.com
Last modified March 14, 1997

Started on 9-22-98