
Google Esquimalt High School
YTV
The New VI
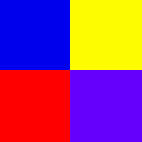
The cube above is an example of an imagemap. An imagemap is when different parts of a single image can be clicked on. Each part of the image can lead to different web sites. To create your own imagemap, just follow the steps below:
- Before you can begin making an imagemap, you'll need a GIF image that you want to turn into a map and the URL's that you would like the map to link to. You will also need a program that will allow you to determine the coordinates of different points on the image such as Paint Shop Pro. Although you could use a program that will actually create the imagemap for you instead, the steps below only show you how to make an imagemap using Paint Shop Pro.
- You must then define the areas that will be clickable on your image. Coordinates have the form of (x,y) representing the horizontal x-axis and the vertical y-axis of the image, beginning from the upper-left-hand corner of the picture. They represent points along those axes expressed in pixels.
Below are the three different types of regions that you can define:
- A rectangle (RECT) defined by the upper left corner and then the lower right corner (x1,y1,x2,y2).
- An arbitrary polygon (POLY) defined by each of the sequential vertices (x1,y1,x2,y2,...xn,yn).
- A circle defined by the middle of the circle and then by its radius (x1,y1,r).
- Open your image using Paint Shop Pro and then save the image with another filename. For example, if the image is called "world.gif", save it as "world_working.gif."
- Then, with the image you renamed, use the drawing tool to draw a shape around the areas of the image that will be clickable. Make sure you use the "outlined" mode of the drawing tool. As well, make sure that your renamed image is exactly the same size as the image that will appear on the page. Paint Shop Pro will show you the coordinates of the area you select in the lower-left-hand corner of the gray bar at the bottom of your screen. But, once you release the mouse button, the coordinate information disappears. For this reason, you may want to write the information down.
- Now you can put your imagemap code right inside your HTML file. You should first begin with the usual HTML tags.
<html>
<head>
<title>Title</title>
</head>
<body>
</body>
</html>
You begin the map section with the <MAP> tag, giving the map a name with the name attribute. For example, if you wanted to name your map "world_map", then your HTML document would look like the following:
<html>
<head>
<title>Title</title>
</head>
<body>
<map name="world_map">
</map>
</body>
</html>
You can now define the different regions and links with several <AREA> tags. You will need to know the shape you used on your "working copy" of the image, the coordinates and the web site addresses that you want the clickable areas to link to. For example, if you used rectangles on your image and your map name was "world_map," then your HTML document would look like the following:
<html>
<head>
<title>Title</title>
</head>
<body>
<map name="world_map">
<area shape=rect coords="12,10,100,110"
href="http://www.websiteaddress.com/">
<area shape=rect coords="75,24,160,120"
href="http://www.anotherwebsiteaddress.com/">
</map>
</body>
</html>
To use the map file you created, include the USEMAP attribute in the appropriate <IMG> tag. Identify the map that should be used. For example, if your original image was called "world.gif" and the name of your map was "world_map," then your HTML document would look like the following:
<html>
<head>
<title>Title</title>
</head>
<body>
<img src="world.gif" usemap="#world_map">
<map name="world_map">
<area shape=rect coords="12,10,100,110"
href="http://www.websiteaddress.com/">
<area shape=rect coords="75,24,160,120"
href="http://www.anotherwebsiteaddress.com/">
</map>
</body>
</html>
Congratulations! You now know how to create your own imagemap.
Back to home