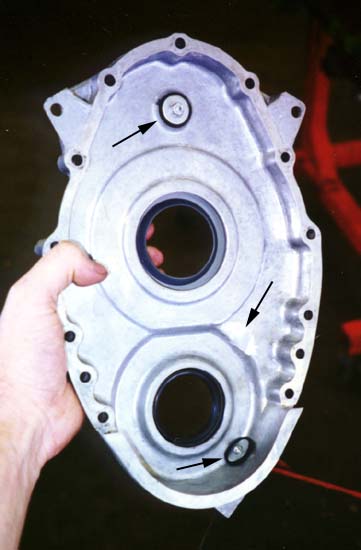
| Here's the timing cover with all the mods. You can see
where I ground it down to make the idlers work right (middle arrow).
The way to do it is to put a dab of grease on the idler axles (the part
that sticks out the furthest) and see where it contacts the cover.
Then just slowly start grinding away. I used a porting tool and it
worked great - just make sure you go slow and don't take off too much at
a time. You can also see in this picture the blocked holes for the
water pump drive and crank sensor. The top one was a quick relese
type plug, but I thought the pieces on it looked pretty sketchy, so I took
it apart and just used the rubber part. I used a couple of fender
washers and a machine screw with a nylock nut to squeeze it together and
it works great! The bottom one is similar, but it started as a taperd
rubber stopper and I drilled a hole through it for the screw. Both
of those pieces came from the local Ace Hardware store.
|
Home | Engine | Suspension | Interior | Links