|
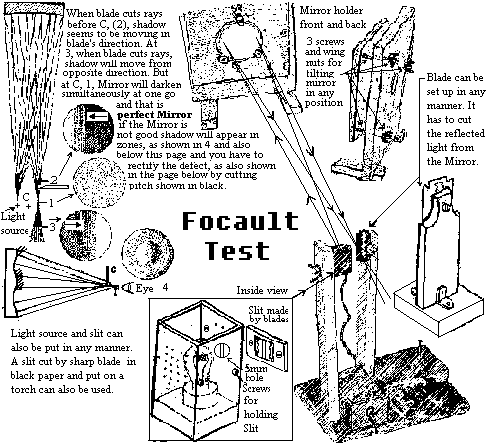
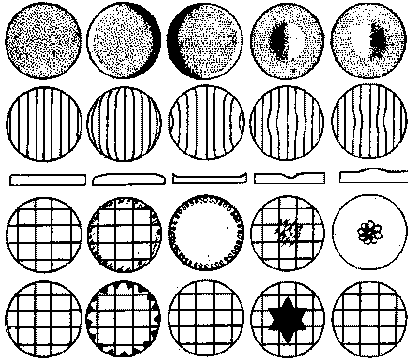
Testing Mirror: Testing of a mirror is a crucial part. A good telescope mirror has to have the proper figure - even surface and without any "zones". A well-known method for testing mirrors is the Foucault-test. This method easily shows the figure of a mirror and any deviations of an even figure (including scratches and zones). Principle The Foucault test is based on the fact that light-rays, which come from the centre of curvature (Radius of curvature which is not focal length but twice that of it) of a spherical mirror are reflected by that mirror to the same point. If a knife-edge cuts through the reflected rays at the centre of curvature, an observer would see the mirror darken or shadowed all at once. If the mirror deviates from a sphere, an observer would see mirror darkening in parts. If the shadow (darkening) spreads evenly over the whole mirror surface at once, the mirror has an even figure. You can test your Mirror with the aid of simple blade or Ronchi grating and torch or some source of other light. You can make the Grating yourself. You need around 50- 120 lines per inch. Take a very thin copper wire and roll double strand of it on any rectangular hollow shape. Secure the wire corners by glueing (Arladite or any other). After drying take out one strand of copper wire. The remaining one strand of copper wire will make a good grating (see 4th pic. from left). Make a slit (cut by blade 0.1mm x 5mm) in a cardboard. Stick a fine butter/trace paper over the slit (for diffusing the light) and secure it before the light source. Switch on the light. See the reflection of slit at a distance of Radius of Curvature (RC) of Mirror.
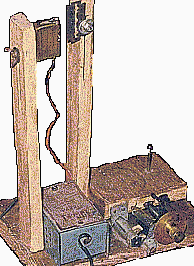
In this picture set-up itself, you can also put a blade instead of Ronch grating (as shown in down below illustration). Hold blade parallel to the reflection of slit at RC and slowly move it to cut through the reflection of slit and it will show you shadow patterns. Alternatively you can also make a Focault Tester (shown in picture).
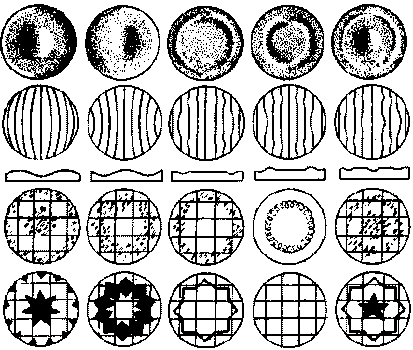
While moving the blade when it slowly starts cutting the slit-reflection, you will see shadow or darkening of the mirror either moving in the blade's direction or its opposite direction. If shadow is moving in blade's direction, you have to move the blade slightly away from the Mirror i.e. increase the distance and see the movement of shadow. Similarly if shadow comes from the opposite direction you have to decrease the distance and see the shadow. You have to increase or decrease this distance to a point and cut the reflection of slit by blade until the shadow stops moving in any direction and Mirror darkens at once. If at RC your Mirror darkens at once without any shadow patterns i.e. zones of black and white or show straight Ronchi Patterns, you have got a perfect spherical Mirror, fit for use. The half of this distance i.e. from Centre of Mirror to this Point is roughly the focal length of your Mirror. Note this distance. The same process is involved with Ronchi Grating. Instead of shadow patterns it will show Band patterns and at RC for perfect Mirror the Bands should be straight, as shown in the above picture or 1st picture downbelow from left side. If you see other types of shadows or bands shown in picture i.e. some parts of Mirror are shadowed and some are bright or bands are not straight then your mirror has zonal defects and you have to remove these. These shades are when blade is cutting from Right Side, if Left Side the shadows will be opposite.
Parabola/
Oblate
depressed raised Hyperbola
|