a8jdpeg: Atari 8-bit JPEG viewer

Update: This page is out of date, the Atari 8-bit JPEG viewers have now moved to:
http://a8jdpeg.atari.org and
http://a8jdpeg.webhop.org, please
update your bookmarks. The versions on those pages are much improved, with new display modes, extra save options, easier to use interfaces, and hopefully fewer bugs.
Well here it is folks! At last you can view your collection of jpeg
images on your Atari 8-bit! This is version 0.4 (22 Dec 00)
of Juddpeg for the Atari. For those of you who don't know,
Juddpeg is the jpeg decoder and
viewer for the C=64, written by Stephen L. Judd and Adrian Gonzalez.
This version supercedes the release dated 17 Nov 00. The
following improvements have been made:
- The flicker modes are a lot less flickery
- A default drive identifier "D:" is automatically added to file names
- A ".JPG" extension is now added to file names if not typed in
- A disk (sub)directory can be displayed within a8jdpeg
- Fixed a bug that produced extra vertical lines for small images
- Fixed a bug that repeated the last row and/or column in small
images
- Options to save images in Micropainter (62 sector) format
- Option to redisplay the same image with different parameters
- Option to abort image display before it has finished
- Small speed improvements
- Better warning message for progressive jpegs (unsupported)
- Image size is now displayed before display options are selected
- Error codes displayed in decimal rather than hex
Have you found a bug? Do you have an idea for further improvements?
Do you have a jpeg image that breaks the program? If so, send me an e-mail.
This version should work fine on most jpeg images out there, if you
have problems displaying certain images then using the jpegtran program
on a Unix machine may fix it:
jpegtran input.jpg > output.jpg
Then try displaying the new image with a8jdpeg.
Source
The source code for a8jdpeg is also available. This
comes in two parts, the decoder and the viewer.
The decoder is a port of Stephen L. Judd's jpy1223-8 file, and is
greyscale only. The viewer has been written from scratch for the
Atari. If you think you can do a better job of displaying these
images on the Atari, then here is your chance. You should be able to
write new viewers by replacing the viewer code with you own. No
modification of the decoder is needed. Details on how to do this are
in the decoder and viewer source code. The source code is in ca65
format, part of the cc65 cross
compiler package. It should be possible to modify this to work on
native Atari assemblers too (MAC/65, AMAC, etc.).
Display modes
This version of a8jdpeg can display jpegs in one of 12 modes:
320x200 in 2 levels of grey (Graphics 8)
160x200 in 4 levels of grey (Graphics 15)
160x200 with corrected aspect ratio in 4 levels of grey (Graphics 15)
80x200 in 16 levels of grey (Graphics 9)
80x200 with 2/1 aspect ratio in 16 levels of grey (Graphics 9)
80x96 with 1/1 aspect ratio in 16 levels of grey (Graphics 9)
64K and greater machines also have the above modes available with 2
screens, increasing the number of grey levels available with
flickering.
The image can be saved in Micropainter (62 sector) format, and
the raw data can also be saved to a disk file. This will be saved as a
64000 byte file, 320x200 pixels, with 1 byte = 1 pixel. No header
information is added to this file (so it really is raw image data).
This version should work with any 48K or more 8-bit Atari computer.
To get the Graphics 9 modes you do need a GTIA chip though =) Since it
doesn't use any memory below $2000 (except for pages 4 to 6 and the top half
of page 0) it should also work with most DOS's. The 64K modes also
use the RAM hidden under the OS, so might crash any DOS's that use that
area. If you do have any trouble with it on your system, then let me know along with details of your set up.
Usage
First boot up into your favourite DOS, without BASIC (hold down the
OPTION key when booting XL/XE models, remove the BASIC cart on 400/800
models) then load a8jdpeg (use the L option under DOS 2.0/2.5/MyDOS or
equivalent). Once loaded you will be prompted for a file name, the
drive number or device can be changed by back spacing and replacing it
with a new one. If no extension is added to the file name ".JPG" will
be added automatically. To stop this from happening, add a dot at
the end of the file name:
|
D:ATARI.JPG | load a file called ATARI.JPG from
D: |
|
D:ATARI | load a file called ATARI.JPG from D:, .JPG added
automatically |
|
D:ATARI. | load a file called ATARI from D:, .JPG not added
automatically |
To display a directory type in a directory mask using wildcards
instead of a file name. The above rules for file names also
apply:
|
D:*.* | display contents of D: |
|
D:*.JPG | display all files with .JPG extension on
D: |
|
D2:* | display all files with .JPG extension on D2:, .JPG is
added automatically |
| |
|
D2:PIC?? | display all files that start with "PIC" followed
by 2 characters and have a .JPG extension on D2:, will match
PIC01.JPG, PICEL.JPG, PIC75.JPG, etc.|
D8:PICS:PIC?? | display all files that start with "PIC" followed
by 2 characters and have a .JPG extension in PICS subdirectory on D8:,
will match PIC01.JPG, PICEL.JPG, PIC75.JPG, etc. This assumes your
DOS supports subdirectories
|
|
To return to DOS press the RETURN key, leaving the file
name empty. The file name can be up to about 60 characters long. An
error here probably means you mistyped the file name. If successful
the image size will be displayed and you will be asked for the row and column offsets, these default to 0
and you can just press RETURN. Since jpeg images can be (much)
bigger than 320x200, you can specify here at what row and column you
want a8jdpeg to start displaying the image. Each unit for the row
and column values equates to 8 pixels, so giving values of 4 for the
row and 6 for the column would display pixel 48(6*8), 32(4*8) at the top left
hand corner of the screen. Finally you will be asked for the graphics
mode you want to view the image in, select one of the options from the
menu.
The screen will then start to flash as the image is decoded and
displayed. While the image is being decoded you can press the s key
to toggle the screen, speeding up image decoding. Pressing the
ESC key while the screen is flashing will abort everything and
take you back to the file name prompt, pressing the R key will
abort and allow you to change the display parameters for the image.
Once the image has been decoded the screen will stop flashing, and you
should be looking at your jpeg. Pressing the ESC key will take
you back to DOS, pressing either the RETURN or SPACE
keys will take you back to the a8jdpeg menu. The R key will
let you redisplay the same image with different parameters. The
+ and - keys will allow you to cycle through different
colour values.
In the pipeline
Here is the current development plan for a8jdpeg:
- Get the colour version working. Currently the decoder works, all
that's missing is the viewer
- anajpeg: a separate program that will display extra information
about jpeg images, spot jpegs that will break the decoder and tell you
why, and if you're lucky, it may even fix them
- Find a way to display progressive jpegs
- Add support for extended memory
- Add a user friendly interface
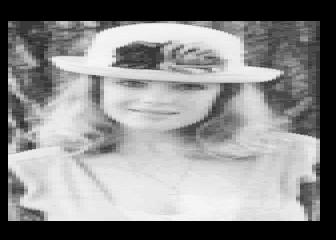
Screen shots
Screen shot taken using Atari800's interlaced screenshot option.
History
- 6Nov00 - version 0.1 released, beta version, 3 display modes, lots of bugs
- 17Nov00 - version 0.3 released, first release, more display modes, faster,
fewer bugs
- 22Dec00 - version 0.4 released, more bug fixes, reduced flicker, extra
save options, improved interface, small speed improvements
Download
That's the boring stuff out of the way (for those of you who read it!),
here is what you've all been waiting for. Note that this is an Atari DOS
binary executable (the .bin extension is to make sure the file gets
downloaded in binary format), you should be able to just save it on a
disk and run it straight from your Atari 8-bit or emulator:
DOWNLOAD
A8JDPEG
DOWNLOAD
DECODER SOURCE
DOWNLOAD
VIEWER SOURCE
Any problems, suggestions, comments, bugs, feedback? Let me know
Thanks to:
Stephen L. Judd - for writing the original C=64 version, and making
the source available
Also thanks to:
René de Bie, Mathy van Nisselroy, TJ Edmister, Marco Antonio Checa
Funcke, James Bradford, Chris Martin, Andreas Magenheimer, Piotr
Fusik, Daniel Miller - for comments, suggestions, ideas,
feedback and other help.
Enjoy!
