The "heater" shield is one of the most common of all shield types in the ROC, primarily because it is used in heraldry and it is easy to orient your coat of arms upon it.
Tools Needed:
|
- 2' X 3' X 3/4 inch piece of plywood
- Oil based paint in your heraldic colors
- Length of rubber hose
- Nylon cord
Step 1.
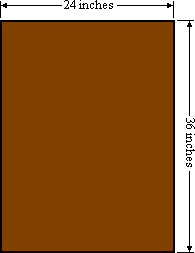
Measure your plywood 24" wide by 36" long, then cut it to size using a circular saw.
Step 2.
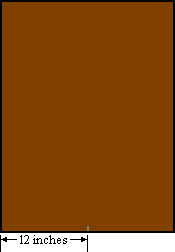
Measure half the width of your shield blank and mark the bottom of your shield at 12".
Step 2.
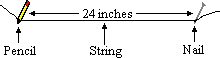
Make a compas by tying one end of your string to a pencil and the other to the nail making sure there is 24" between the pencil and nail.
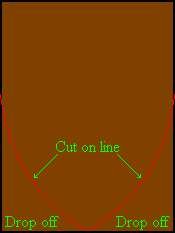
Step 3.
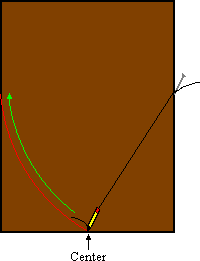
Set your pencil at the center mark pull the string taught to one end of your shield blank and hold the nail in place. Draw from the center point a line up till the pencil is on the other edge of your shied blank.
Step 4.
Repeate step 3 on the other side.

Step 4.
Carefully cut along your lines useing a saber saw, jigsaw or bandsaw.
Step 5.
Now you have the shape of your heater sheild cut out. Sand the edges and put a coat of primmer on both the front and back. Make sure your Arms are heraldicly correct and have been approved by the College of Arms before you start your paint job! This will both save you time and from emberracement if your Arms are not approved.

|
|
Standard Disclaimer