- 1. Cut 4 pieces of 60” wide canvas 84” long.
2. Cut 84” long pieces into triangles by cutting diagonally between corners.
3. Sew 2 pieces together along side 3 to form a larger triangle. Use Flat Feld seams.
4. Sew 2 more pieces onto the larger triangle. Sew these pieces on along edge 2. Use Flat Feld seams.
5. Sew together another identical piece with the remaining 4 small triangles.
6. Cut one piece of 60” canvas 168” long. This will be the top center. Sew any heraldry on at this time.
7. Cut 2 pieces 6 x 12” for reinforcement. Sew onto the top center as shown using a zigzag stitch.
8. Sew each of the ends on the top center using Flat Feld seams.
9. Cut 10 squares of canvas about 8” square to use as reinforcement. Sew onto each pole location as shown below using a zigzag stitch.
10. Make a hole approximately Ľ” in diameter about 2” from the edge at each seam point. (See illustration below). Button hole these holes using a large zigzag stitch. These holes will be the tent pole holes. You may use grommets if you prefer, but the button hole is authentic and very reliable. Also make a hole in each of the two Top Center reinforcement places 1” in from the apex.
11. Cut an 11’ x 5’ wide piece of canvas into 5 equal width pieces (approximately 12” each). This will become the weather flap of your tent. Sew the 5 pieces together end to end to create a strip that is 12” x 55” long. Use flat feld seams.
12. Hem the entire length on one edge. A 5/8” hem is adequate. Any heraldry you would like to display on the weather edge should be added at this time.
13. Cut a light ˝” widen nylon web stock into 5” strips. Fold strips in half and sew to inside of weather edge 24” apart to form loops for supporting the side walls.
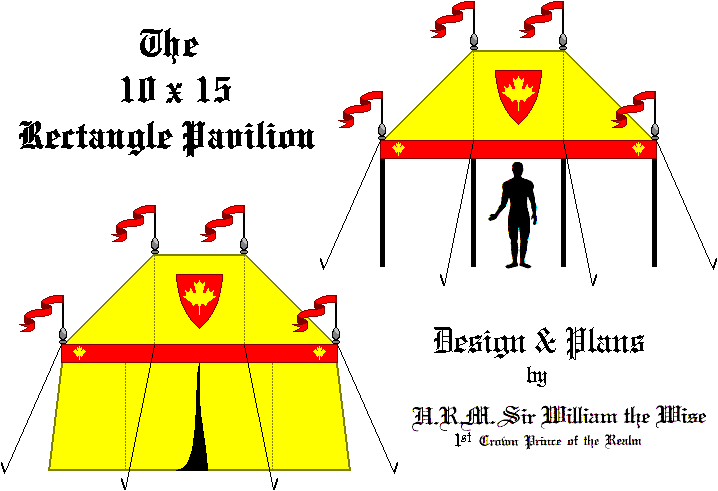
14. Attach weather flap to tent top using a flat feld seam. Sew to entire perimeter. Cut to length and sew flap together on end. (Please note: the illustration at right shows the tent top laying flat, the top is actually a modified cone and will not lay flat. The weather edge will not lay flat either).
You are going to make 2 sections of sidewall. Each section will be identical.
1. The following dimensions are for a tent with a sidewall height of 7’.
2. Cut 12 pieces of 60” wide canvas, 89” long.
3. Cut one of the pieces in half lengthwise to give you two pieces 30” wide and 89” long.
4. Cut one of the 60 x 89 pieces into 4 pieces 14” wide and 89” long. Cut each of these pieces diagonally to create 8 long slender triangles.
5. Sew 5 60x89, a 30x89 and four triangles together to form one side as is shown below.
6. Sew two-inch hems in the top and bottom edge the entire length as is shown below.
7. Make button holes or install grommets along the length. Install these at the seams and halfway between.
8. Cut 8 strips of canvas 3” wide and 16” long. Press to form double fold bias tape and then sew down the length to create straps.
9. Fold the strap in two and sew the overlapping ends together over an area of a bout 3” to form a loop. Make four loops. Sew these loops to the sidewall 30” and 60” from top as shown below.
10. Take a strap and fold in half and sew the folded end to the seam of the short rectangle panel as shown 30” and 60” from top as shown in illustration below.
1. Purchase 14 @ 2 x 2 x 8’. Cut 12 into 7’.
2. A 2x2 is square. You might wish to run them through a table saw set at a 45-degree angle to make them octagonal. Sand and stain all 2x2s.
3. Drive a 20-penny nail into the top of 6 poles so that approximately 2” is sticking out. Pre-drilling will keep the poles from splitting.
4. Drill a 3/8” hole 4” deep into the top of 4 7’ poles and into the top of two of the remaining 8’ poles.
5. Cut the two 8’ lengths to 5’. (Make sure the hole is in the 5’ length and not the 3’ off cut.
6. Cut 2 @ 24” of 2” electrical (metal) conduit. File the edges to remove burrs the sharp edge. Sand the lower 1’ of the 2 @ 5’ poles so that the poles can be pounded snuggly into the conduit. Hammer together so that 12” of the conduit covers the wood and 12” is empty.
7. Take the 2 remaining 7’ poles without the holes in the top and sand a 12” section at the top. Keep sanding until the end will easily slide up into the conduit. You will now have a 12’ center pole that is in two pieces for easy transportation.
1. Drill a 5/16” diameter hole through each of the 6 wooden pole tops. These holes should be perpendicular.
2. Paint to desired finish.
3. Hammer 3’ long 5/16” diameter steel rod through balls from the top so that 3 1/2 “ protrude below.
4. Cut 6 pieces of ˝” PVC pipe 20” long. Please note: You can get 6 @ 20” from one piece of pvc pipe, but you may have more like 24” of bare rod above your pipe ball. You may wish to purchase two pieces of PVC and cut to fit.
5. Slide over the rod protruding from the top of the balls. Hammer a 5/16” axle hat onto rod.
6. Sew 6 flags approximately 20 x 60. Sew tube into one end of each flag that will allow the flag to tightly slide over the PVC pipe. Please note: the purpose of the PVC pipe is as follows; it will allow your flag to rotate around the rod and reduce the tangles and knots. In a small breeze a lightweight flag will blow nicely.
1. Cut your rope into 6 lengths 15’ long and 4 lengths 30’ long.
2. Fold the 30’ pieces in half and tie a knot to form a loop about 4” long.
3. Tie a 4” loop knot in one end of each 15’ rope.
1. Make 10 stakes from 3/8” rebar. Cut the rebar to 12” lengths for camping in areas of hard rocky soil and 16” lengths for sandy soil.
2. Heat one end of each stake to a glowing red color in either a charcoal fire or with an acetylene torch. Bend the end of the stake to form a candy cane shape.
1. Assemble and secure top.
2. Run a Ľ” nylon rope around the perimeter of the tent through loops which are sewn into top and tie taughtly.
3. Starting at one corner, begin to tie the sidewall to the rope.
4. Tie the second section of the sidewall to the rope.
5. Overlap the 30” wide sidewall panel over the 60” wide side panel of the other section.
6. Pull the sidewall out taught and push sidewall stakes into ground.
|
|
Standard Disclaimer