|
|
|
Burning CDs using Windows Media Player |
|
Michael Ruzicka CSM564 Fall 2004 Price |
|
|
|
|
Website to Download Windows Media Player for
Free: |
|
http://www.microsoft.com/windows/windowsmedia/player/download/download.aspx |
|
To start, the computer must have a CD burner
drive to burn CDs. |
|
Windows Media Player is software that is
available as a free download. |
|
Most new PCs already have the media player
downloaded. |
|
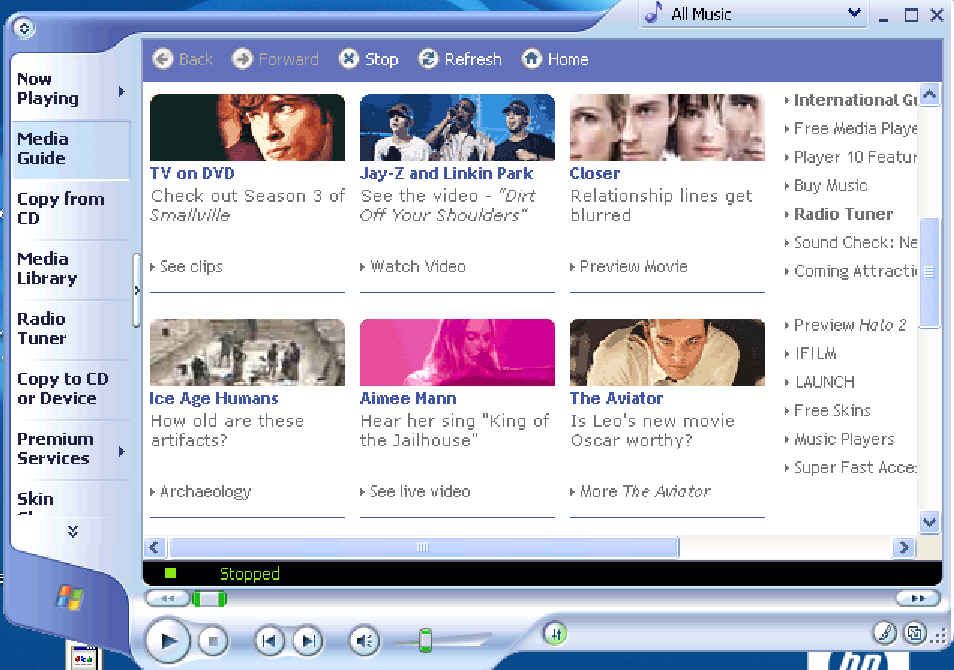
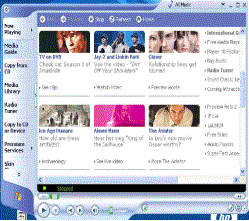
The image on the right is how the media player
looks when it is online. |
|
The CD to burn and blank CDs would help also! |
|
|
|
|
Insert the CD to be copied into the CD-R drive. |
|
The menu of songs on the CD will appear on the
media player. |
|
The menu on the left will give an option to
“Copy from CD.” |
|
Click on this option and the songs will appear
all checked. |
|
You can choose the songs you wish to copy onto
the PC’s hard drive. |
|
Now you are read to copy the music.Just click
the red “Copy Music” button at the top menu. |
|
|
|
|
Editing the playlist to mix your own CD: |
|
After the CD has been copied, click on the “Copy
to CD or Device” button on the menu to the right. |
|
Click on the “Edit Playlist” button now
appearing at the top menu. The
media library will open in a new window. |
|
Just double-click each song to be burned onto
the new CD. |
|
Be aware of the time limitations of the blank CD
to be burned so that all the songs will fit. Click “OK” when done. |
|
|
|
|
Blank Disc Basics: |
|
CD-R:
Compact Disc Recordable.
Used in burning CDs very inexpensive. Only one burn session. |
|
|
|
CD-RW:
Compact Disc ReWritable. Can
be burned in multiple sessions until space runs out. More expensive than CD-Rs. |
|
|
|
All blank CDs are not alike. Like the blank tapes of yesteryear,
quality varies with the company. |
|
|
|
|
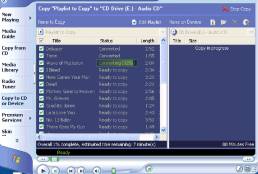
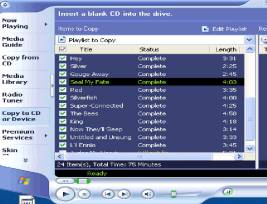
It’s all automatic from here. |
|
The song list should not be displayed on the
media player. |
|
Make sure all the songs that are to be burned
have the “Ready to copy” prompt on their status. |
|
If a song has the status “Will not fit” the
playlist must be shortened to allow for disc space. |
|
Click on the red “Copy” button at the top menu
and the media player will begin to convert the songs to be burned onto the
blank disc. |
|
|
|
|
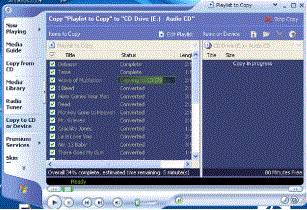
Once converted, the songs will now burn, or
copy, onto the disc. |
|
|
|
|
The songs will now individually complete, or
verify, on the disc. |
|
|
|
|
Time to label your disc. |
|
|
|
Once the burning process has finished, the CD
will automatically eject from the PC’s CD drive. |
|
|
|
Now you can label the disc anything you
want. I went with a marker. |
|
|
|
|
|
|
Always be sure to check your CD in another
machine. |
|
Just because it burned, does not necessarily
mean it will play. |
|
Try the new disc out in a stereo or other
computer. |
|
Make sure your songs are all listed and the CD
can be read. |
|
All types of blank CDs can be finnicky and will
sometimes not read in some machines—Buyer Beware. |
|
But most of all have fun! |
|
|
|
|
Burning CDs using Windows Media Player |
|
Michael Ruzicka CSM564 Fall 2004 Price |
|

 Notes
Notes