
So far the car (2000 Nassau Blue, Z51, MN6, Sports Seats) only has only simple mods.
OFF-ROAD EXHAUST
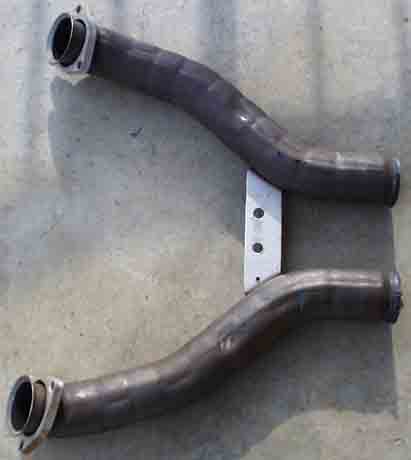
I made an off-road exhaust for under $100. It consists of a
stock front section
(no pre-cats), stock rear section,
and some straight pipe welded between the two. The OEM front section is typically cut
off and thrown away when long tube headers are installed. The same it done with the
OEM rear when an X-Pipe is installed. Get both from your favorite shop (I only paid
shipping for these parts).
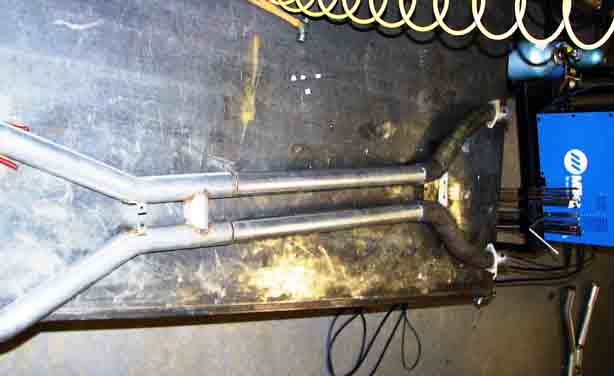
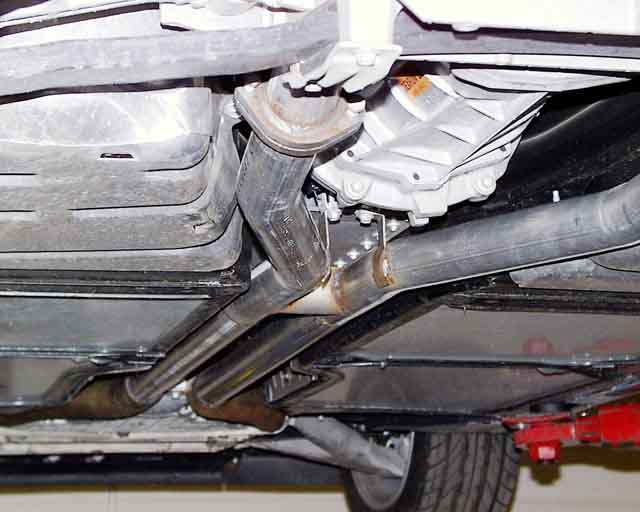
Here's a view of the new exhaust on the
welding table and on the car. The only
problem was the OEM front section was slightly different than the one from my car. I
don't know if the difference is because it was from a different year, or because it
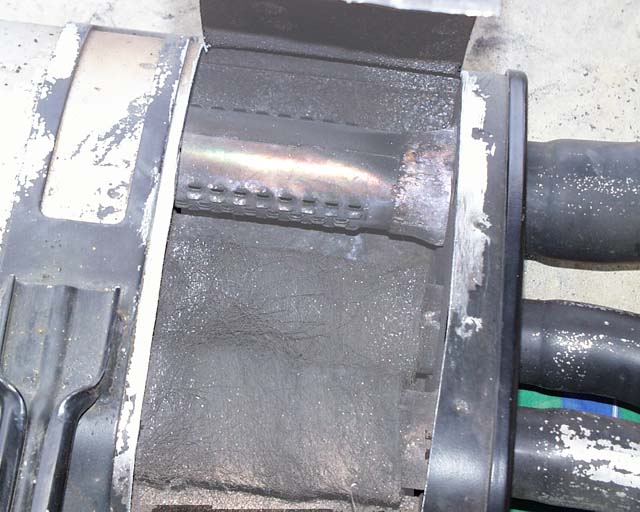
didn't have pre-cats. To fix the difference I had to weld in some
small extensions.
There hasn't been any loss in low rpm torque (according to the butt dyno), and it
definately pulls harder in the higher rpms. It really didn't get louder but sound
is deeper. More of what I would have expected the stock car to sound like. Next
will be the removal of some internal baffles from the mufflers.
Thermostat Mod
I also modified the OEM thermostat. After measuring the temperature that the stock
thermostat opens, it was disassembled. In the
center of the picture is a 0.058" long brass spacer (its on edge). It was cut from
a screw and drops inside the housing. The the thermostat now opens 12 F degrees
sooner (178F).
The modified thermostat hasn't been installed yet. I need to design/build the fan
controller first.
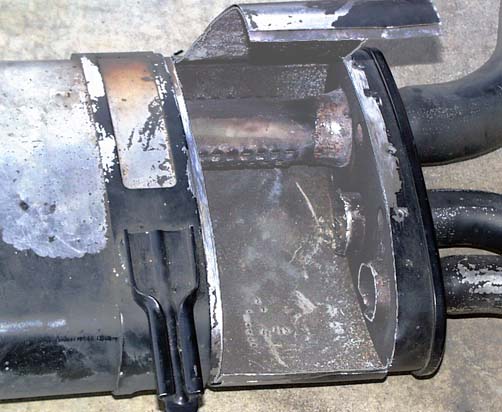
Muffler Mod
I started to modify a set of stock mufflers. You should be able to find a set for the
cost of shipping. Don't pay the $100+ prices some people want. I don't have any mp3
files yet, but will record some in the future.
The top of the mufflers were cut open with a hack saw (long cuts), and a dremel tool to
connect the two long cuts. It was opened on the top surface so it won't be visible when
installed back on the car.
I believe the back chamber of the muffler acts as a high pass filter and is there to remove
some of the boominess. My goal is to have more of a high pitch than low rumble, so I left
the back chamber intact. I don't remember where I got this picture, but it shows all of the
internal chambers. To modify my mufflers, I only cut
the case open at the front chamber.
The packing around the two outlet pipes acts like a low pass filter. I'm guessing that at low
throttle openings and low rpm, most of the exhaust flows through the center chamber. At large
throttle and higher rpm, the exhaust will flow through the perforated pipe and packing. I removed
both the outlet perf pipe and packing. The internal pipes
are soft and easily removed with a hack saw or chisel.
To close up the muffler for a quick sound check, I duct taped
the muffler closed for a quick blast around the block. That way I can easily open it up if more
mods are required. If it sounds good, it will be brazed back together.
More to come.....
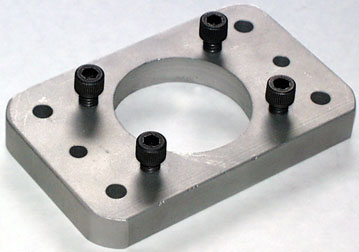
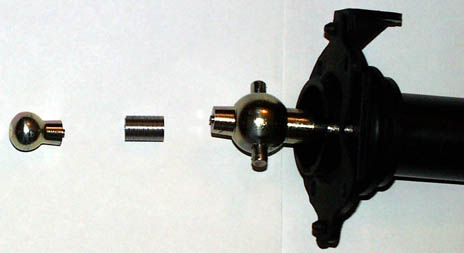
Shifter Mod
Not wanting to pay the $$$ for a short throw shifter, I made my own. A used, low mileage
shift lever was purchased to modify. The rivets that attach the base plate were removed before taking
this photo of the original shift lever. A
spacer was machined to lift the whole assembly by 0.5".
Holes were drilled and tapped so the base plate could be bolted rather than riveted back together.
Then the lower tip was cut off the lever and a 0.5" extension
was machined. The lower tip and extension were welded
to the rest of the lever. Finally 0.5" was cut off the threaded end of the lever.
The result is a shift lever that has the same length as stock, but throws are reduced by 26%.
All for the cost of a used shift lever ($25).
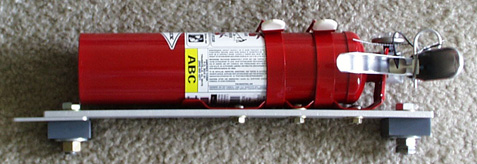
Fire Extinguisher Install
I registered for a two day drivers school at Watkins Glen. This is the first I've attended that requires a fire extinguisher be mounted in the car. I picked up the extinguisher (Amerex 417TS) at a local fire extinguisher co for $27. The TS version comes with a twin strap bracket.
The extinguisher is mounted to an aluminum bar (1/4"). I bolted the bar to the seat using existing holes and 3/4" spacers. The seat can still move almost completely through its normal range without contacting the fire extinguisher.
I also added a flashlight stop off the end of the bar. I keep a flashlight on the floor along the side of the seat (not while on the track). Only problem is that during hard braking the flashlight slides up towards my feet. A small extension off the fire extinguisher bracket now catches the flashligt.
Assembly before installation.
Installed in car 1.
Installed in car 2.
Open bracket (blury).
Other Mods
CAGS defeat (Homemade)
Vortex air filter
Removed MAF screen
DynoDay 10/12/02
Dyno Run1
Dyno Run2
C4 With Lingenfelter Engine
Here are the dyno plots of my car. Hopefully the low HP is due to the poor air / fuel ratio. An AFR1 will go on next weekend to fix the overly rich condition.
Air / Fuel Ratio and HP
HP and Torque
Here are some pictures of John Shiels brake cooling ducts.