Alright. This tutorial is much like the “Static Ball” one, but it has it's differences.
I simply called this one Glass. Nice name, hm? o_O Let's begin. - Start out with a blank 300 x 300 pixel image. - Color the background black using the Paint Bucket tool. - Go to Filter > Render > Differencee clouds. Do the Difference Clouds 2 times. Not once! The second randomized filter is always better, somehow. |

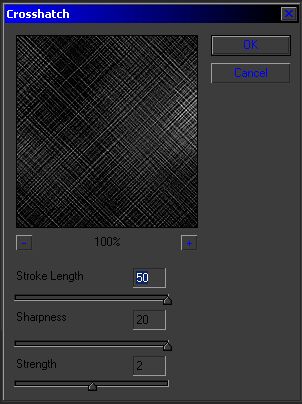
Alright. After this, go to Filter > Render > Difference clouds, using these
settings: (Stroke length: 50. Sharpness: 20. Strength:
2) |

Next, go to Filter > Brush Strokes > Ink Outlines, then apply these settings,
and click OK. |
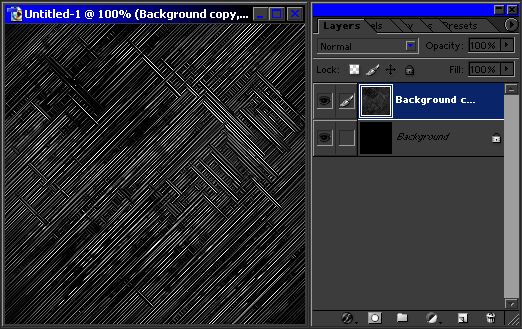
Alright. Now, apply the Filter > Brush Strokes > Ink Outline filter TWO MORE
times. ( Just click Filter > Ink Outlines. This automatically re-applies the filter, using the settings you earlier set for it. ) |
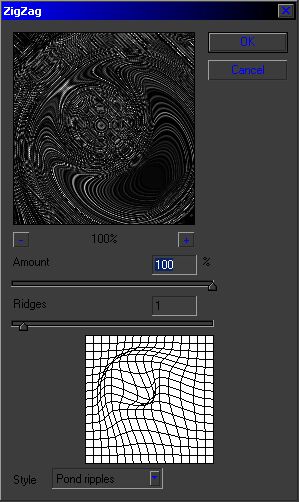
Ok! Almost done. Go to Filter > Distort > ZigZag. Apply the filter after adjusting
it to the settings shown below. |
Alright. You're basically done now. After applying the ZigZag filter, go to Filter
> Blur > Blur. Giving it a blur smoothes out those rough edges. This leaves you with the finished image. Congrats! d00t d00t. |
